
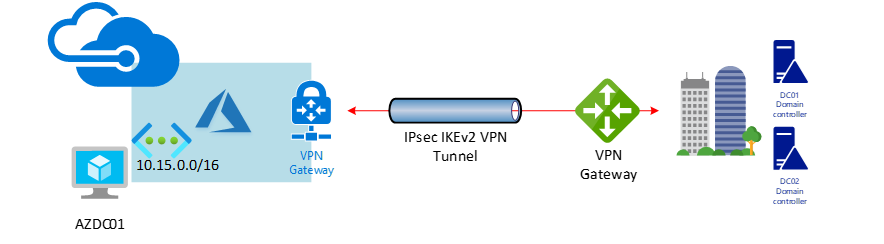
Today. I am going to show you how to deploy a domain controller server at Azure after deployment site to site VPN between On-Premise and Azure.
On-Premise Site (Calgary)
Create Active Directory Site for Azure Site
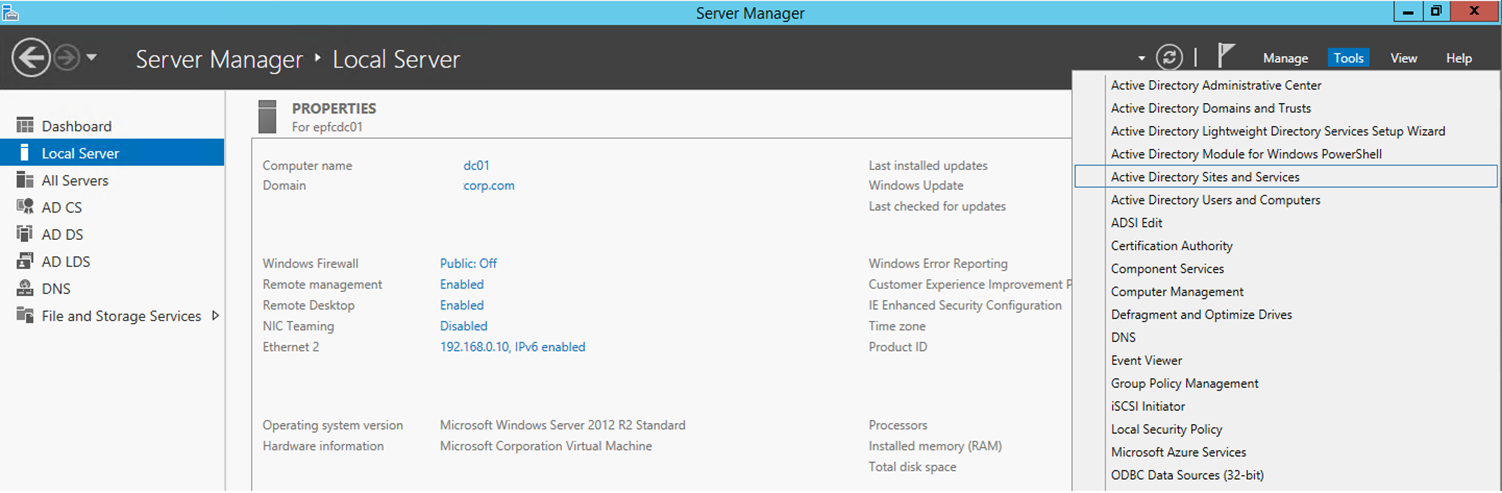
1.Logon to DC01 (On-Premise site).
2.Open Active Directory Sites and Services from Server Manager Tools.
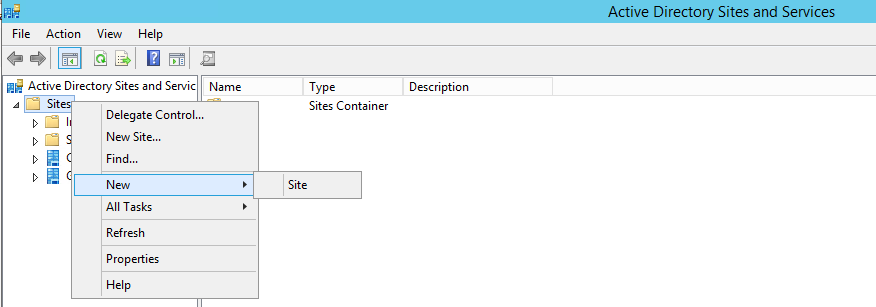
3.Right-click Sites, select New, click Site.
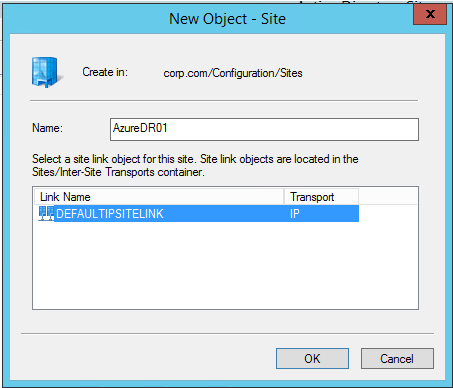
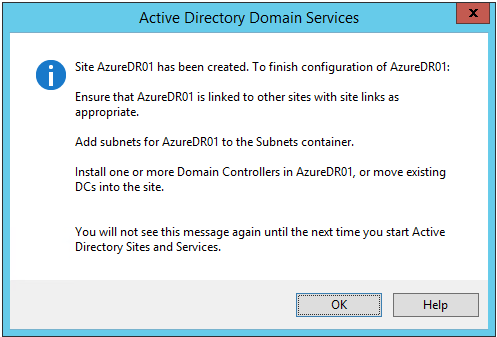
4.on the New Object – Site page, type AzureDR01 in the Name field. Select the DEFAULTIPINTELINK site link, click OK.
5. On the Active Directory Domain Services information page, click OK.
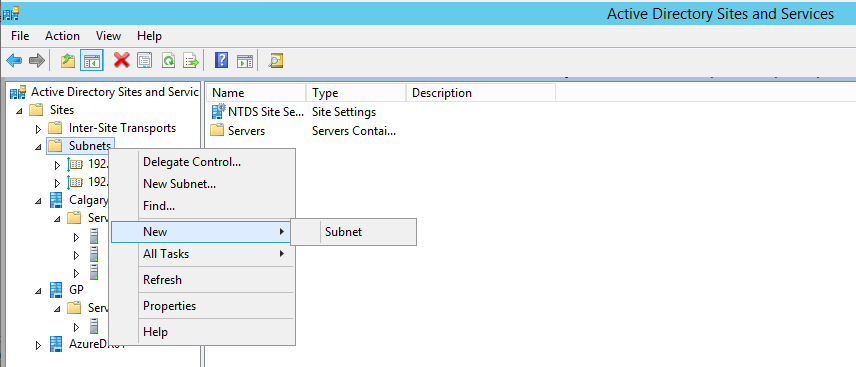
6.Right-click Subnets, select New, click Subnet.
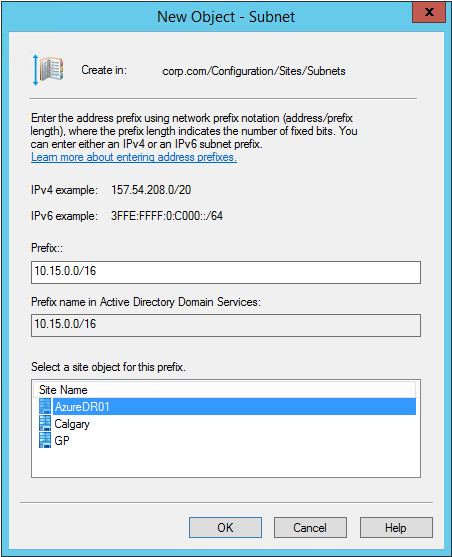
7.On the New-Object – Subnet page, type 10.15.0.0/16 I the Prefix field, select the AzureDR01 in the Select a site object for this prefix filed, click OK.
At Azure Site
Configure Static IP address and DNS for Azure VM
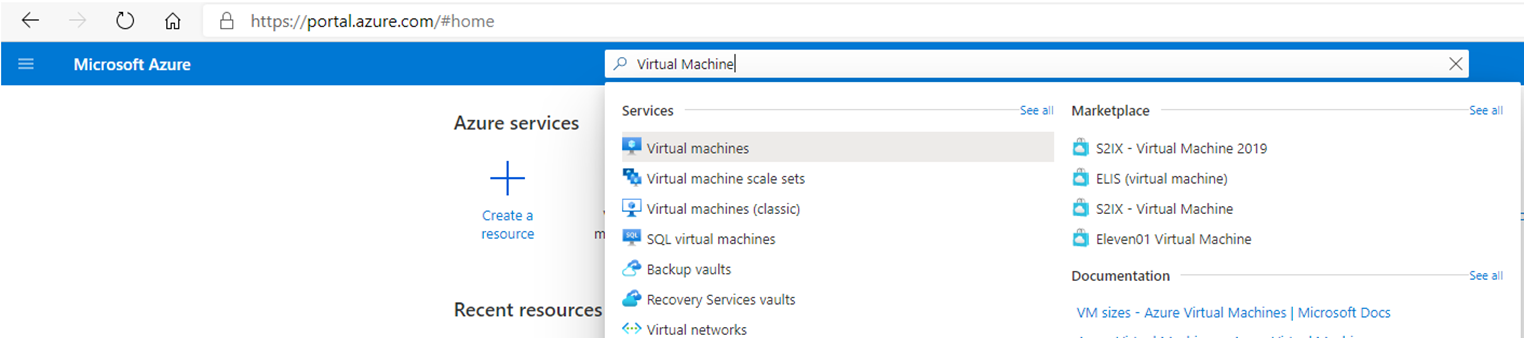
1.Signin to Azure Portal.
2.In Search resources, service, and docs (G+/), type virtual machines.
3.Select Virtual machines from Services.
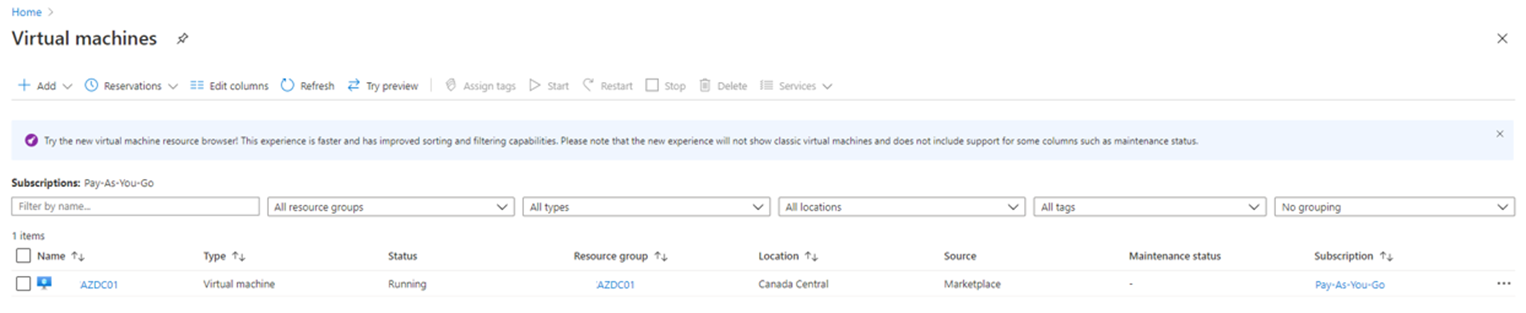
4.On the Virtual machines page, click the AZDC01 virtual machine, it’s the new VM at Azure, if you don’t know how to create a new Virtual Machine at Azure, you can check my previously blog.
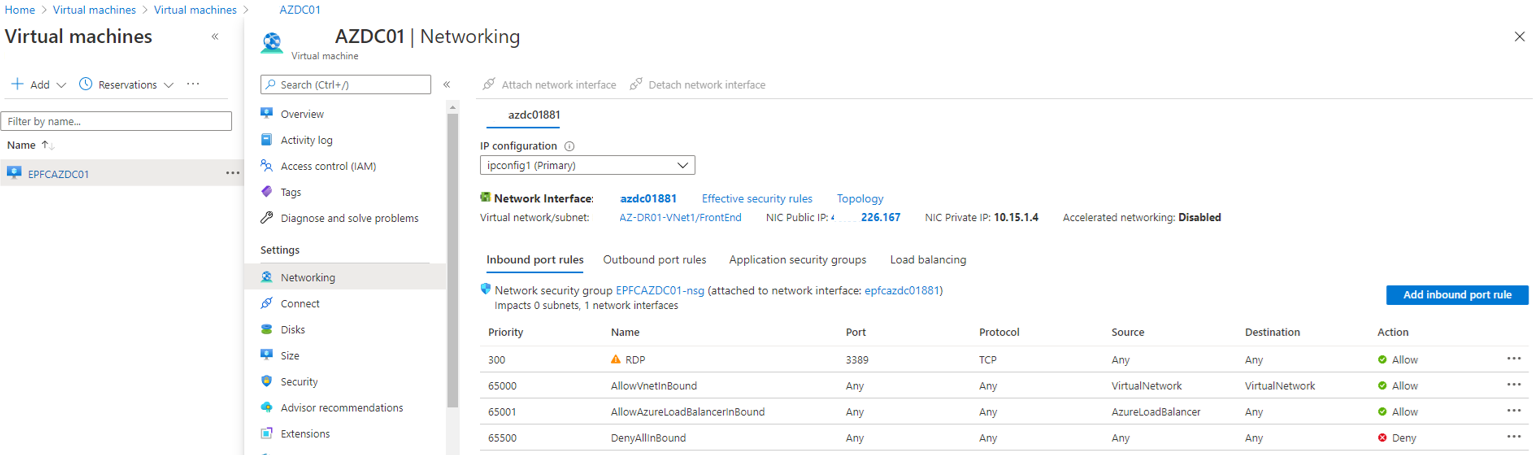
5.On the AZDC01 Virtual machine page, select Networking.

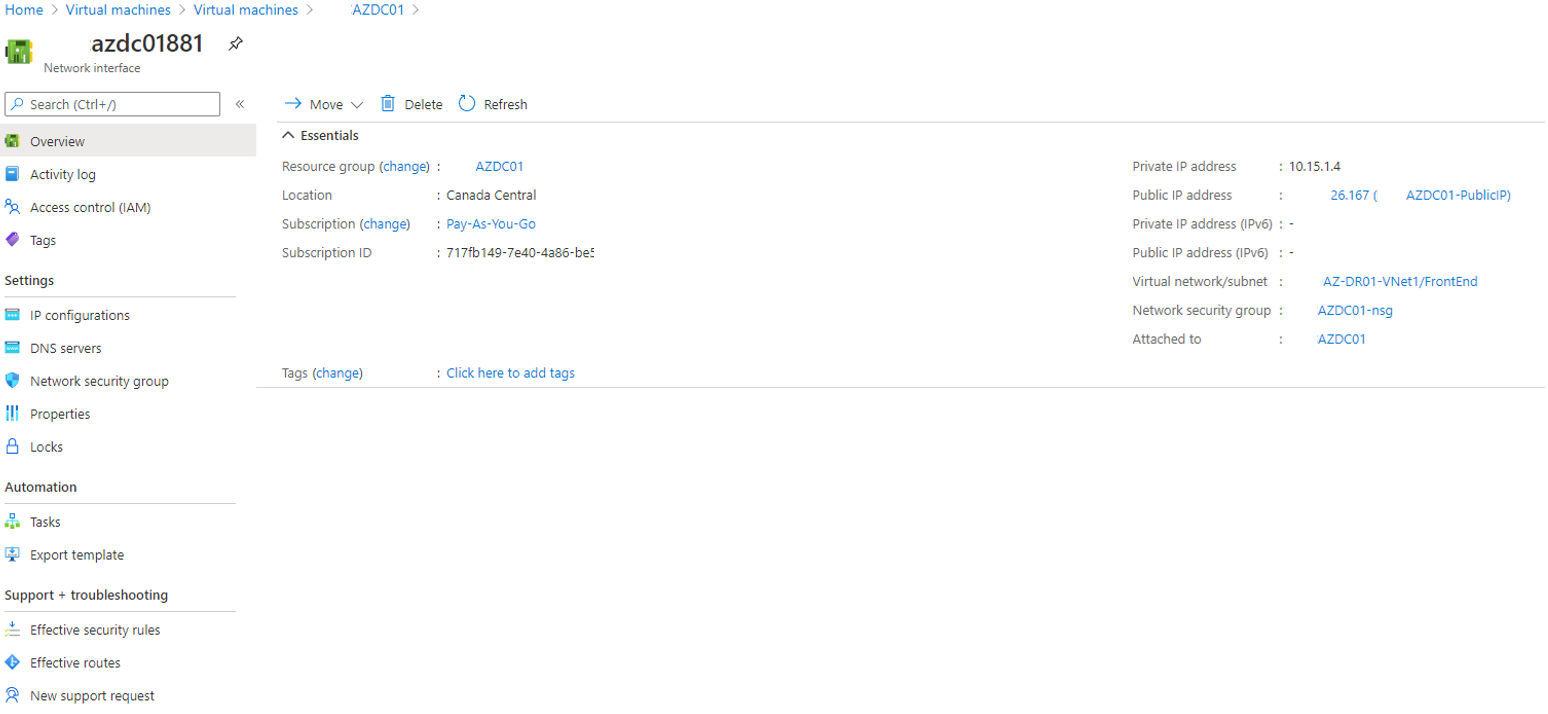
6.On the Networking page, click Network Interface: azdc0101881.
7.On the azdc01881 Network interface page, select IP configurations.
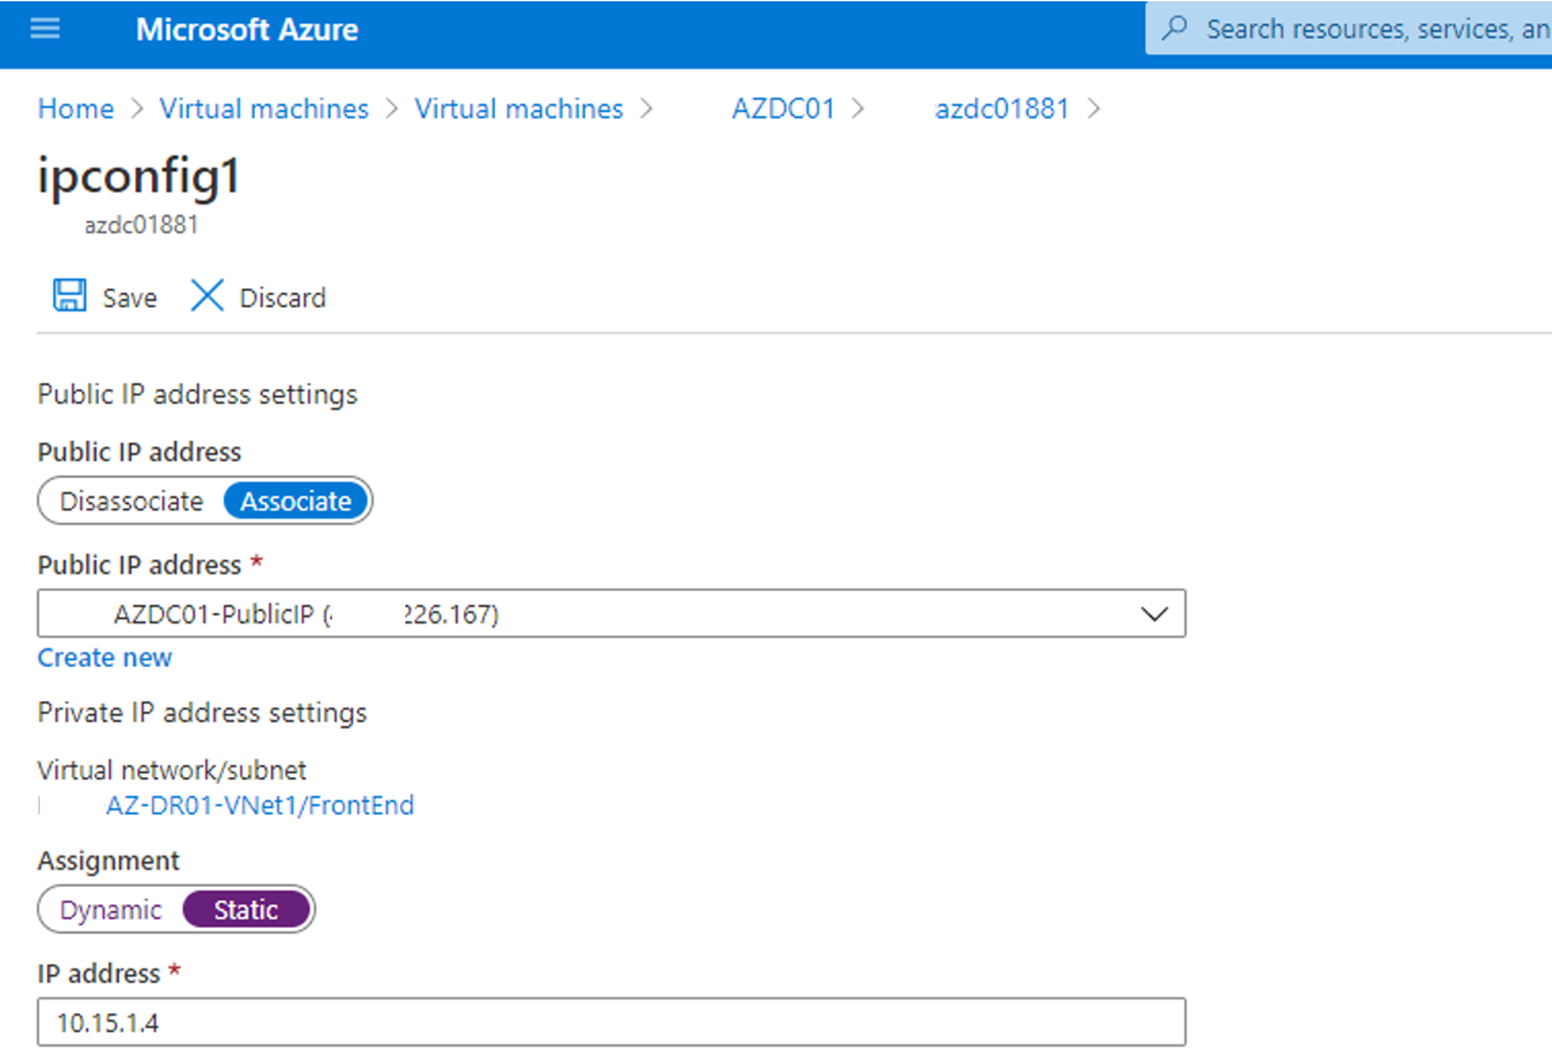
8.On the IP configurations page, click ipconfig1.
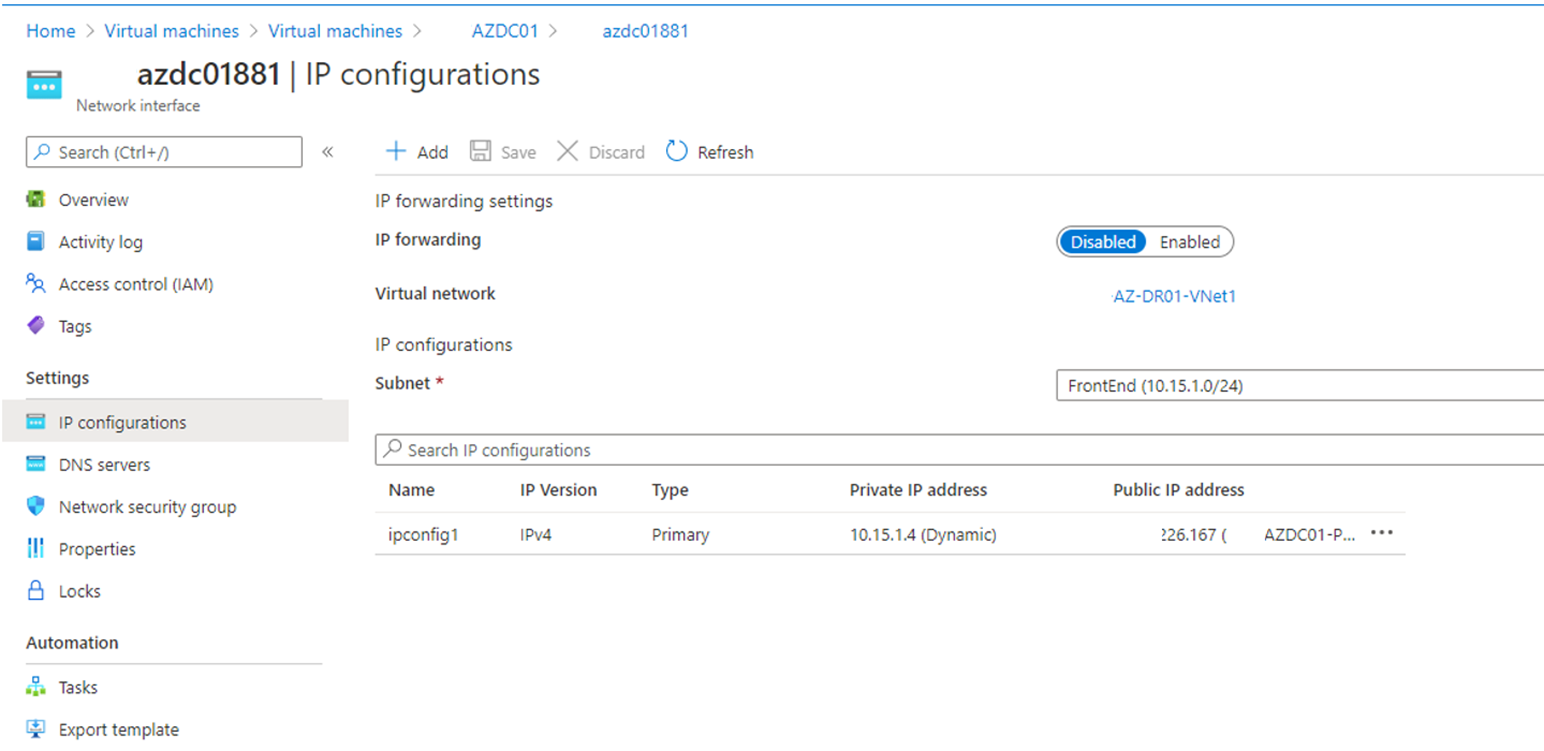
9.On the ipconfig1 page, change Assignment settings from Dynamic to Static, click Save.
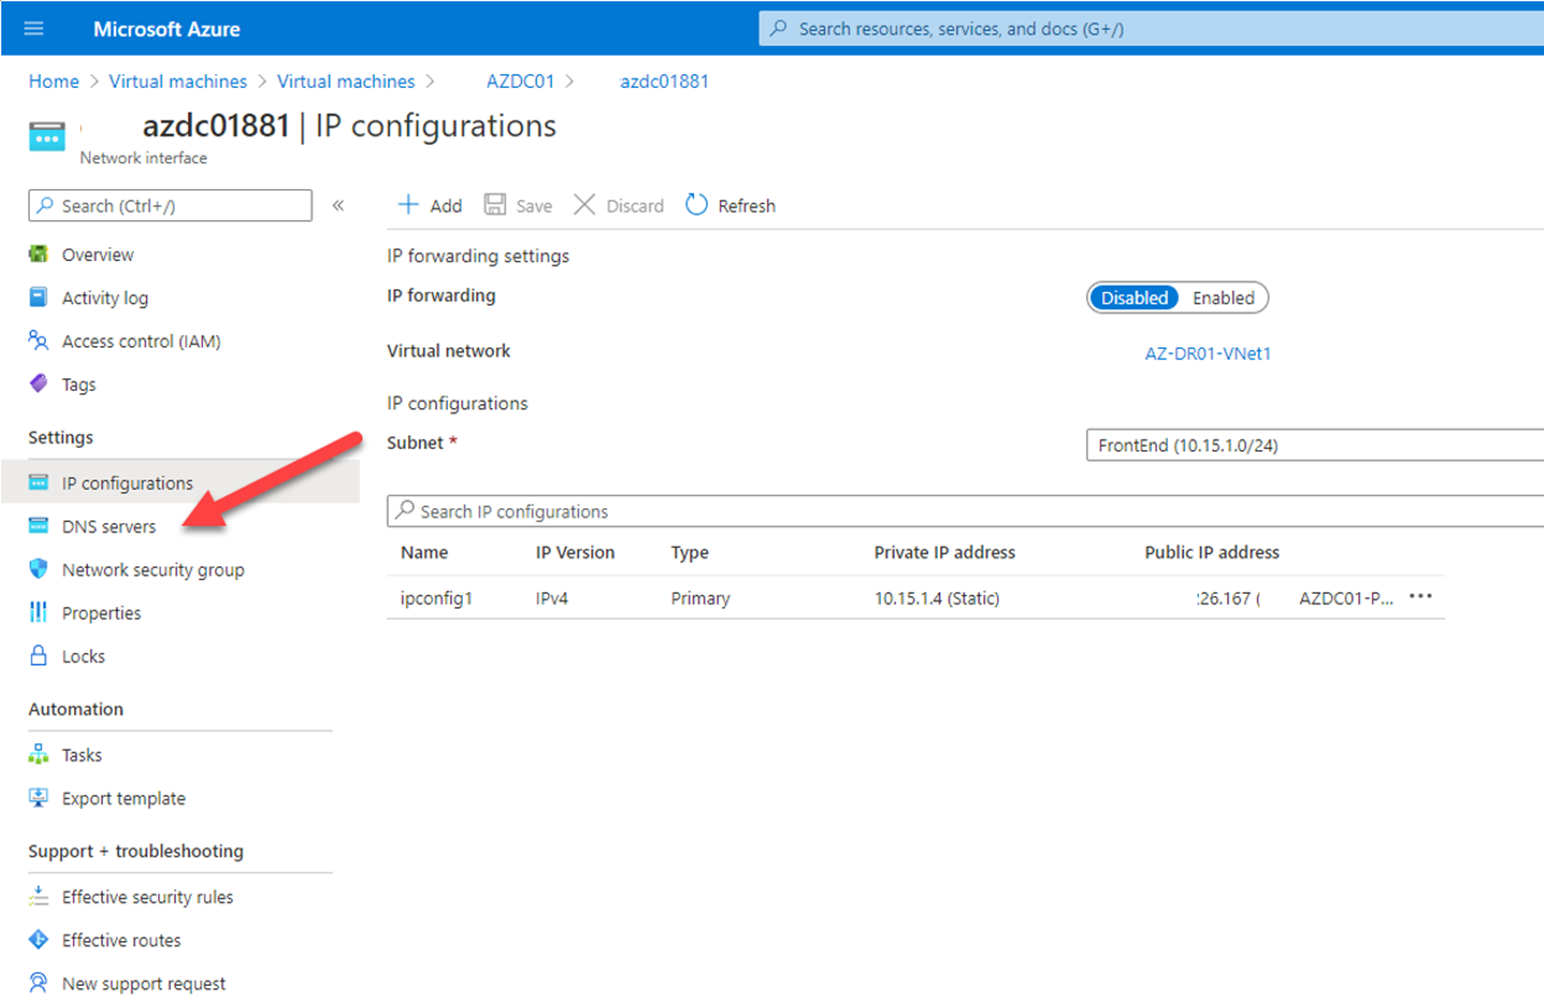
10.Go back to IP configurations page after successfully saved IP address changes for network interface, select DNS servers.
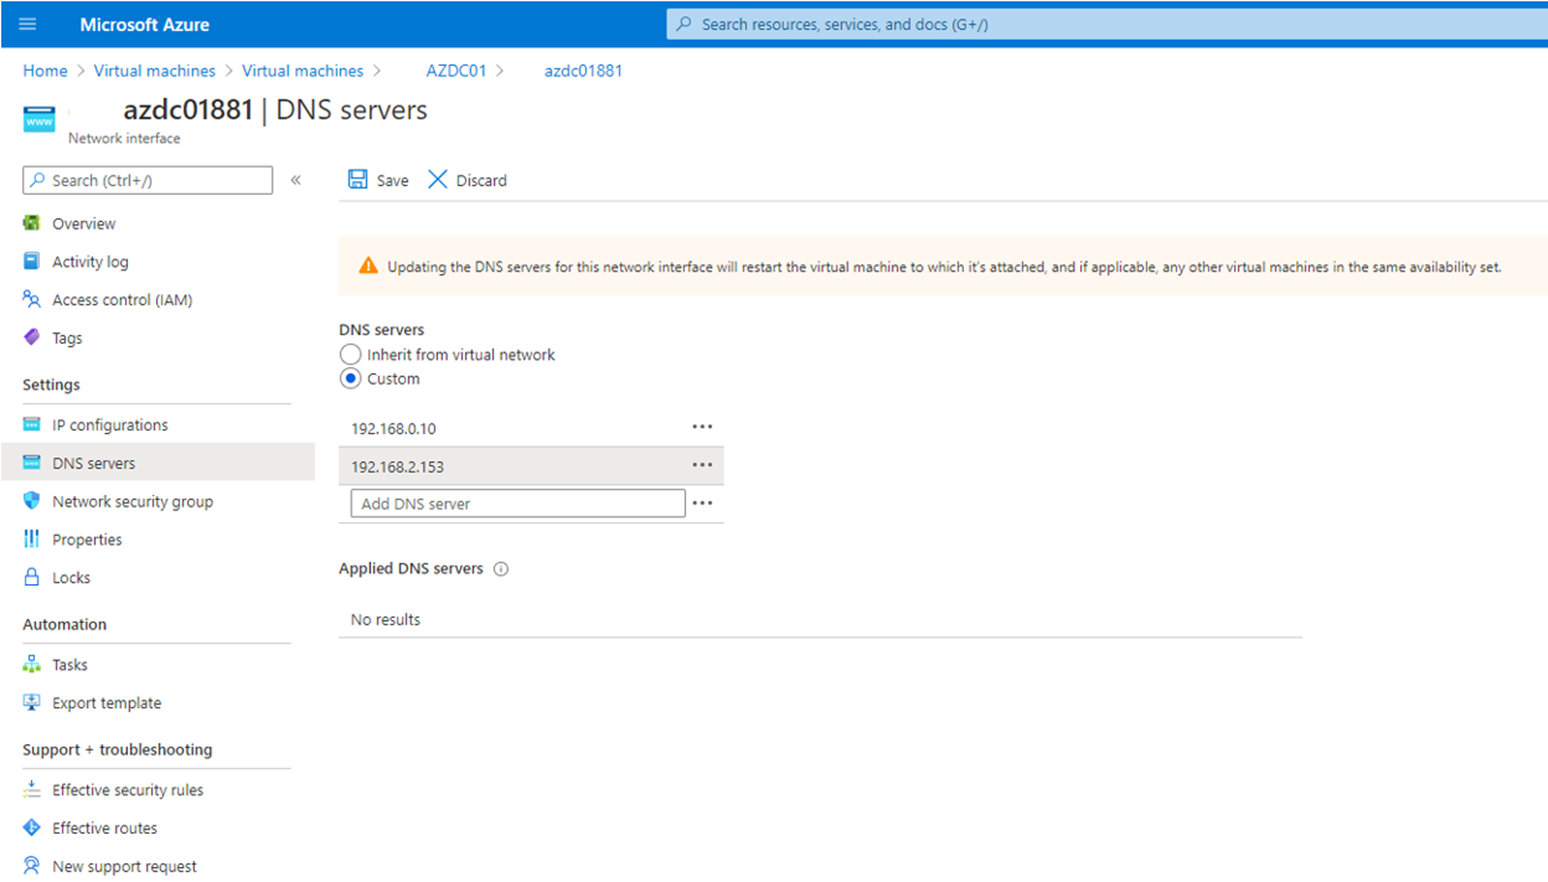
11.On the DNS servers page, change DNS servers setting to Custom, and add on-premise DCs IP address, click Save. It will restart the VM if you ddid not shutdown VM.
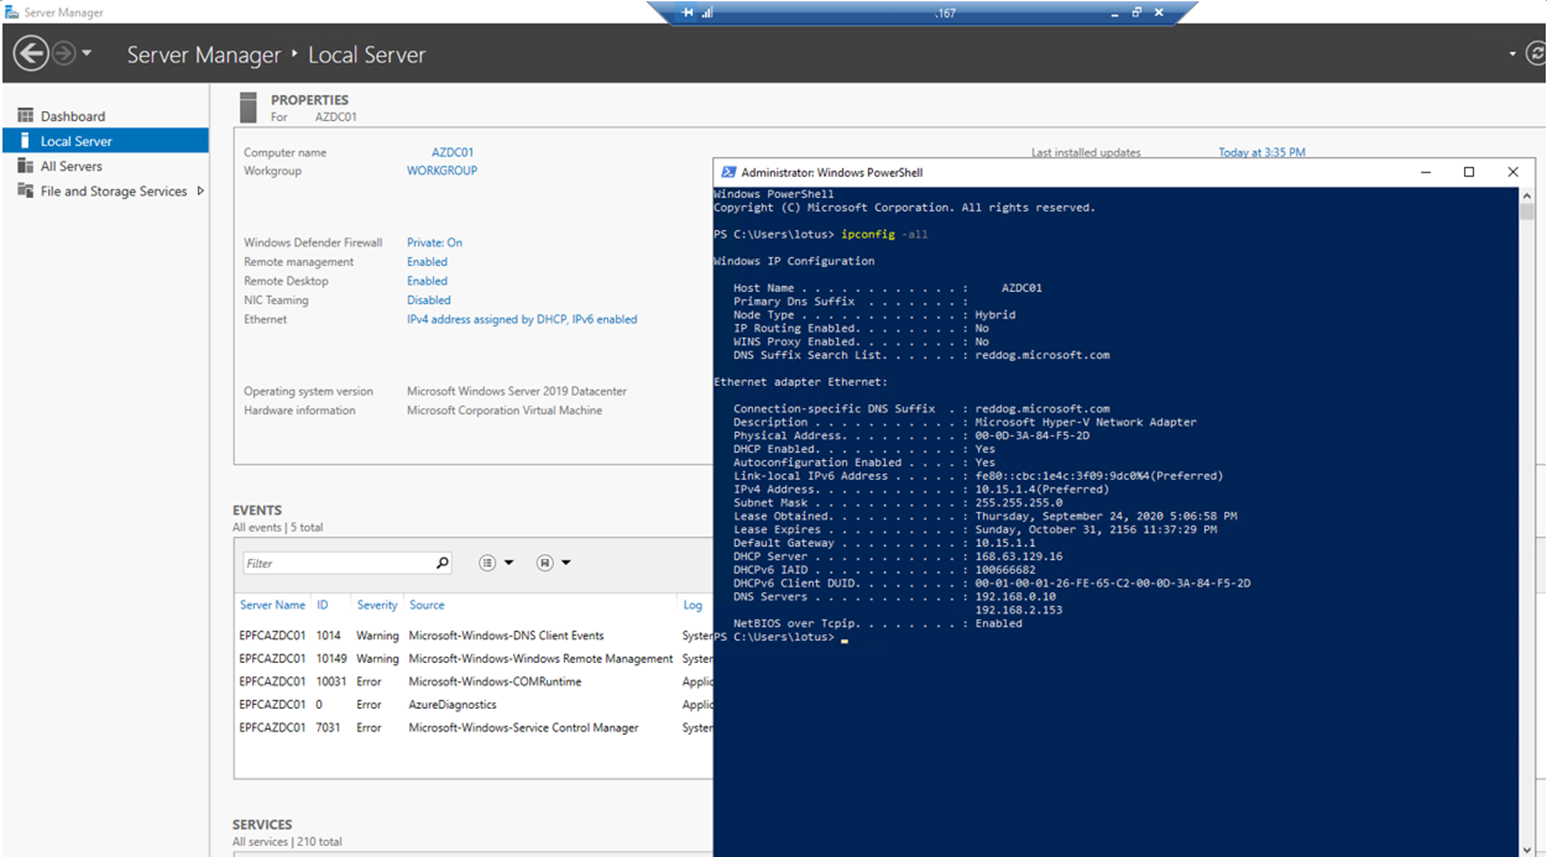
12.Logon AZDC01 server and make sure IP address and DNS servers settings are correct.
Promo AZDC01 as Domain Controller server
1.Logon to AZDC01 server.
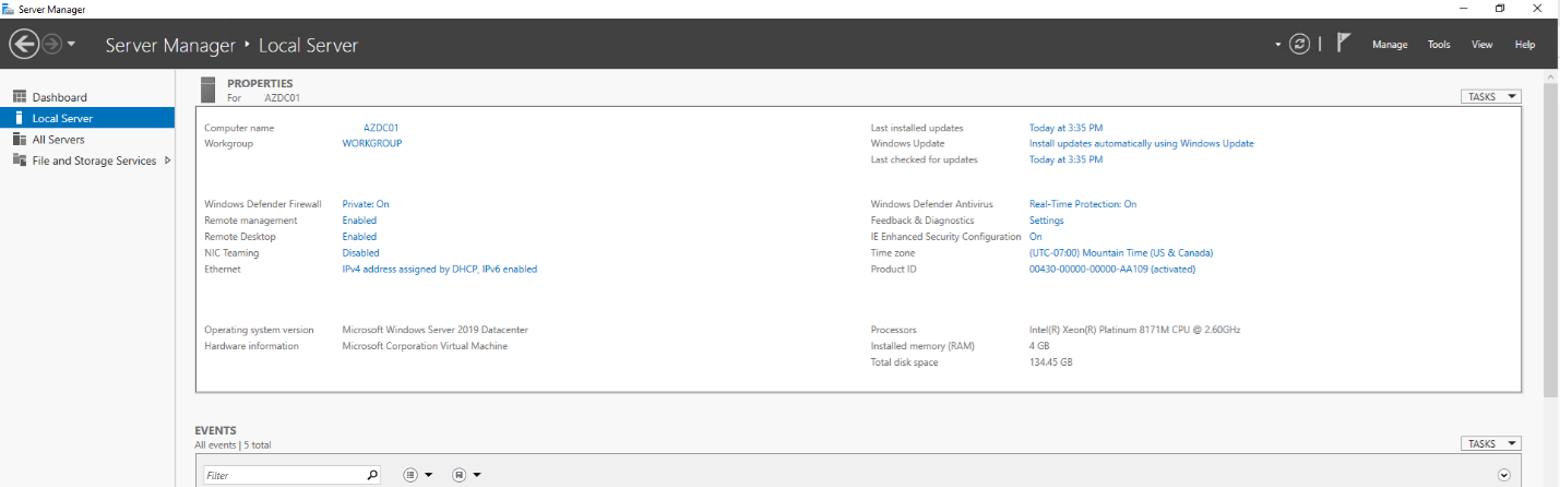
2.Open Server Manager and Select Local Server.
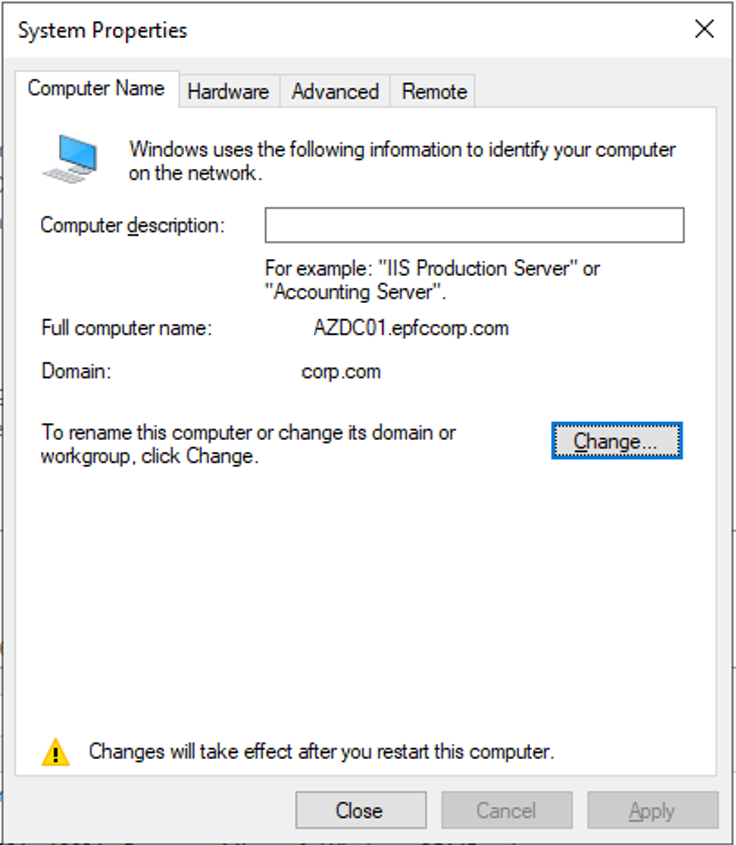
3.On the PROPERTIES page, click WORKGROUP.
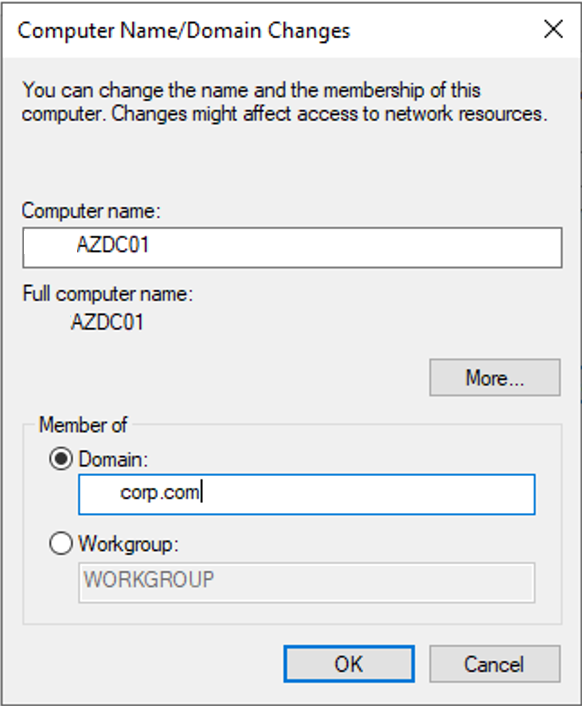
4.On the System Properties page, click Change.

5.On the Computer Name/Domain Changes page, change Member of Domain and type corp.com in Domain field, click OK.
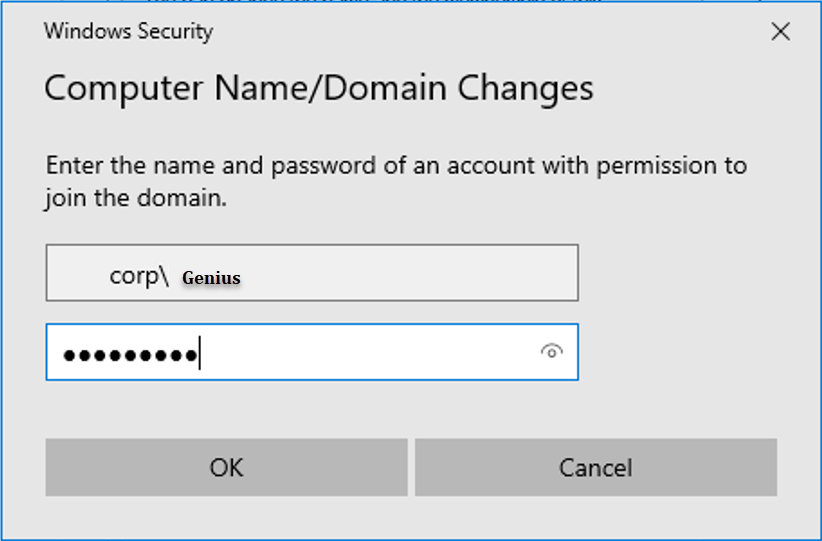
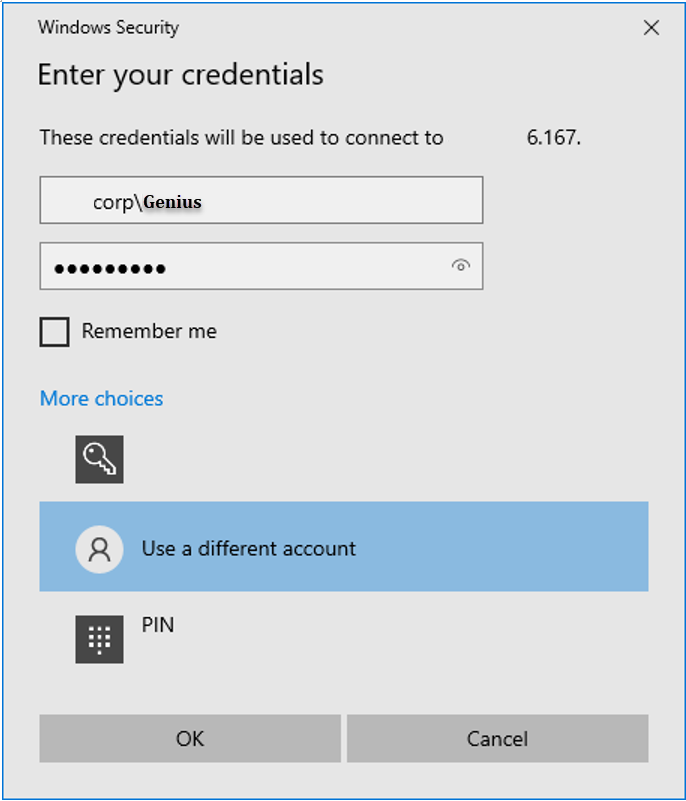
6.On the Windows Security page, enter the domain admins username and password, Click OK.
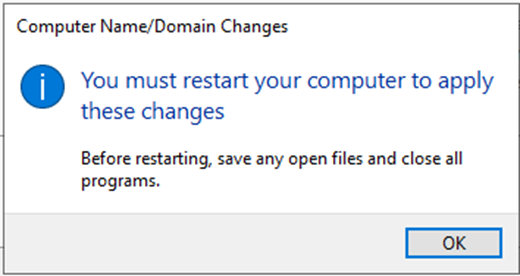
7.Click OK on the Welcome to the corp.com domain page.

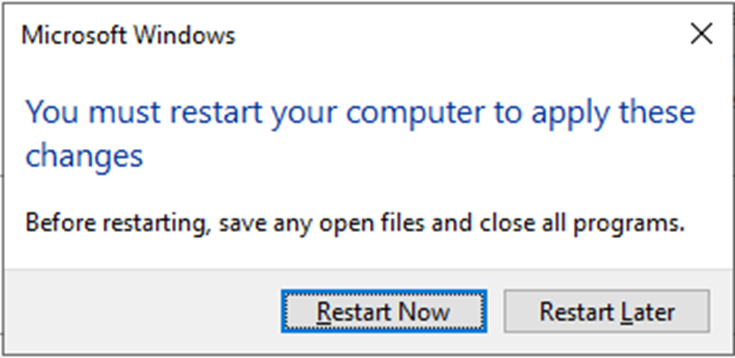
8.Click OK on the You must restart your computer to apply these changes page.
9.On the System Properties page, click Close.
10.Click Restart Now on the restart information pop up.
11.Signin server with domain admins account after rebooting it.
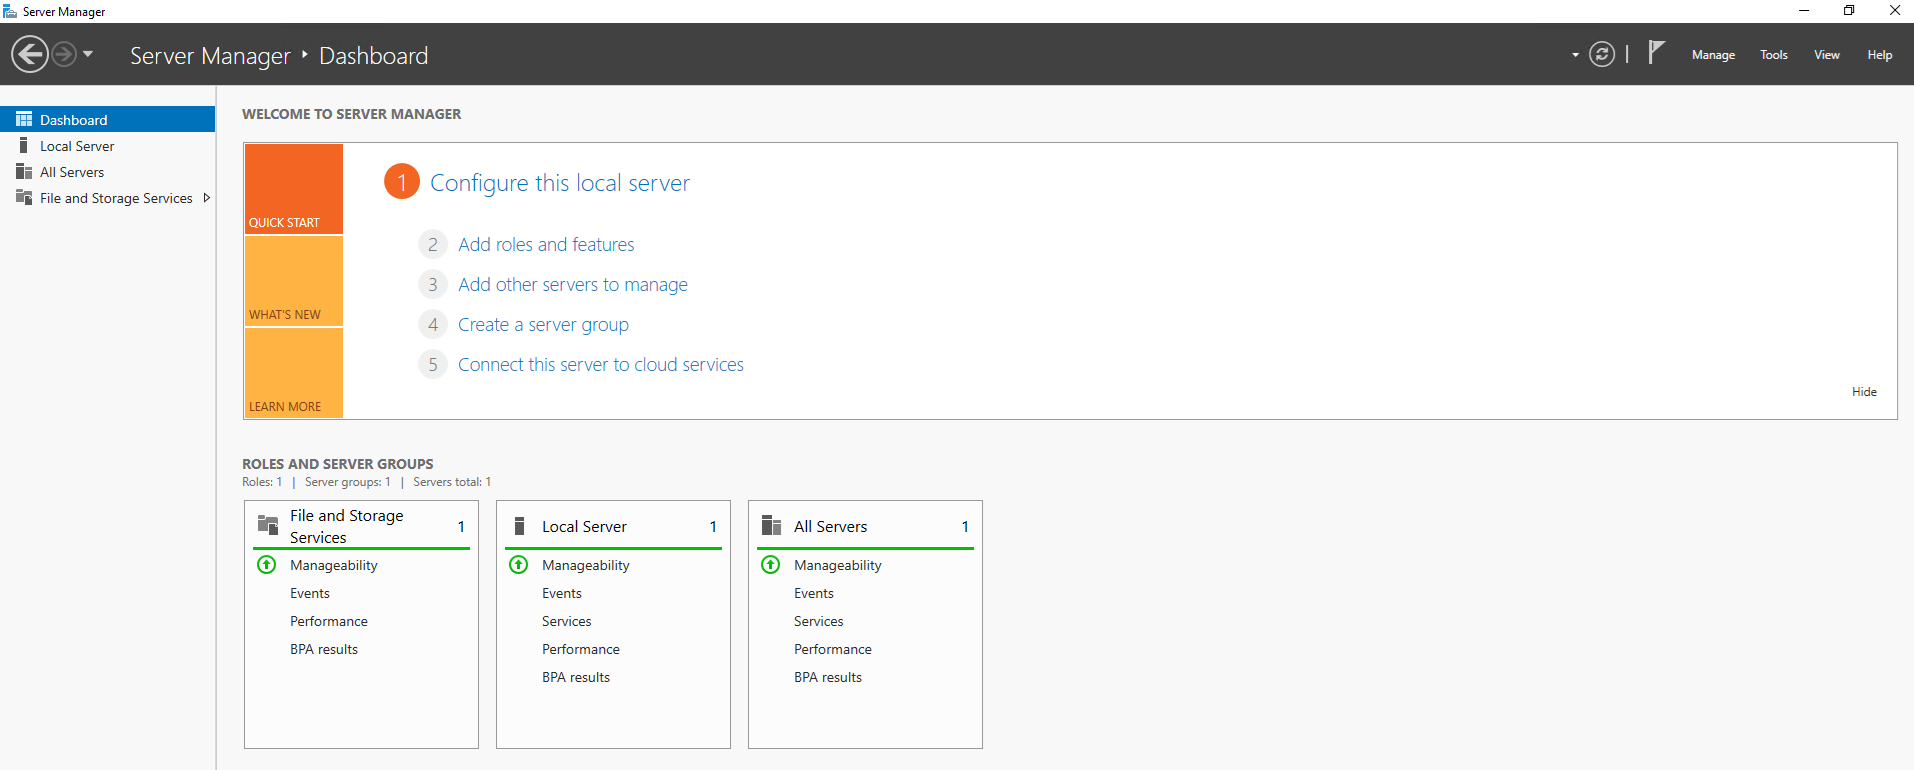
12.Open Server Manage, click Add roles and features in Dashboard.
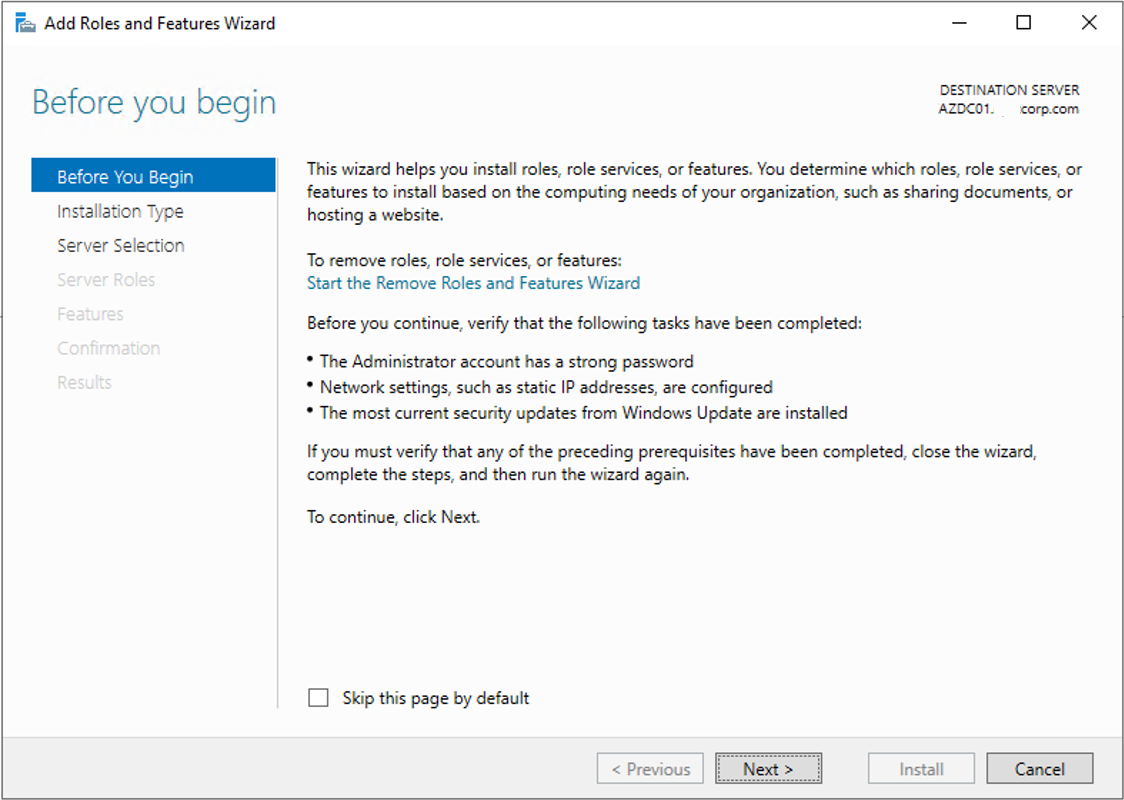
13.On the Before you begin page, click Next.
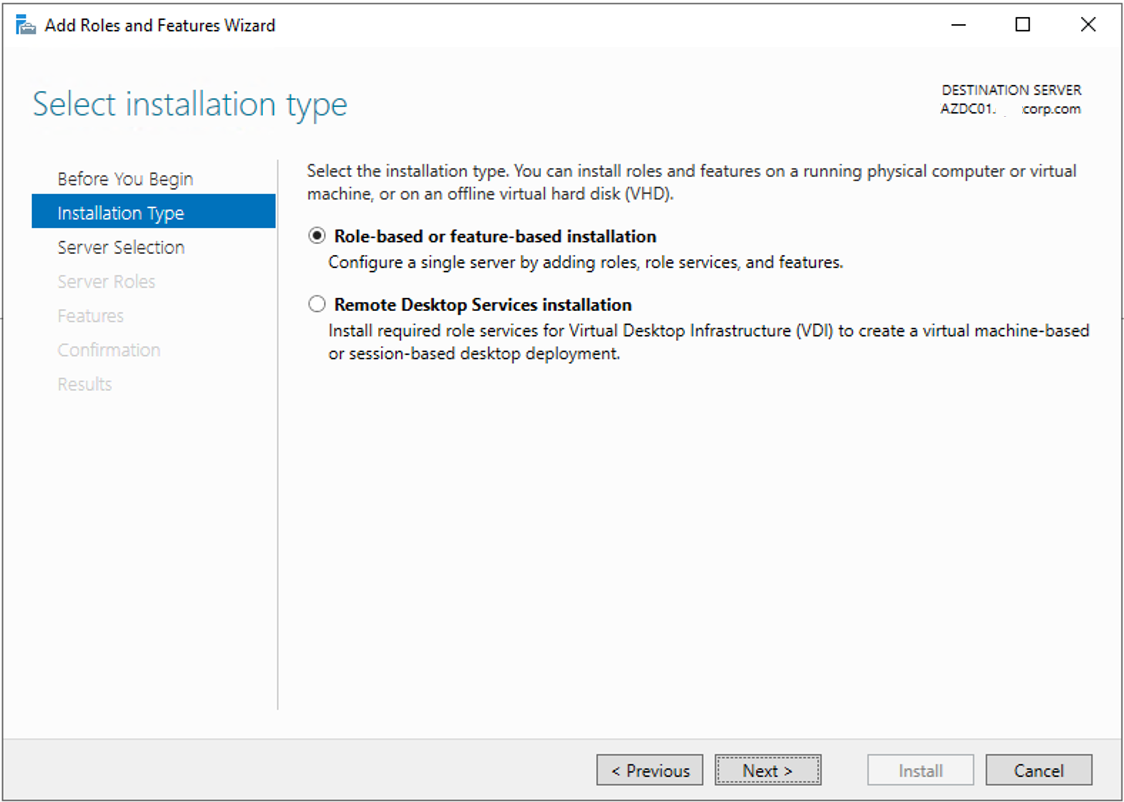
14.On the Select installation type, select Role-based or feature-based installation, click Next.
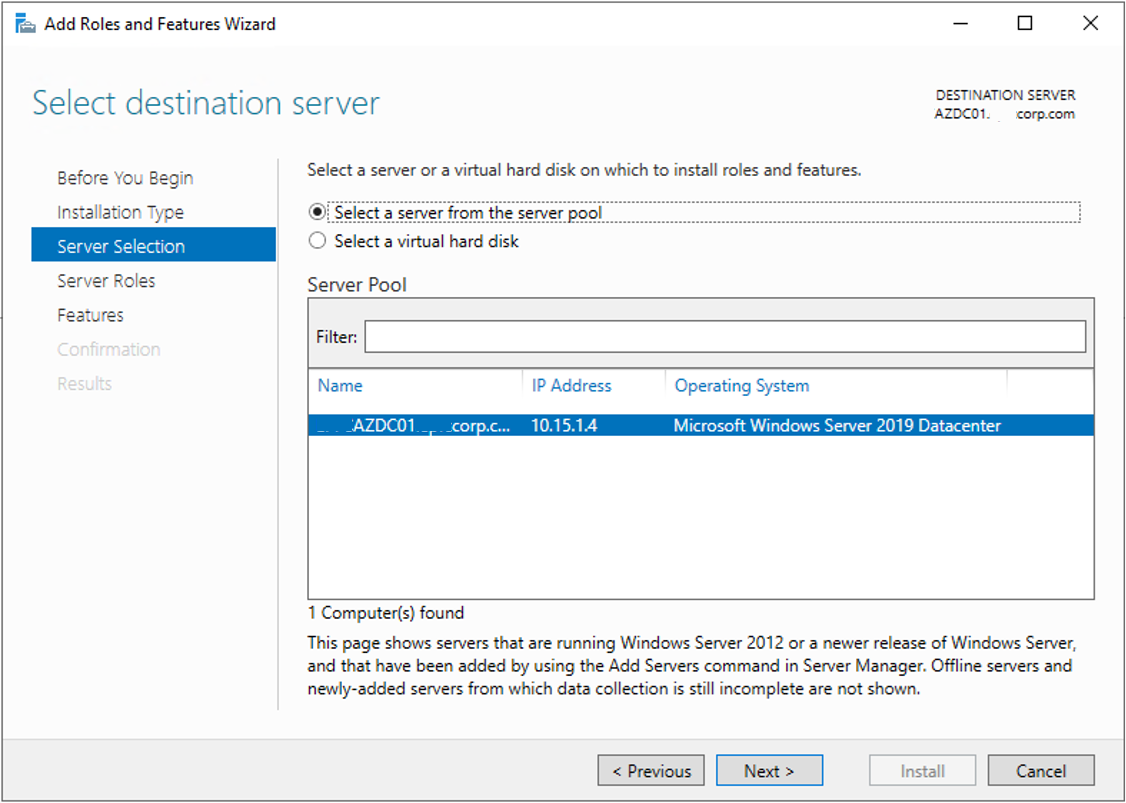
15.On the Select destination server page, select AZDC01, click Next.
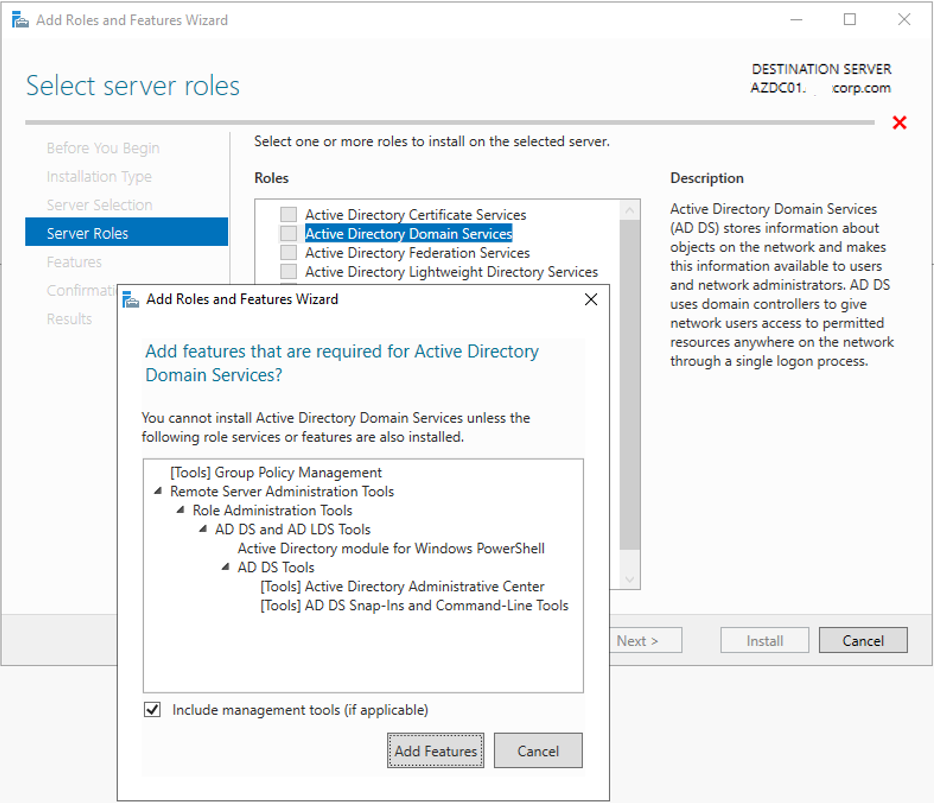
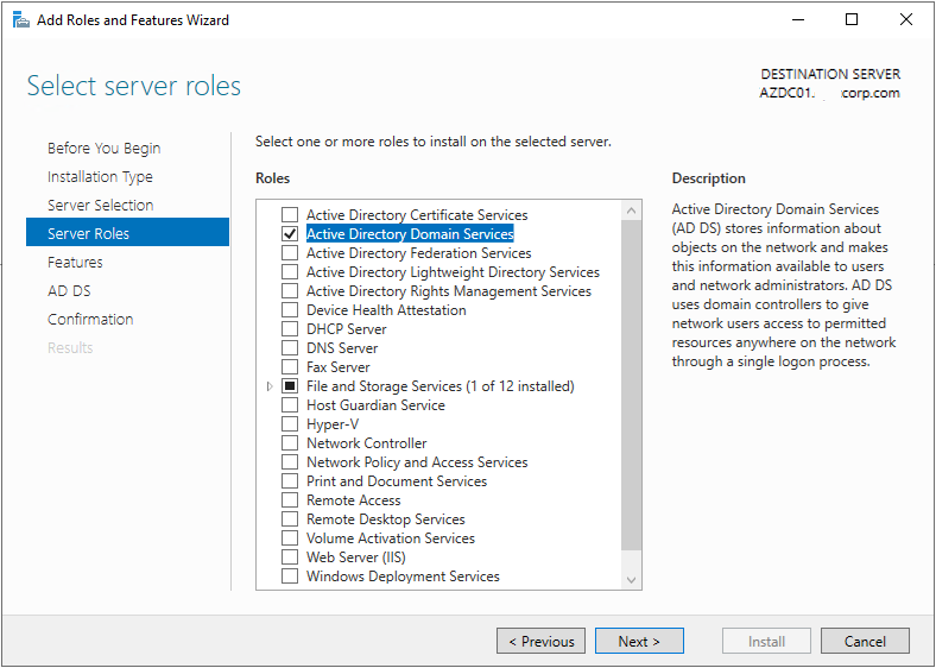
16.On the Select server roles page, select Active Directory Domain Services.
17.On the Add features that are required for Active Directory Domain Services page, click Add Features.
18.On the Select server roles page, click Next.
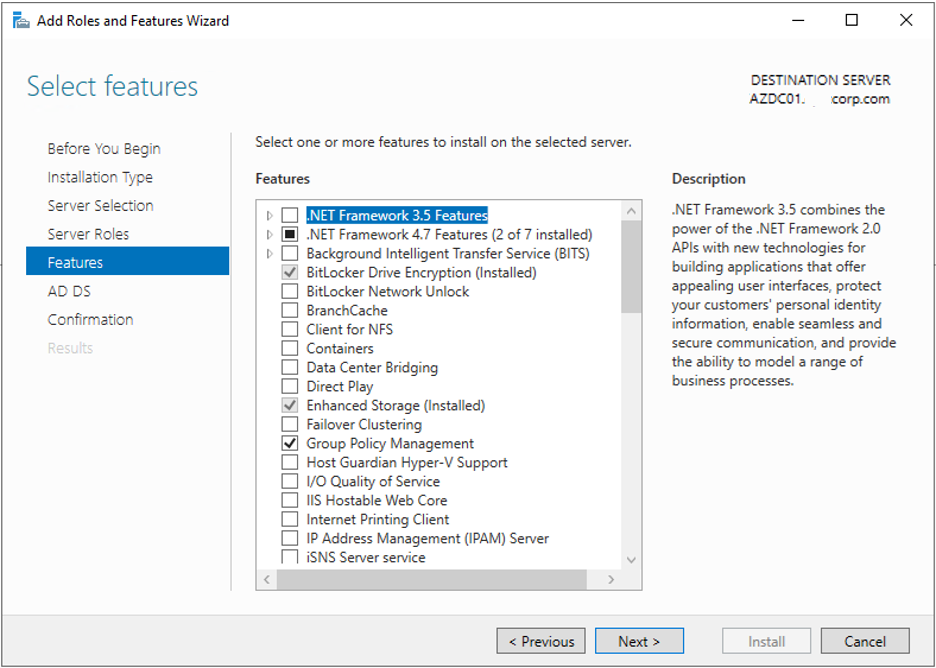
19.On the Select features page, click Next.
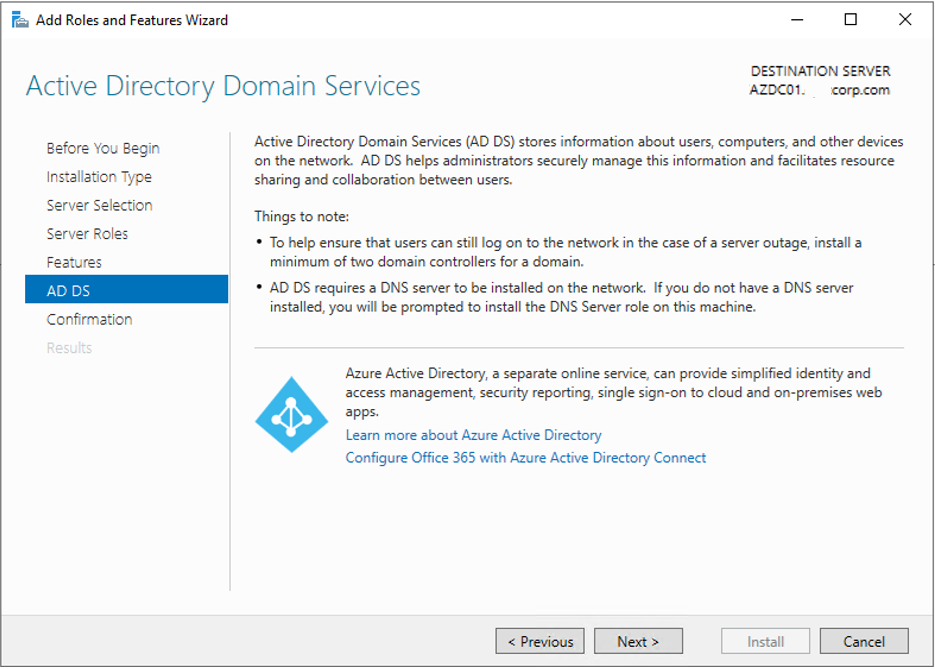
20.On the Active Directory Domain Services page, Click Next.
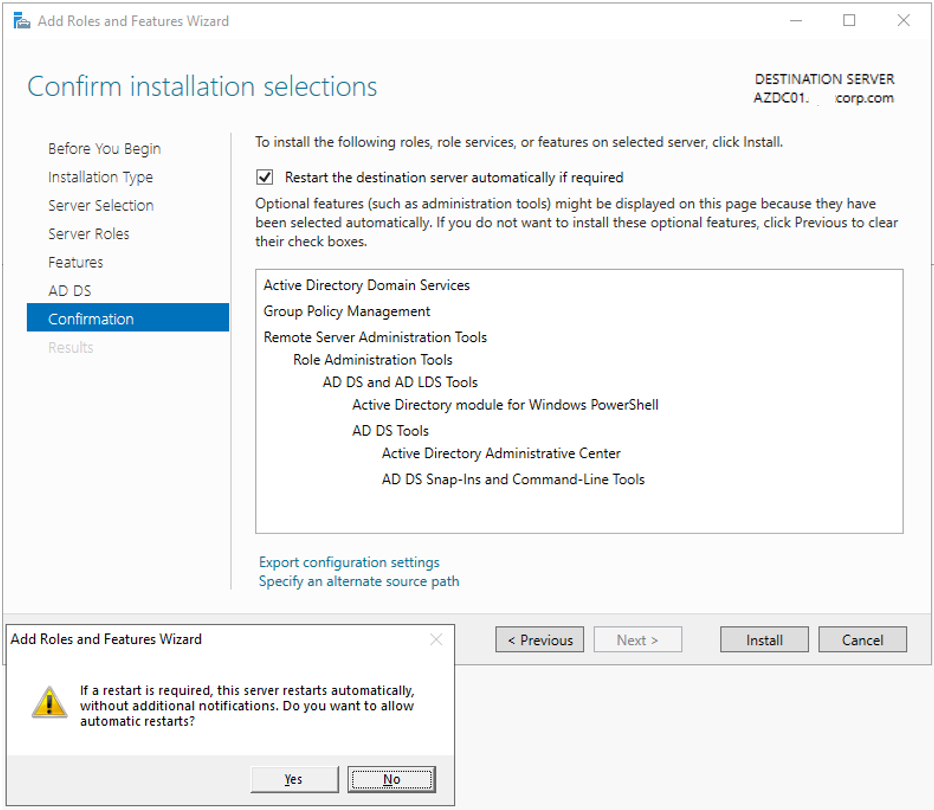
21.On the Confirm installation selections page, select Restart the destination server automatically if required, click Yes at restart warning message, click Install.
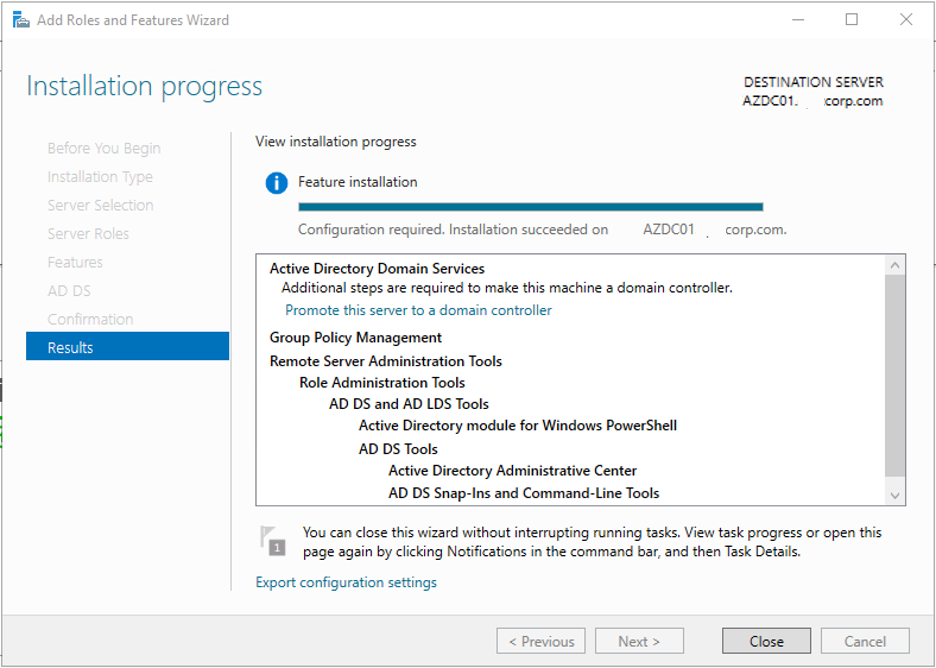
22.On the Installation progress page, make sure installation succeeded, click Close and restart server.
23.Signin server with domain admins account after reboot it.
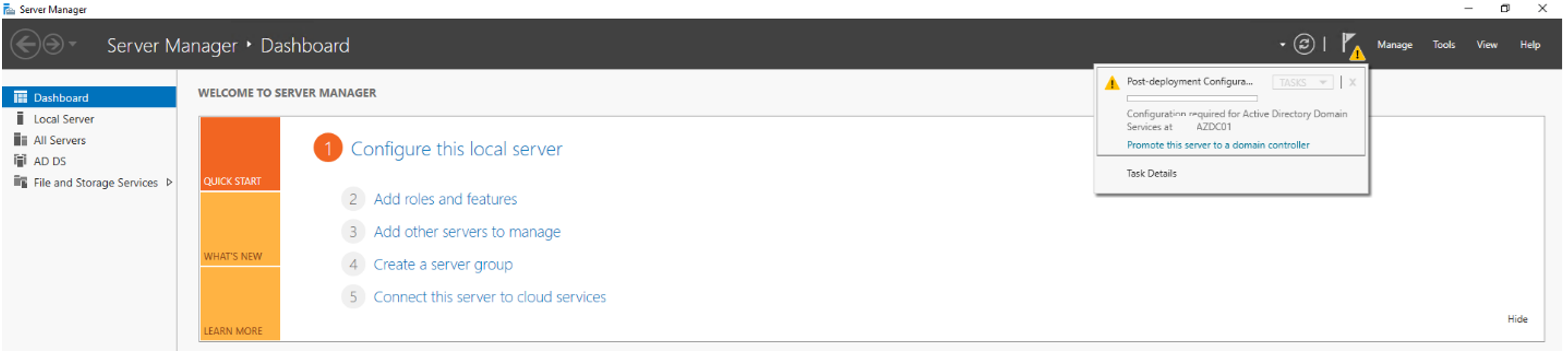
24.Open Server Manage, click the flag warning message, click Promote this server to a domain controller.
25.On the Deployment Configuration page, select Add a domain controller to an existing domain, type corp.com to Domain filed, click Next.

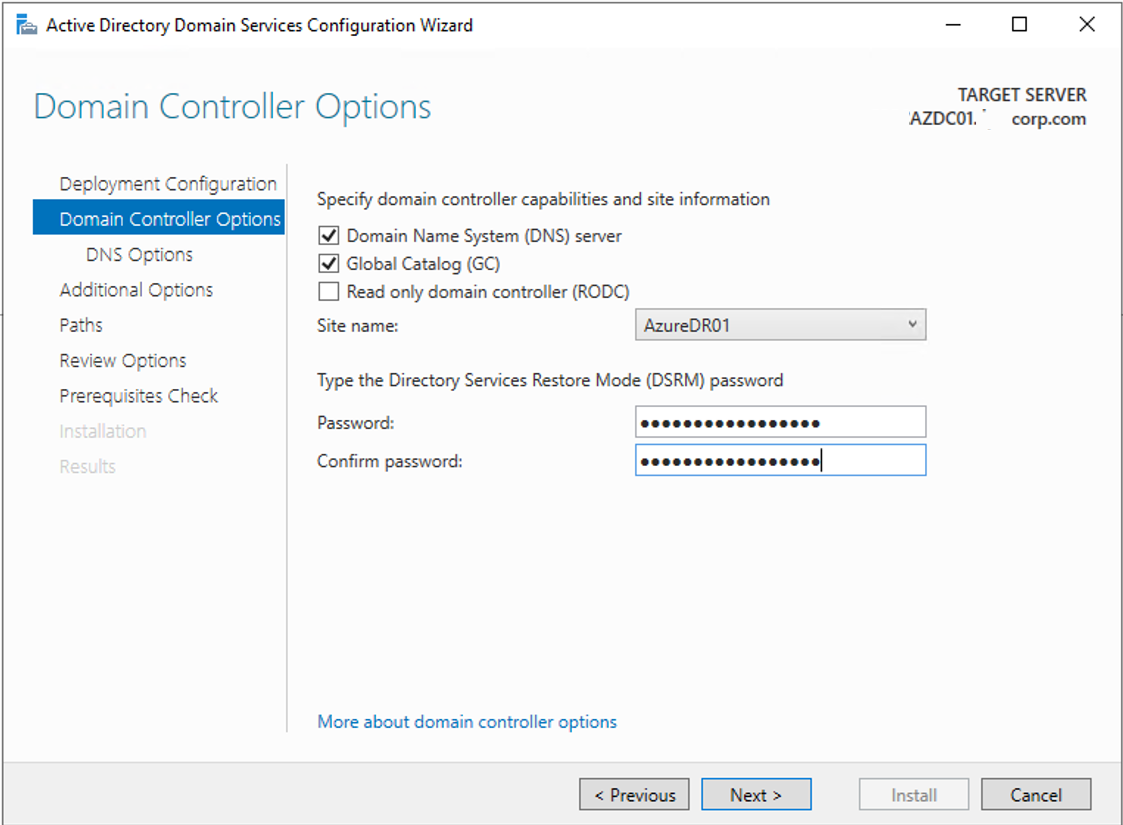
26.On the Domain Controller Options page, select Domain Name System (DNS) server, and Global Catalog (GC), select AzureDR01 for the Site name, Type P@ssw0rd to password and Confirm password field, click Next.
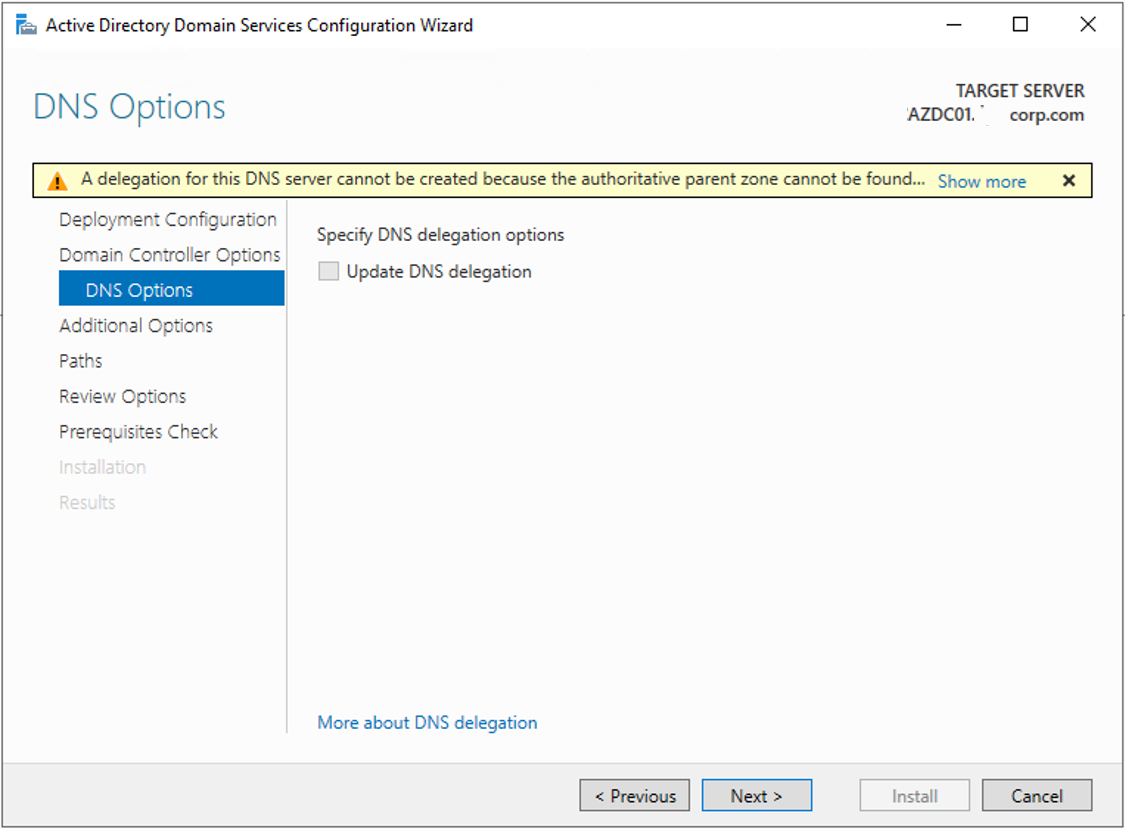
27.On the DNS Options page, click Next.
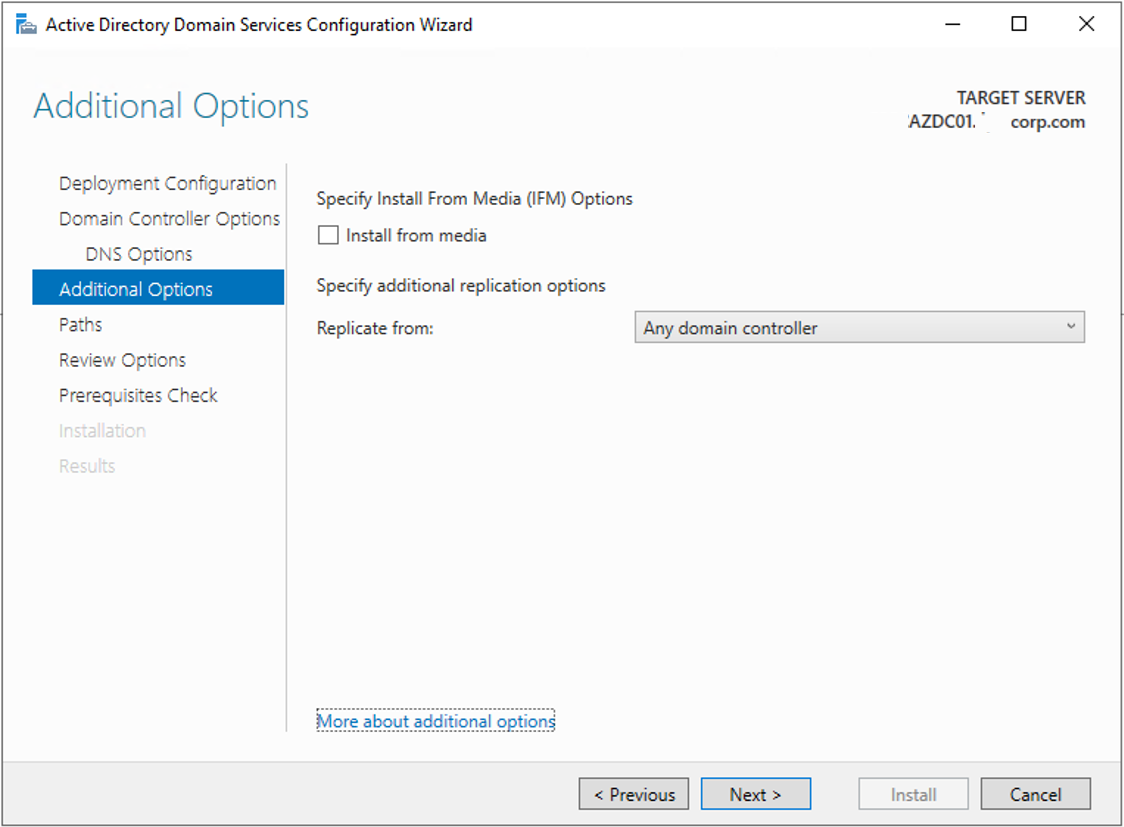
28.On the Additional Options page, click Next.
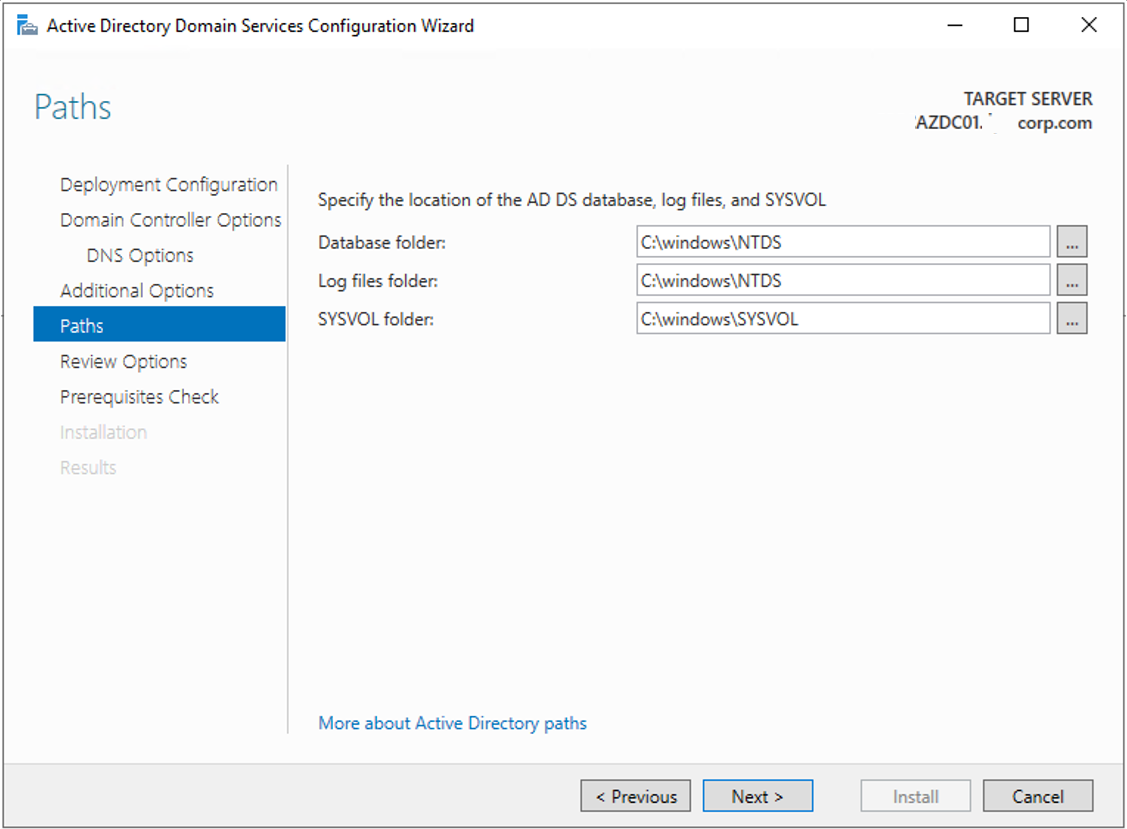
29.On the Paths page, click Next.
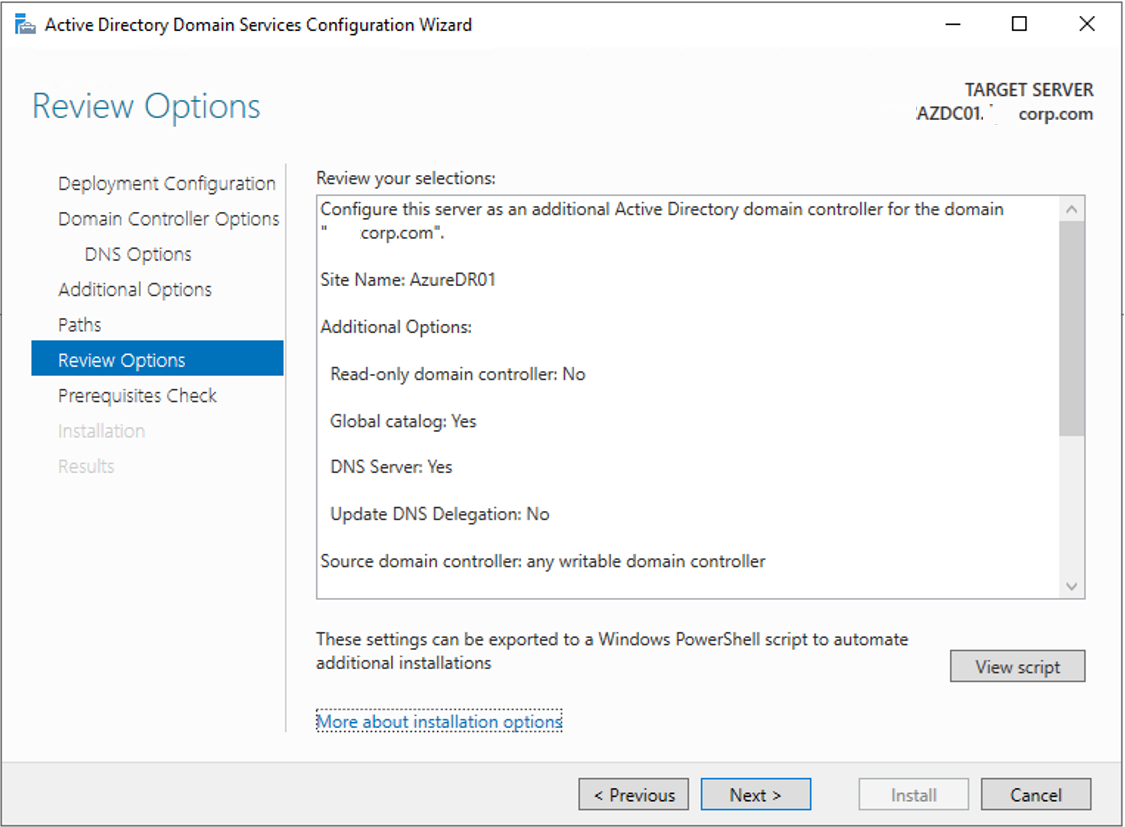
30.On the Review Options page, click Next.
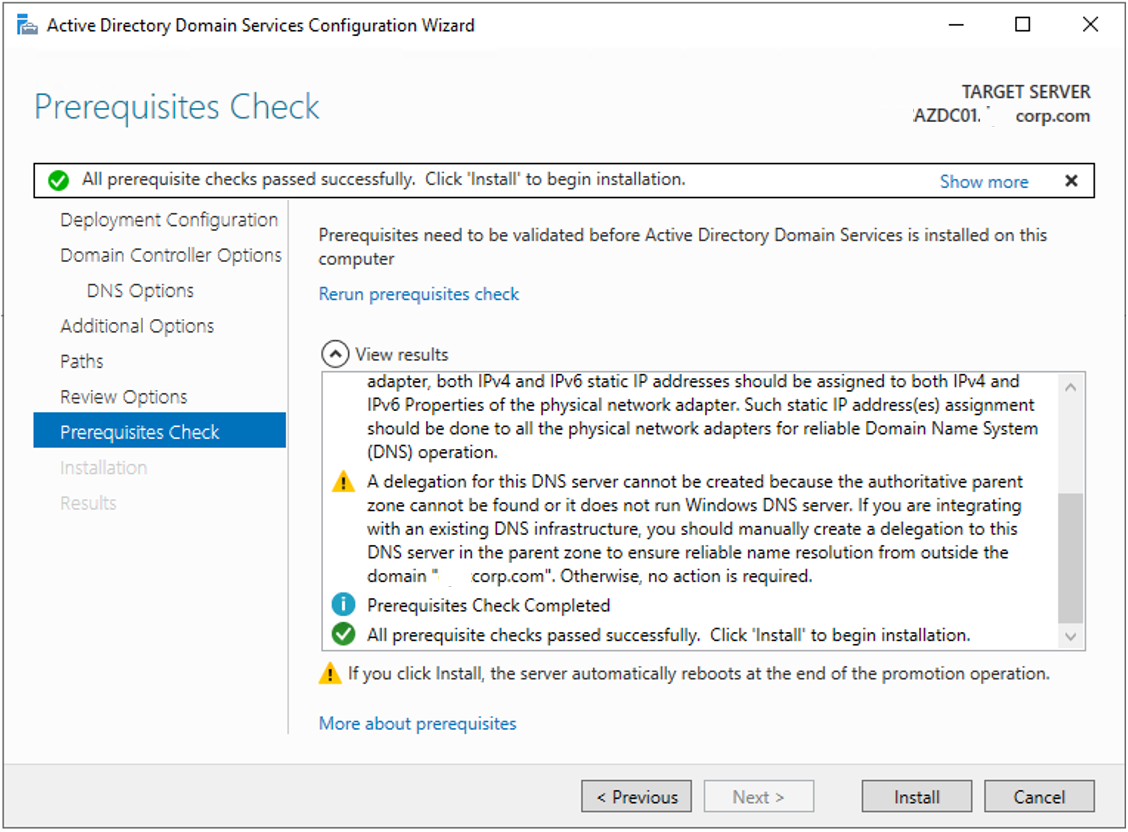
31.On the Prerequisites Check, make sure All prerequisite checks passed successfully, Click Install. If you were following my previously blog to create VM, ignore the physical network adapter that does not have static IP address warning message,
because we configured it at Azure portal not Windows server IPv4 settings.
32.the server will restart atomically after installation completed.
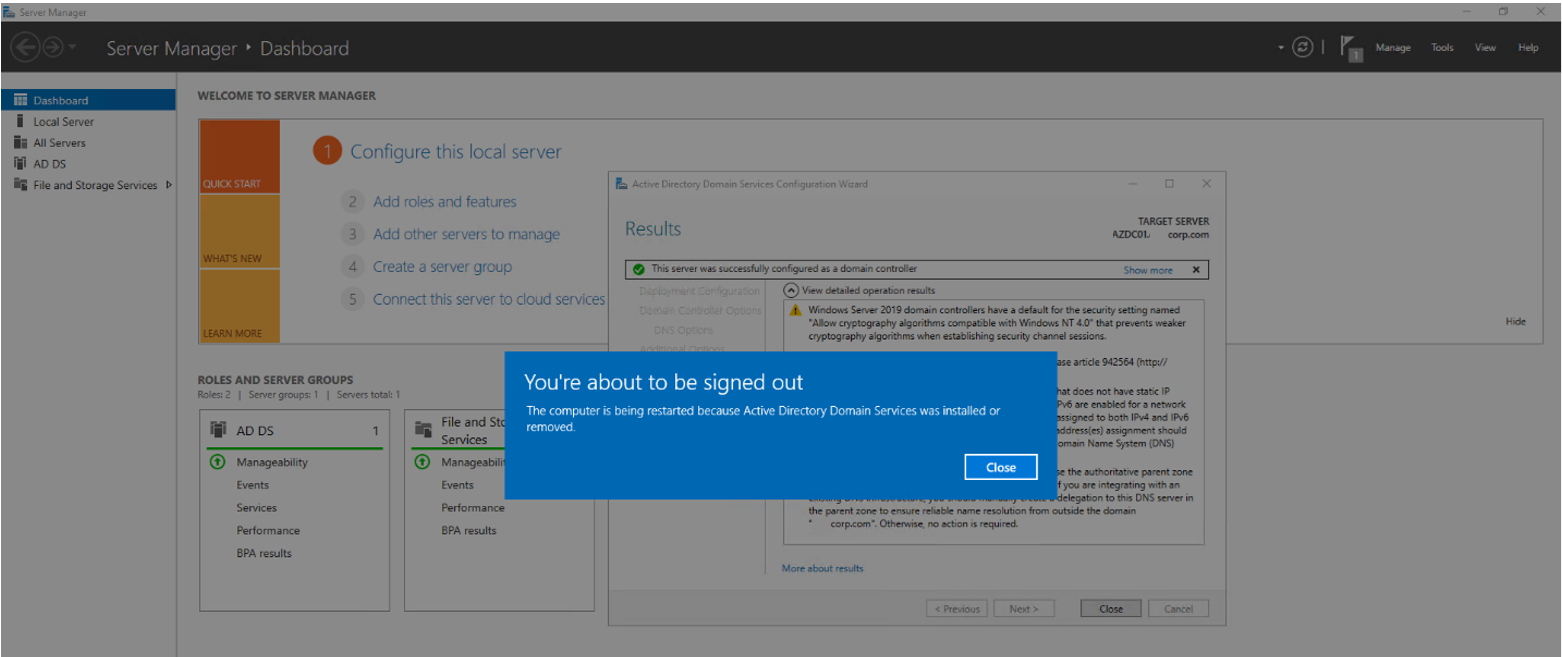
33.this server is a new domain controller at Azure after reboot.
Hope you enjoy this post.
Cary Sun
Twitter: @SifuSun
Personal Website: carysun.com