
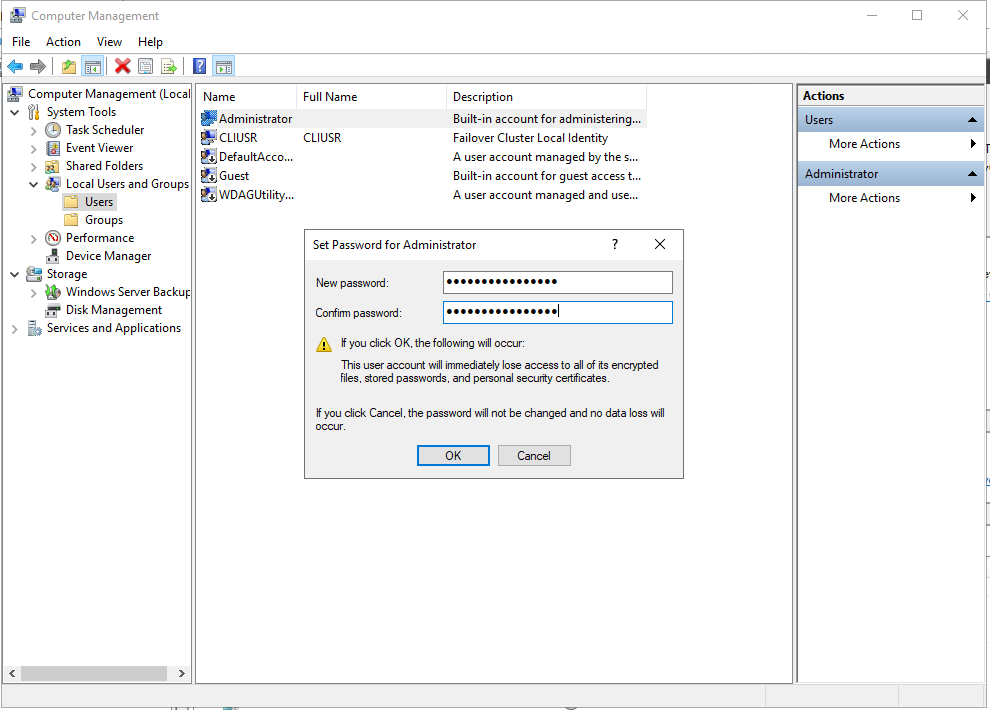
1.Create a local Administrator account with the same name and password on all servers in the cluster.
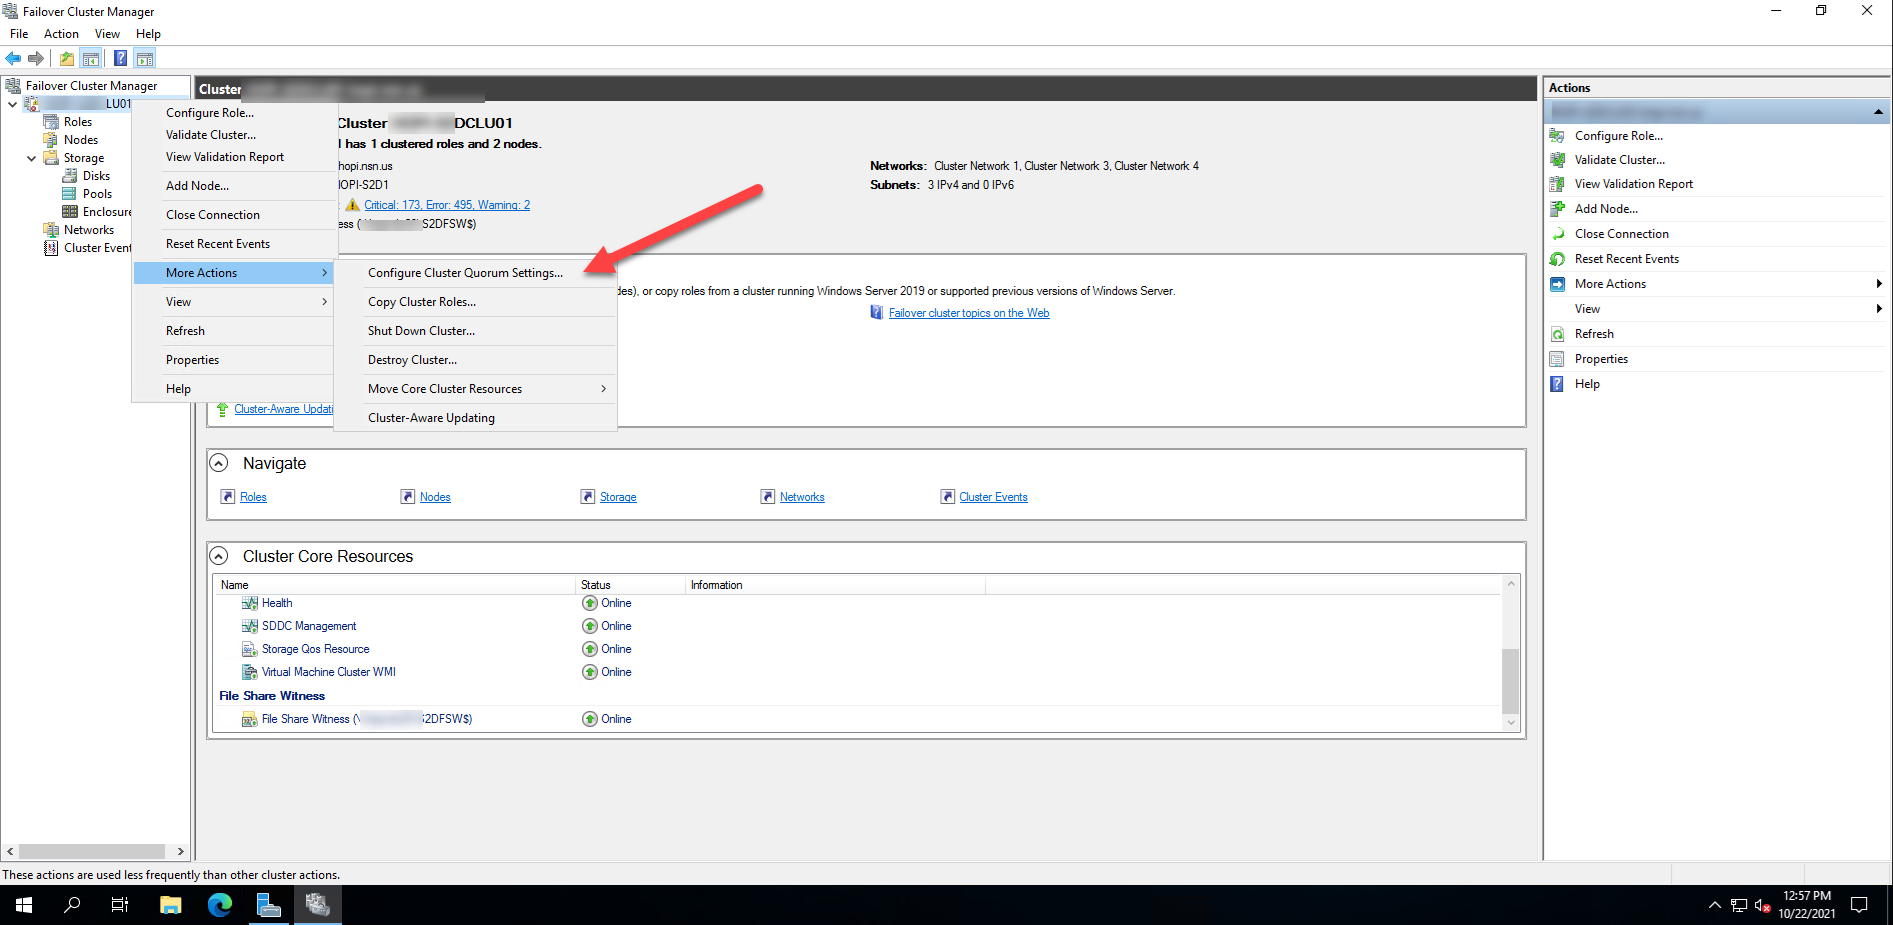
2.Following steps to remove file share witness, Open Failover Cluster Manager, Right-click cluster name, select More Actions, click Configure Cluster Quorum settings.
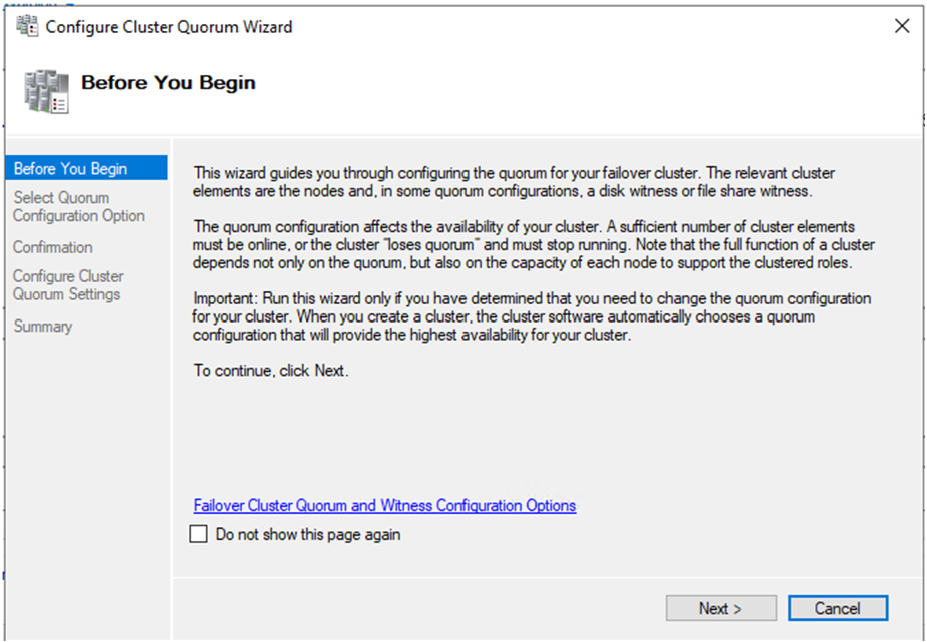
3.On the Before You Begin page, click Next.
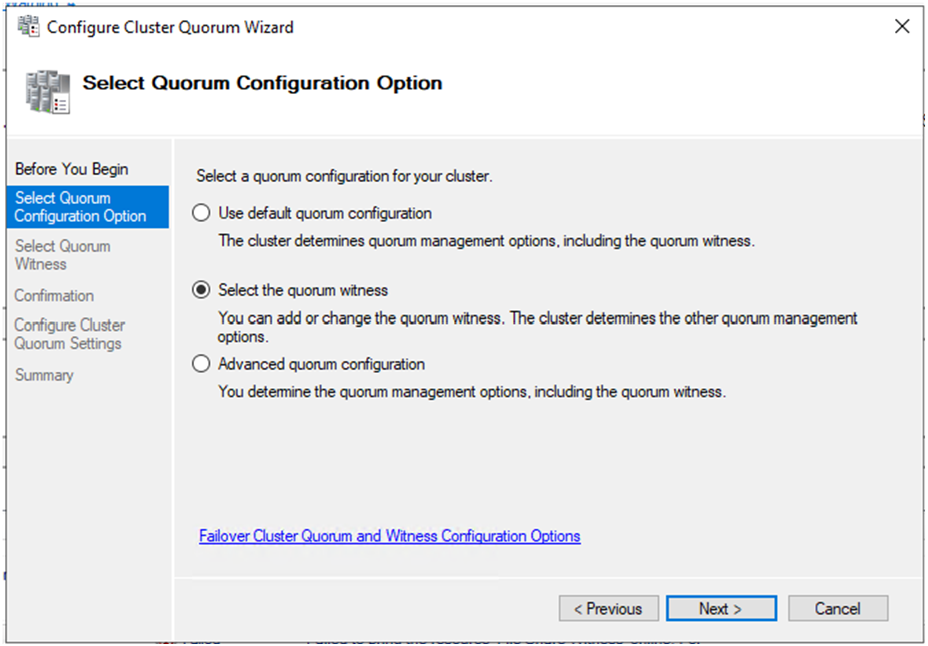
4.On the Select Quorum Configuration Option page, select Select the quorum witness, click Next.
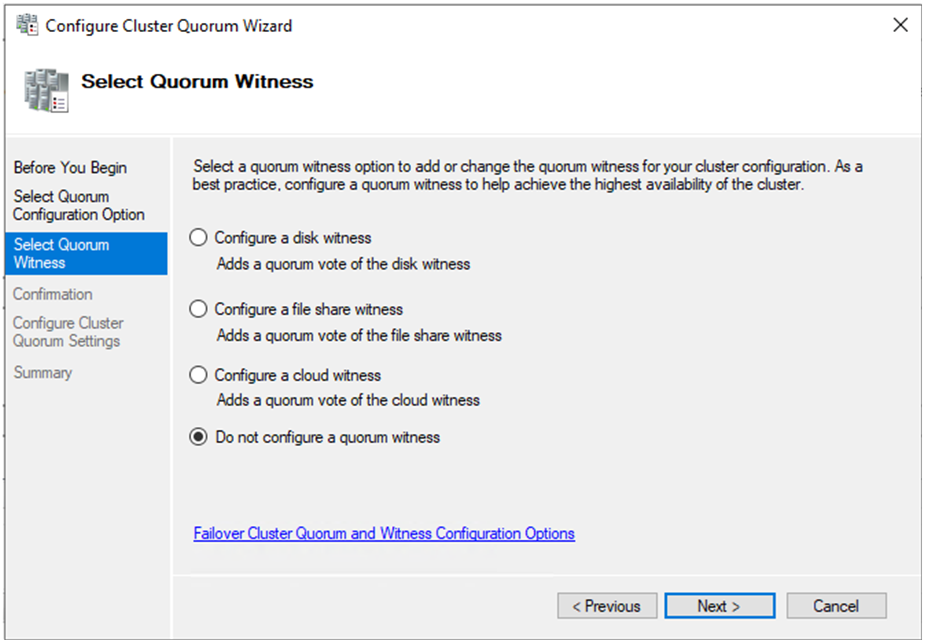
5.On the Select Quorum Witness page, select Do not configure a quorum witness, click Next.
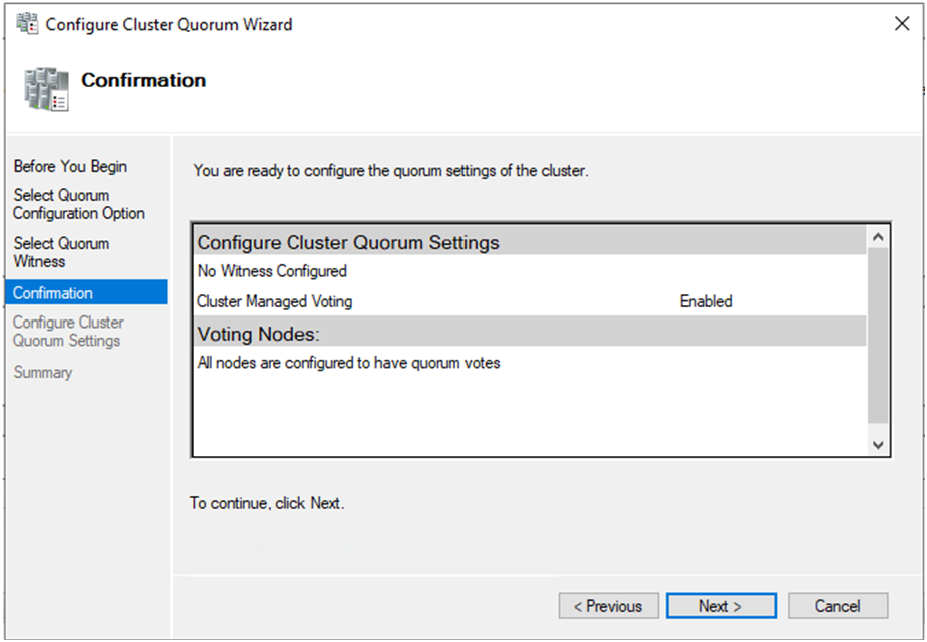
6.On the Confirmation page, click Next.
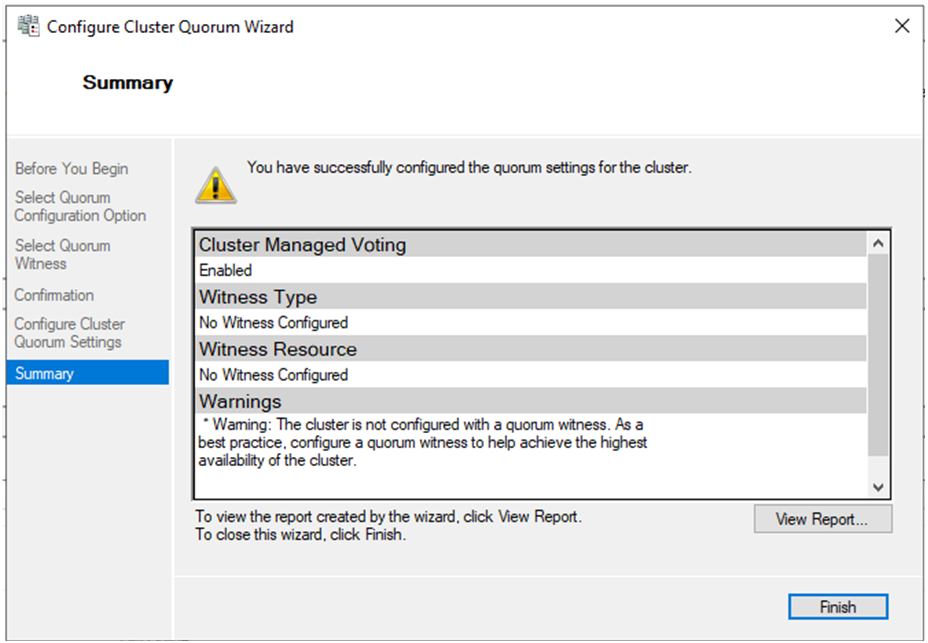
7.On the Summary page, verify configured successfully, click Finish.
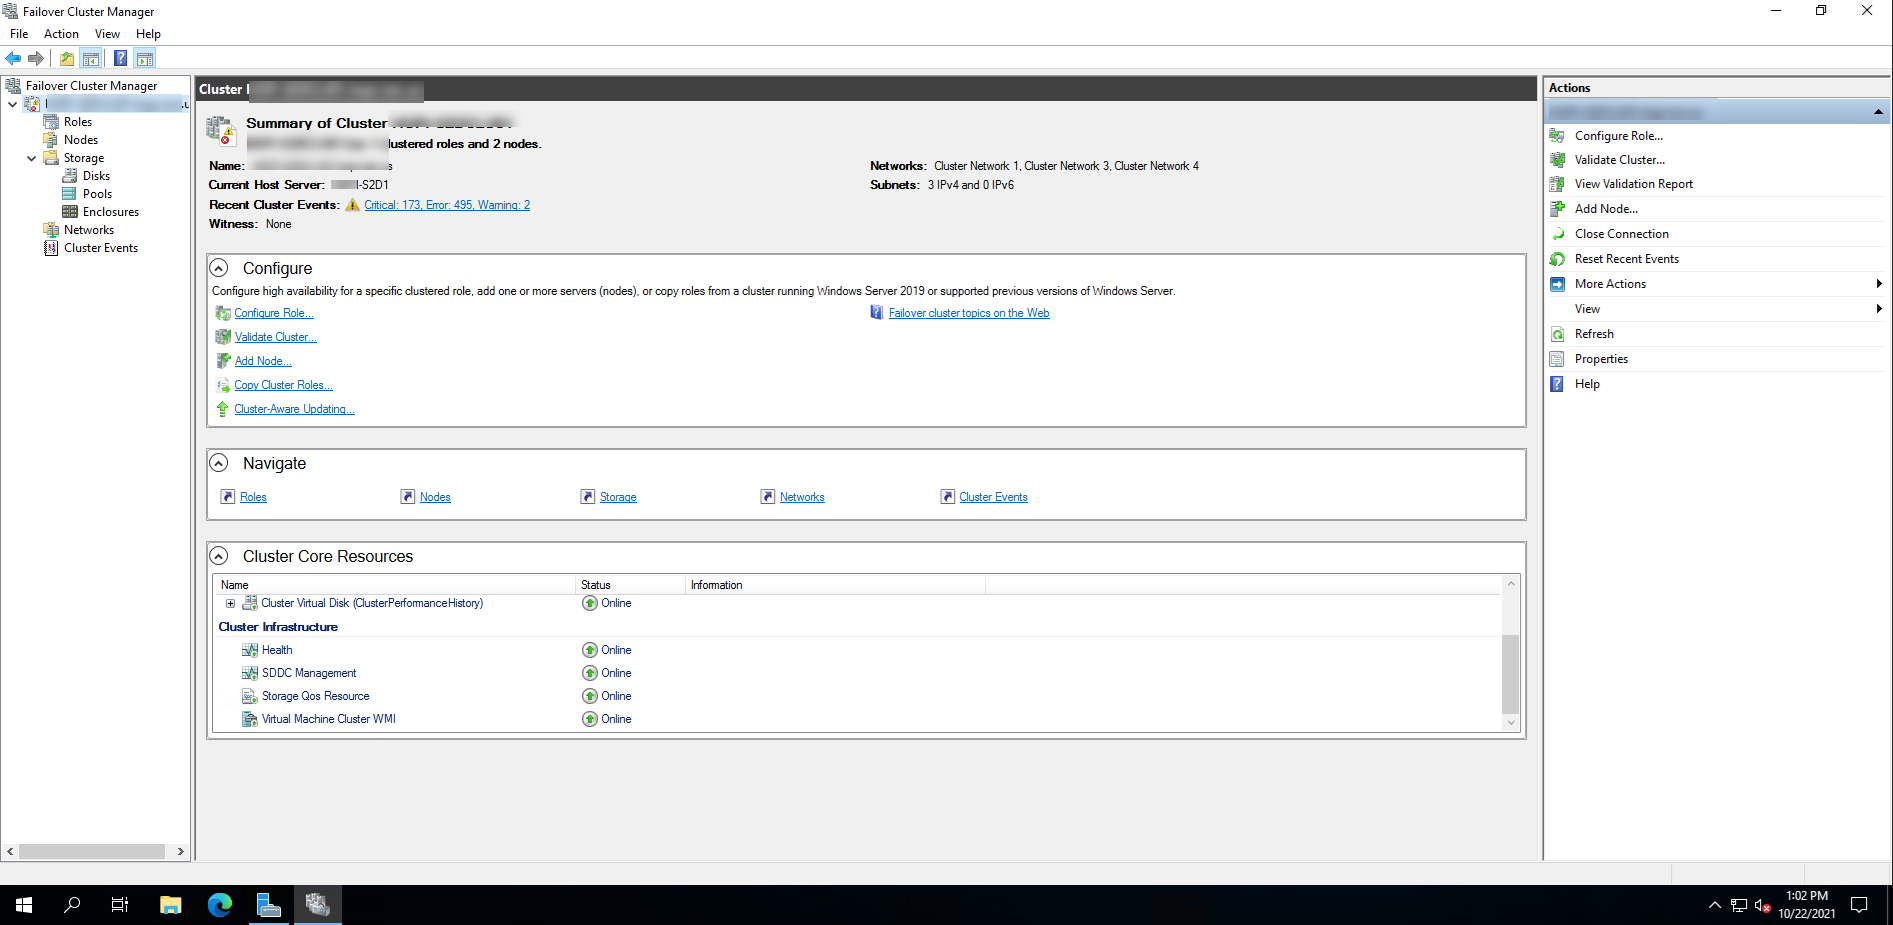
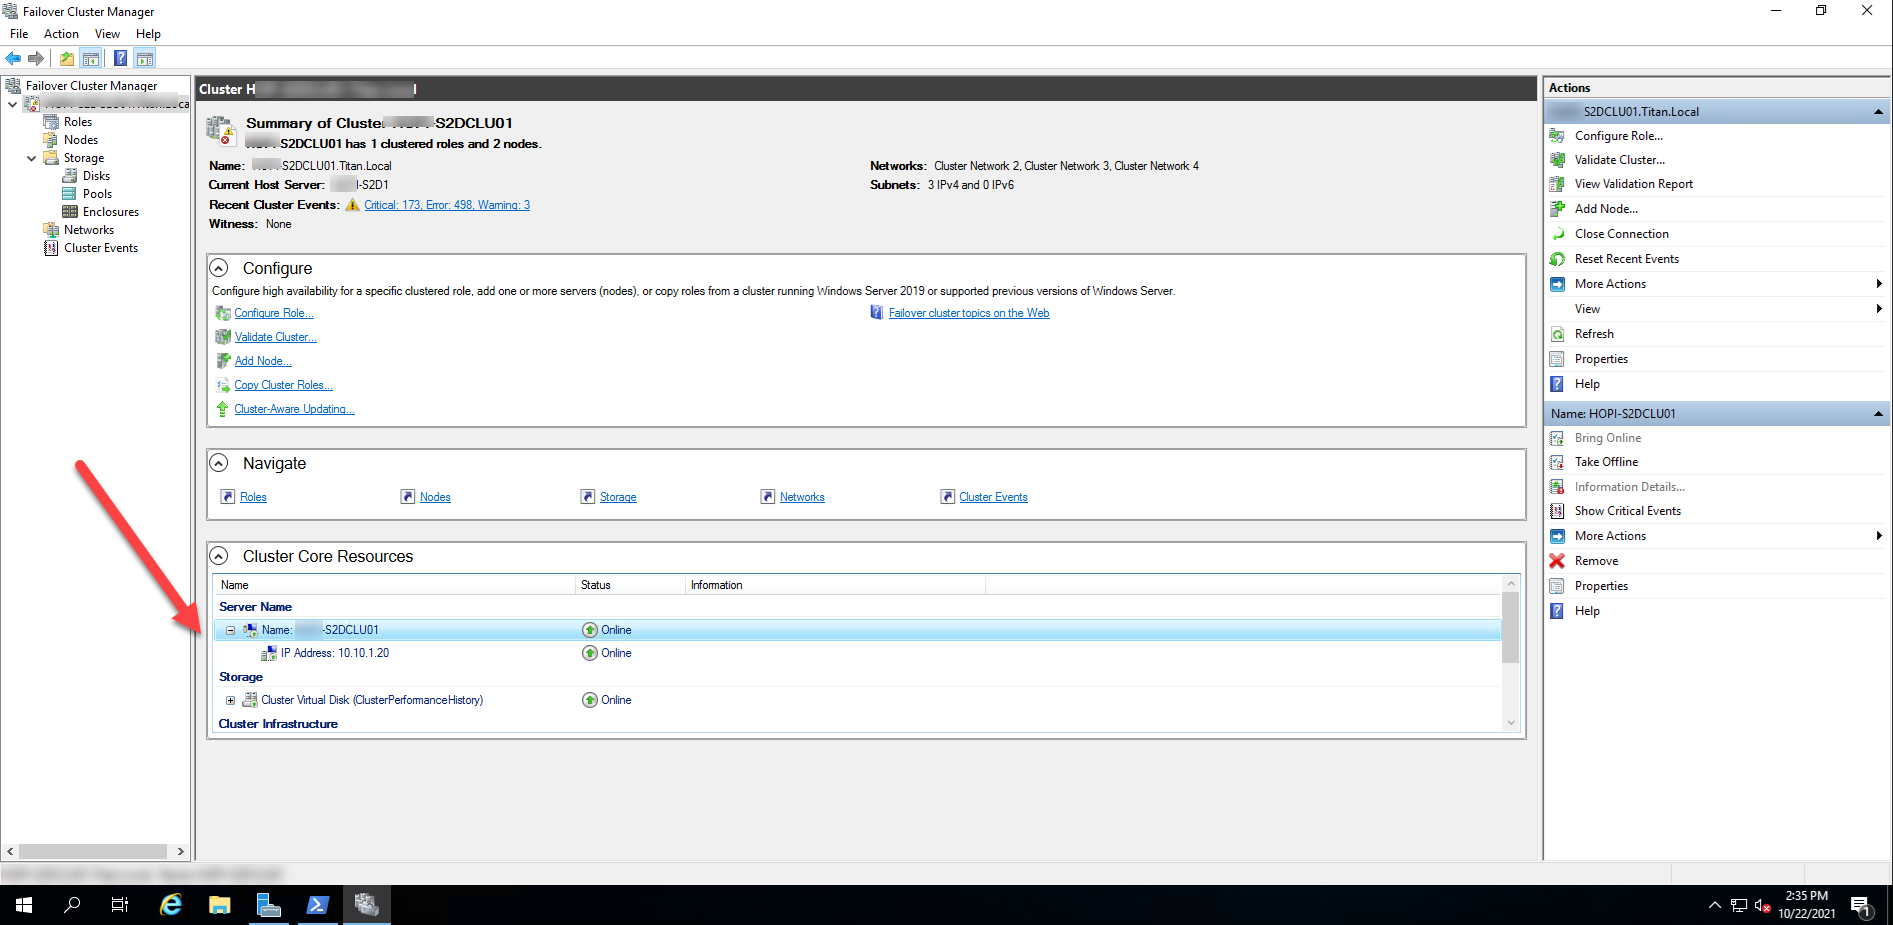
8.Verify Cluster Core Resource of Failover Cluster Manager, make sure the File Share Witness was be removed.
9.Sign in to the first server with a domain user or administrator account that has Active Directory permissions to the Cluster Name Object (CNO), Virtual Computer Objects (VCO), has access to the Cluster.
10.Open Failover Cluster Manager console, select all CSVs, right-click , select Take offline.
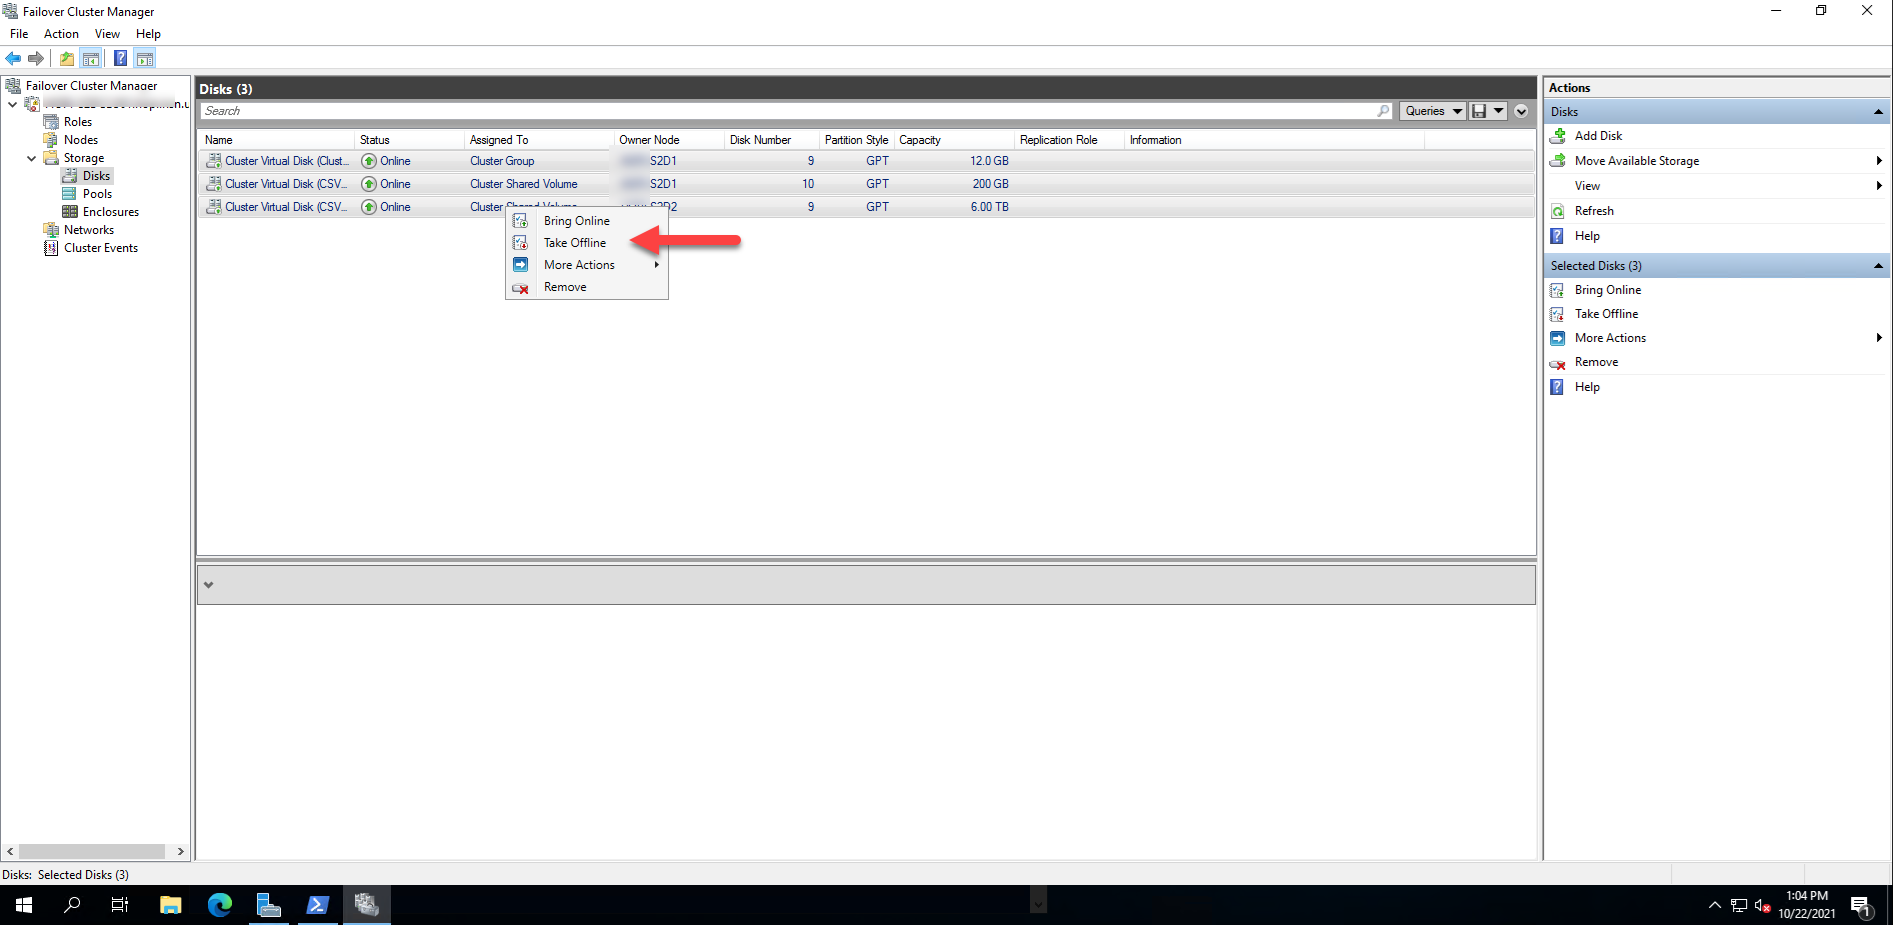
11.Ensure all CSV offline.
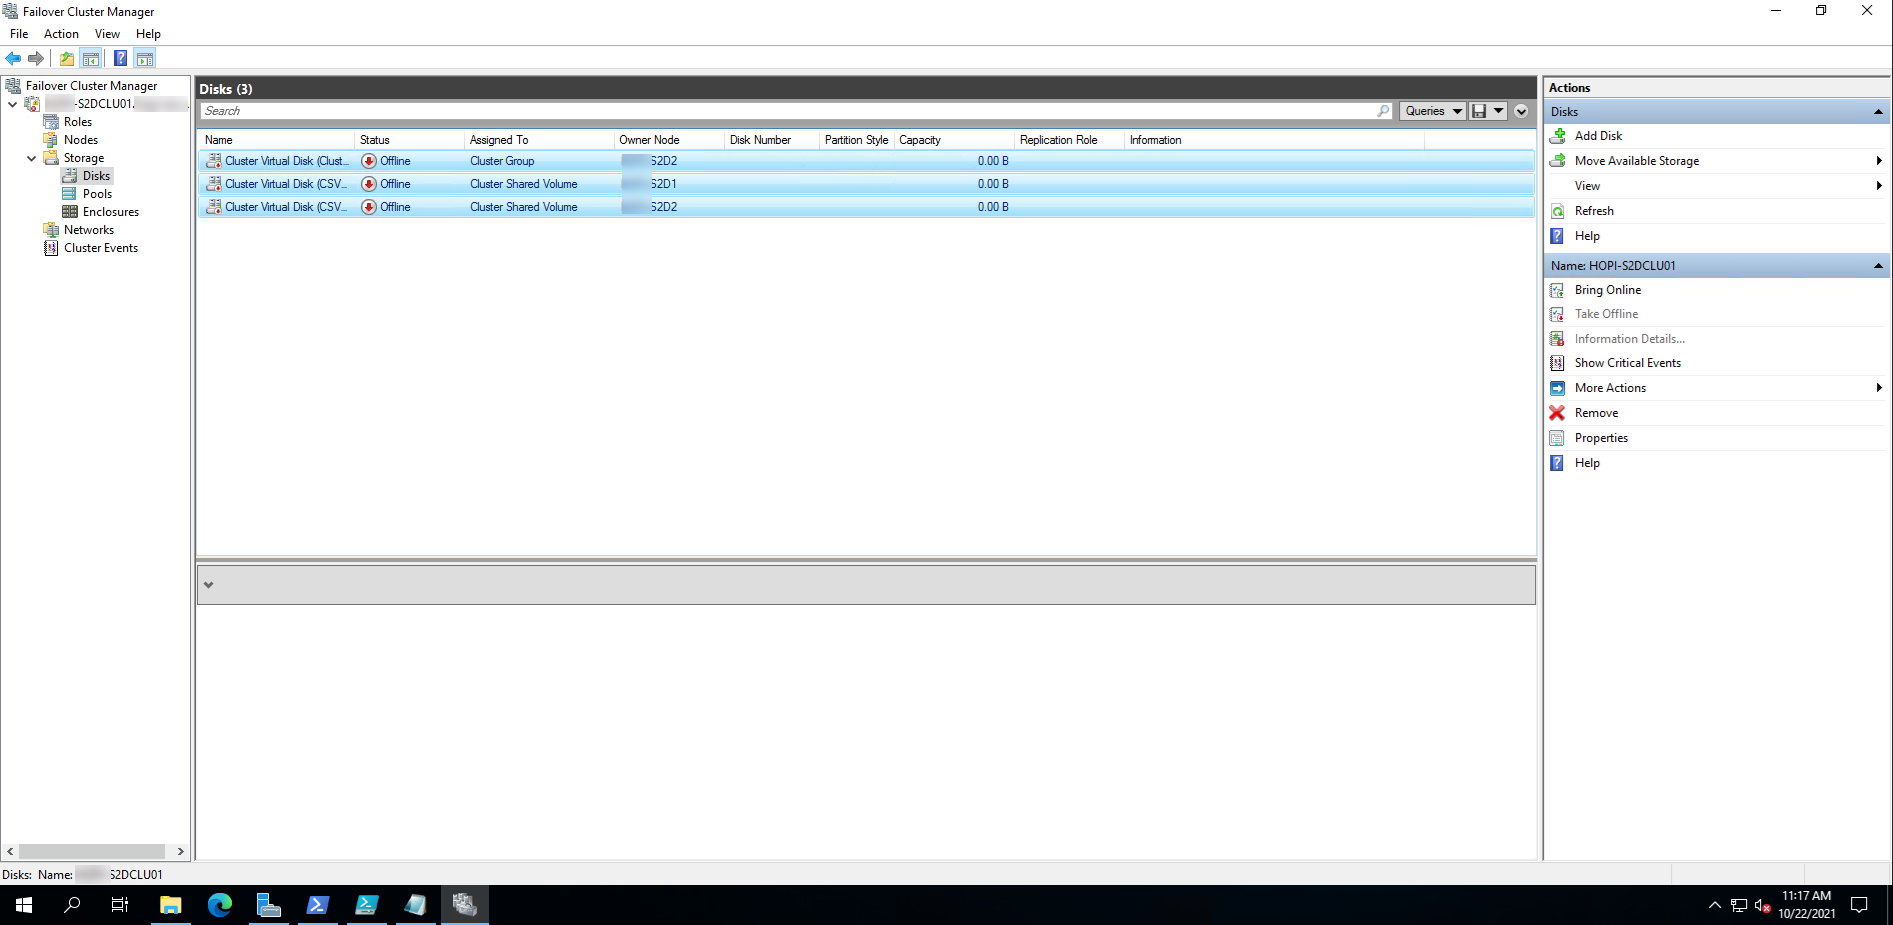
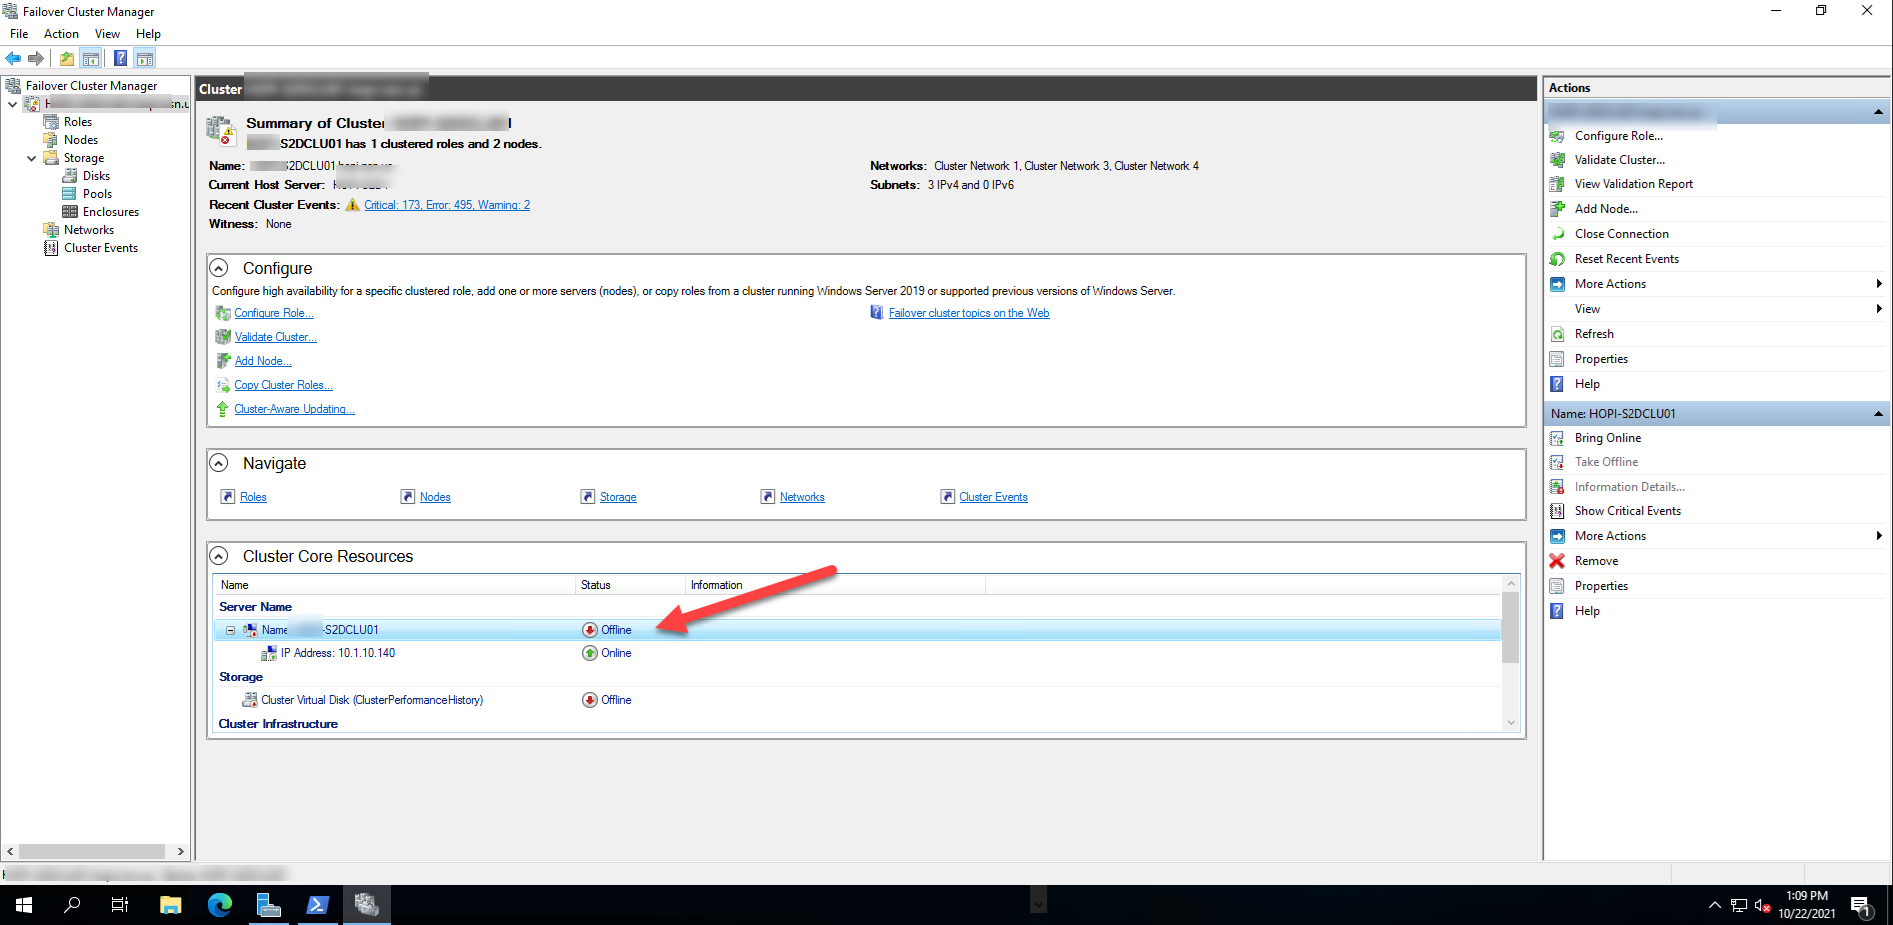
12.Ensure all Cluster Network Name resources are in an Offline state.
13.Run following PowerShell cmdlet, this command will remove the Active Directory objects that the cluster may have.
Remove-ClusterNameAccount -Cluster HOPI-S2DCLU01 -DeleteComputerObjects

14.Login to DC, use Active Directory Users and Computers to ensure the CNO and VCO computer objects associated with all clustered names have been removed.
15.Run following PowerShell Cmdlet on all servers in the cluster to stop the Cluster service and set the service startup type to Manual.
Stop-Service -Name ClusSvc

Set-Service -Name ClusSvc -StartupType Manual

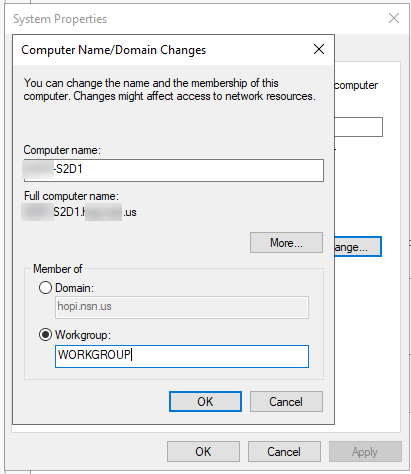
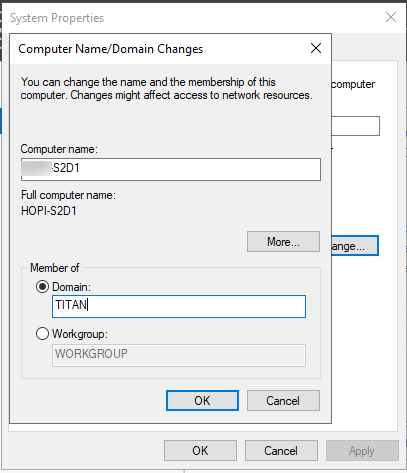
16.Change all servers from domain membership to a workgroup, restart all servers.
17. Join the servers to the new domain, , restart all servers.
18.Once the servers are in the new domain, sign in to a server with a domain user or administrator account that has Active Directory permissions to create objects, has access to the Cluster, and open PowerShell. Start the Cluster Service, and set it back to Automatic.
Start-Service -Name ClusSvc

Set-Service -Name ClusSvc -StartupType Automatic

19.Bring the Cluster Name and all other cluster Network Name resources to an Online state.
Start-ClusterResource -Name "Cluster Name"

20.Change the cluster to be a part of the new domain with associated active directory objects. To do this, the command is below and the network name resources must be in an online state. What this command will do is recreate the name objects in Active Directory.
Stop-ClusterResource -Name “Cluster Name”
New-ClusterNameAccount -Name S2DCLU01 -Domain titan.local -UpgradeVCOs
21.Use Active Directory Users and Computers to check the new domain and ensure the associated computer objects were created. If they have, then bring the remaining resources in the groups online.
Start-ClusterGroup -Name "Cluster Group"
Hope you enjoy this post.
Cary Sun
Twitter: @SifuSun
Web Site: carysun.com
Blog Site: checkyourlogs.net
Blog Site: gooddealmart.com