
If you would like to upgrade Citrix Virtual Apps server from Citrix Virtual Apps 7 1912 LTSR version to the newer version, it might happen error messages “We cannot determine which SQL Server version is current installed” and “The SQL Server LocalDB version is lower than the minimum supported version”.
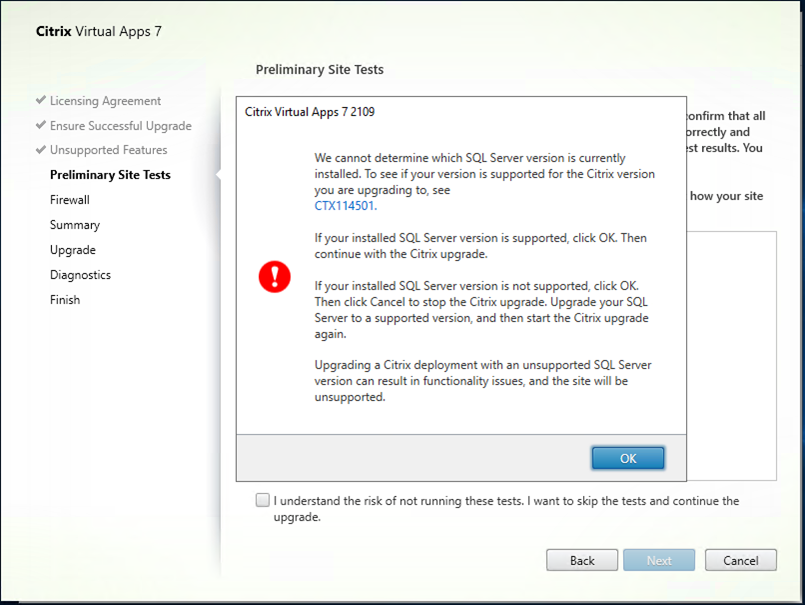
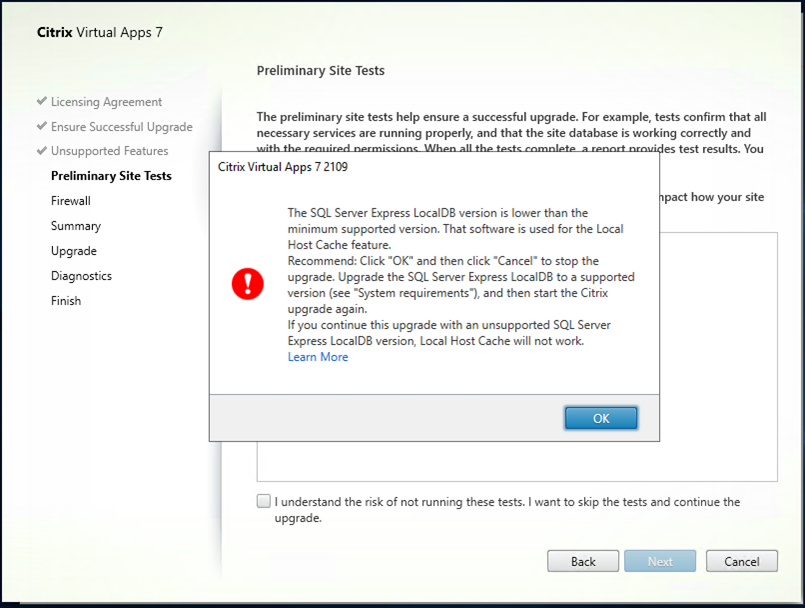
This is because the server was upgrade from XenApp to Virtual Apps, the SQL Server Express version is 2014.
As we know, the SQL Express 2014 is not longer support after Virtual Apps 7 1912 LTSR version.
Today, I am going to show you how to replace SQL Server Express LocalDB to the newest version.
1.Login to Virtual Apps delivery Controller server.
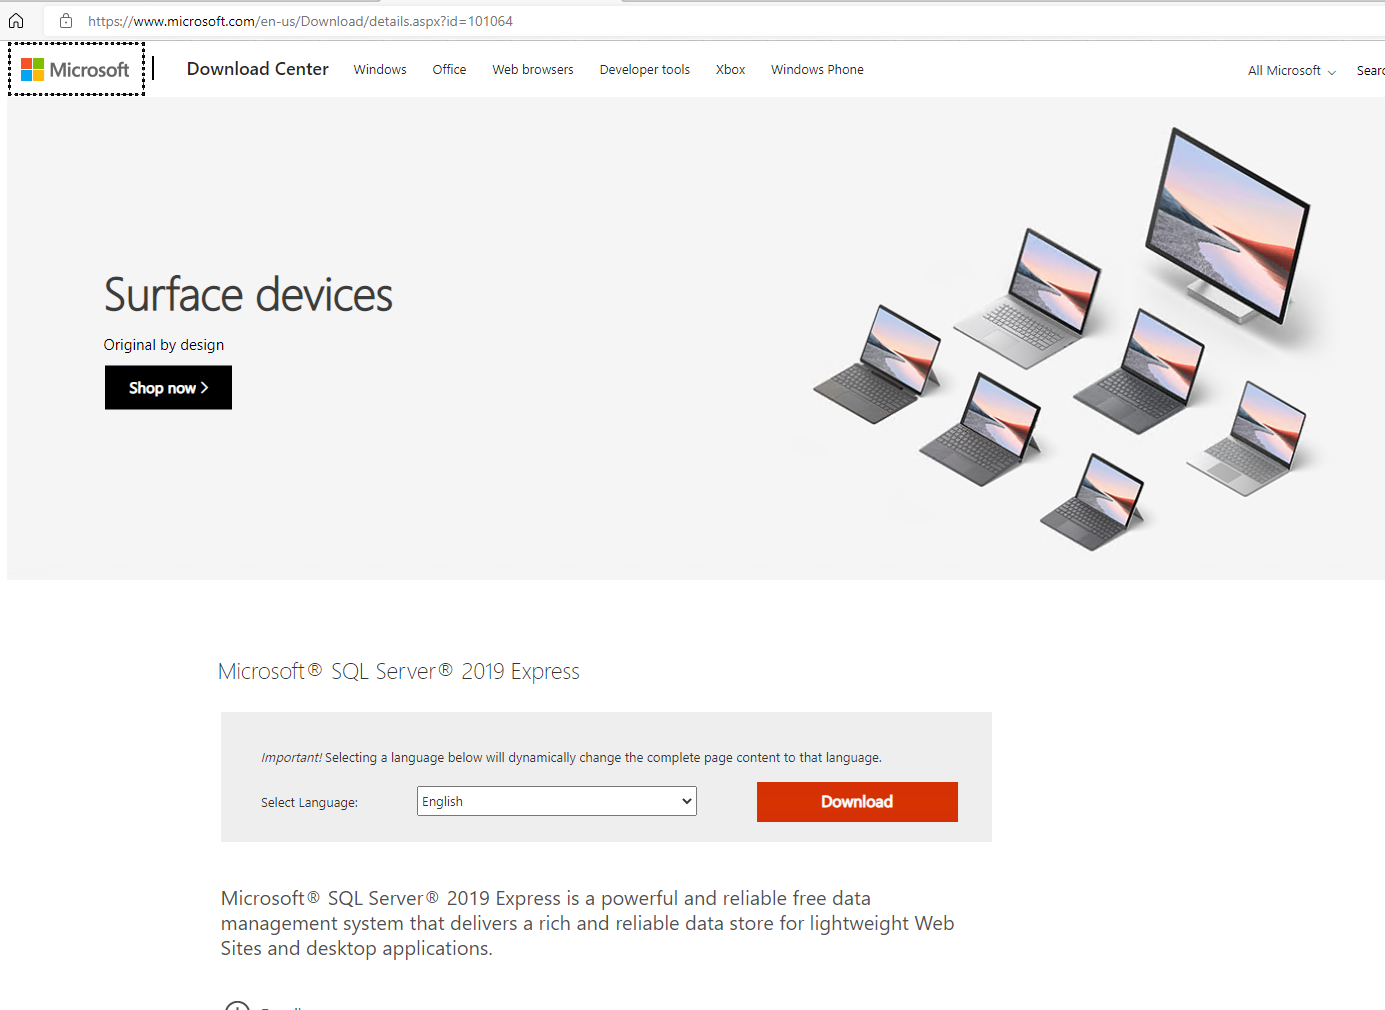
2.Download Microsoft SQL Server 2019 Express via below link.
https://www.microsoft.com/en-us/download/details.aspx?id=101064
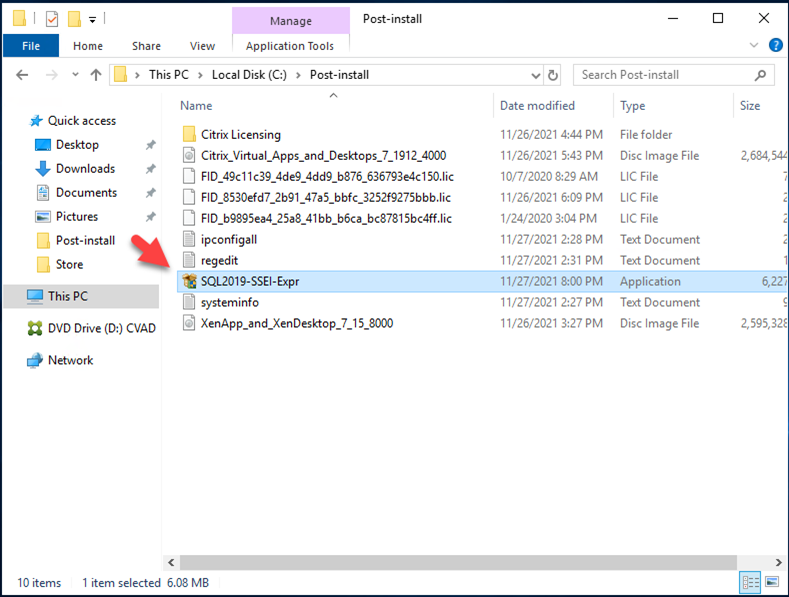
3.Run SQL2019-SSEI-Expr.exe file.
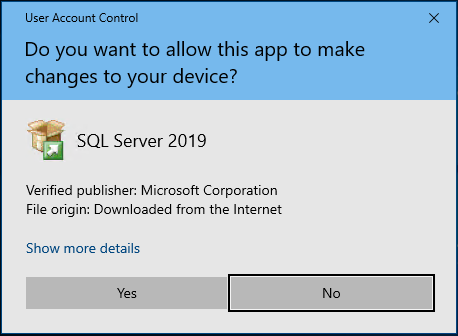
4.On the User Account Control page, click Yes.
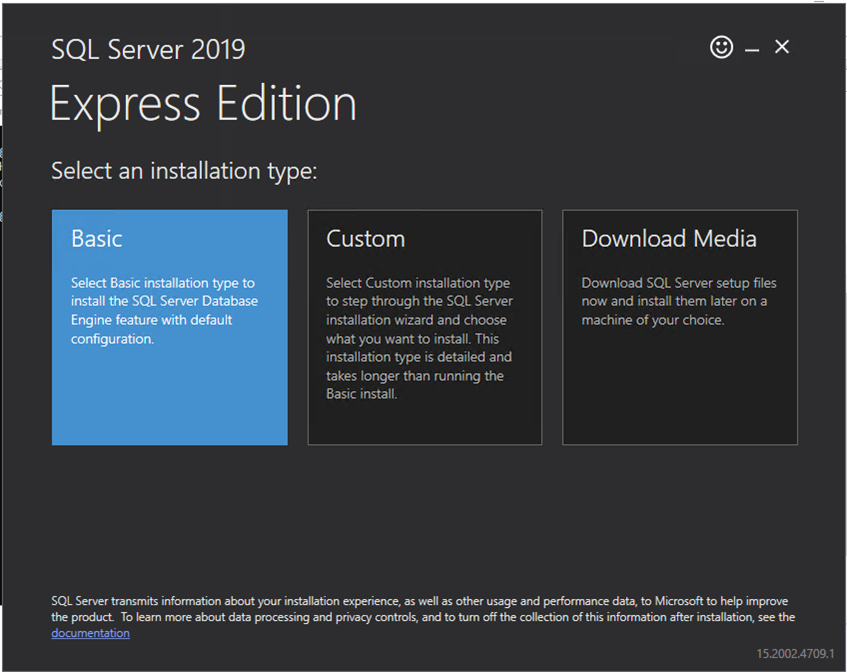
5.On the Select an installation type page, click Basic.
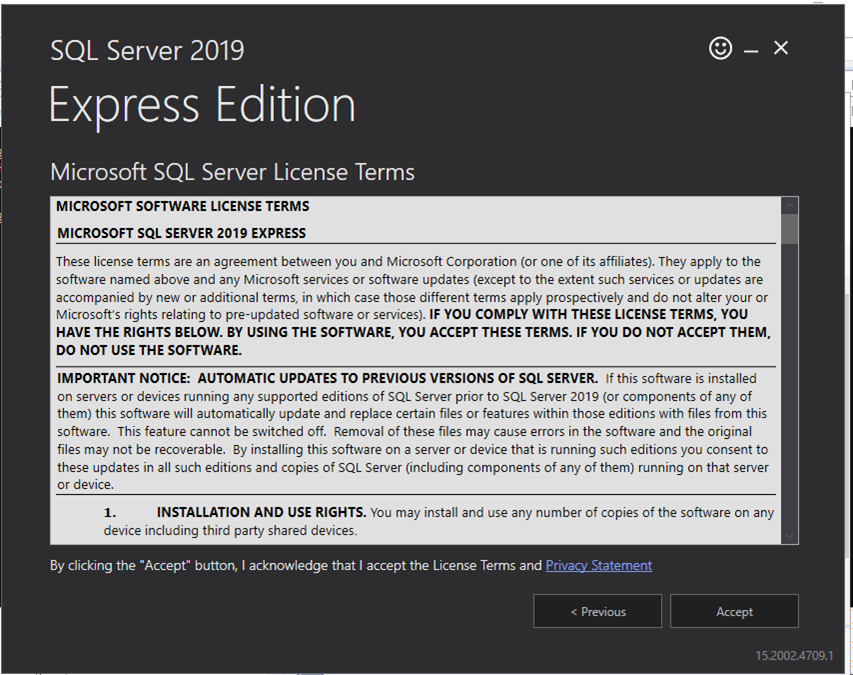
6.On the Microsoft SQL Server License Terms page, click Accept.
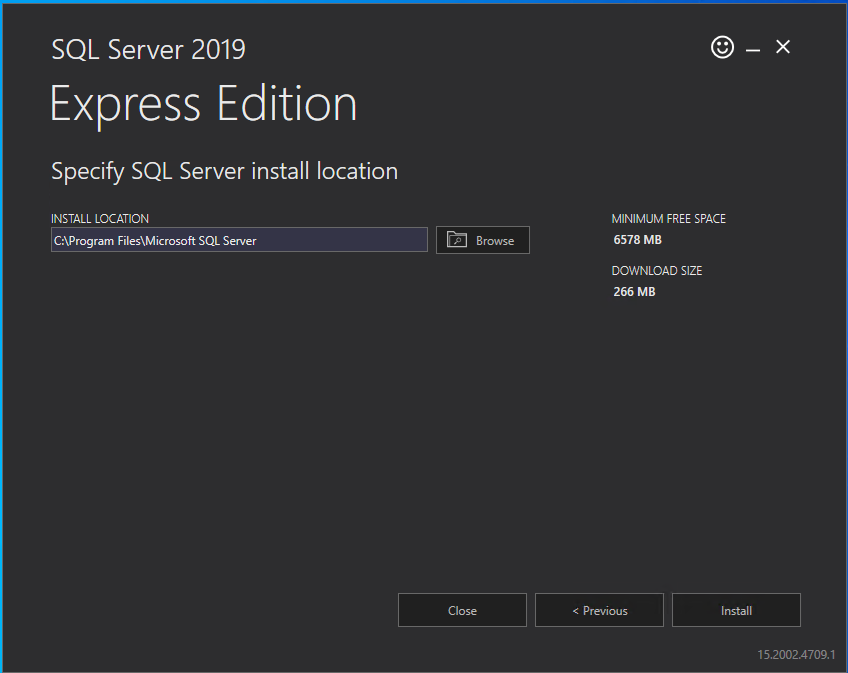
7.On the Specify SQL Server install location page, click Install.
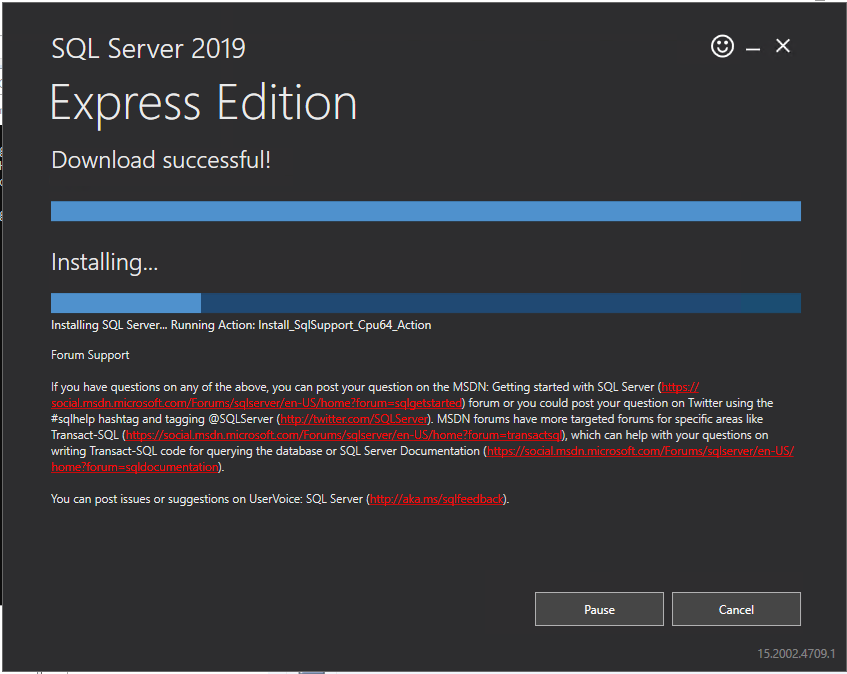
8.It might take few minutes to completed download and installation.
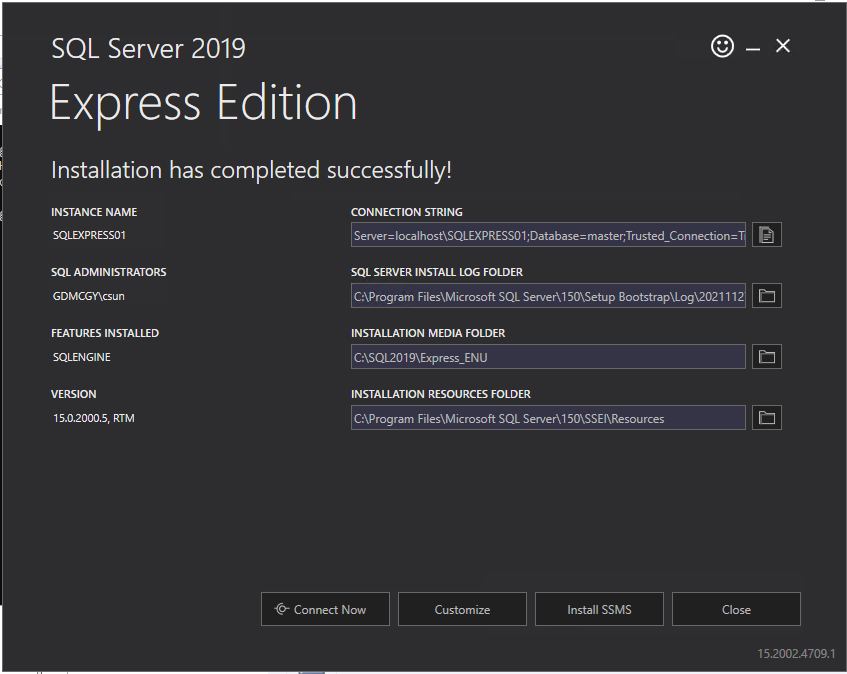
9.On the Installation has completed successfully page, take note for instance name and all information, click Install SSMS.

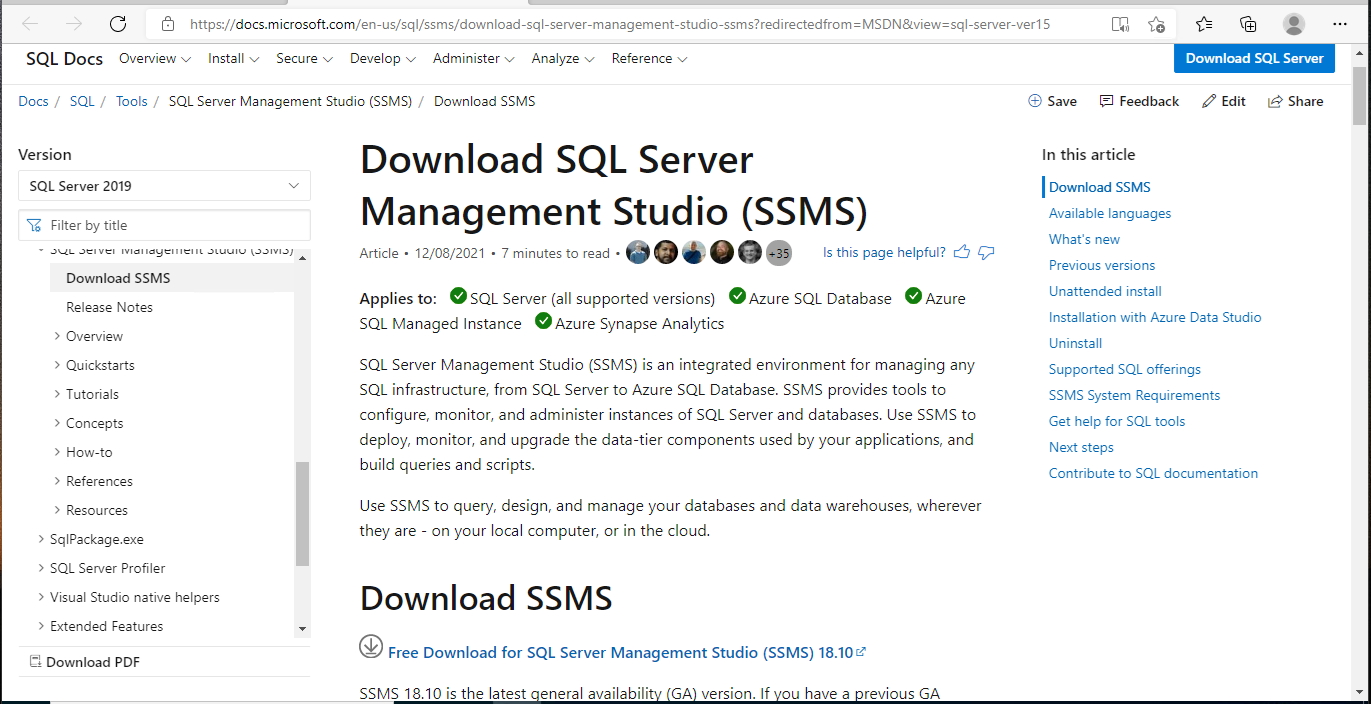
10.On the Download SQL Server Management Studio (SSMS) page, click Free Download for the SQL Server Management Studio (SSMS) 18.10.
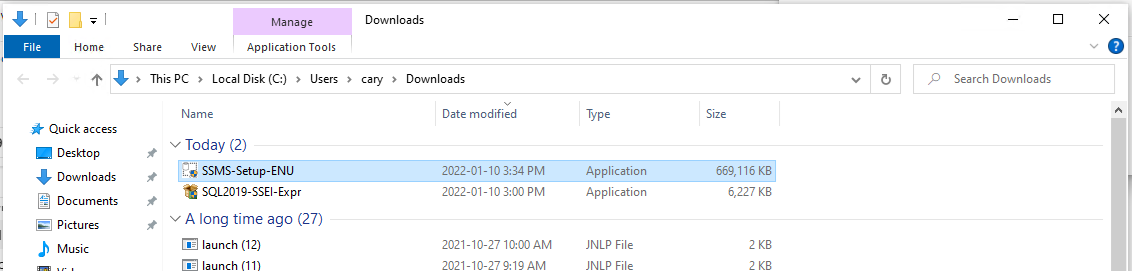
11.Run SSMS-Setup-ENU.exe.
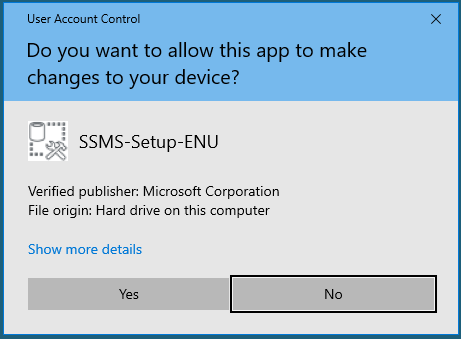
12.On the User Account Control page, click Yes.
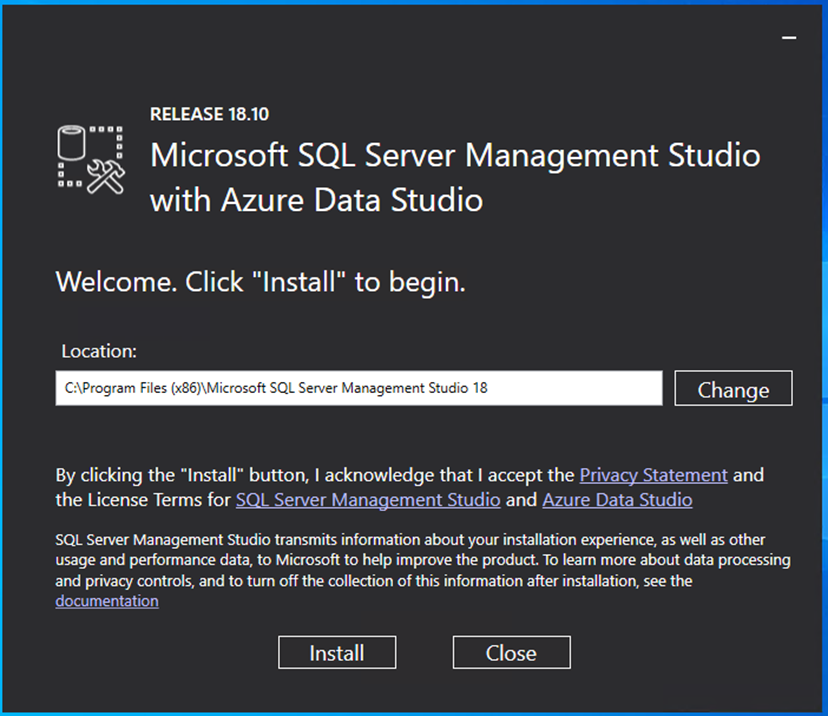
13.On the Welcome page, click Install.
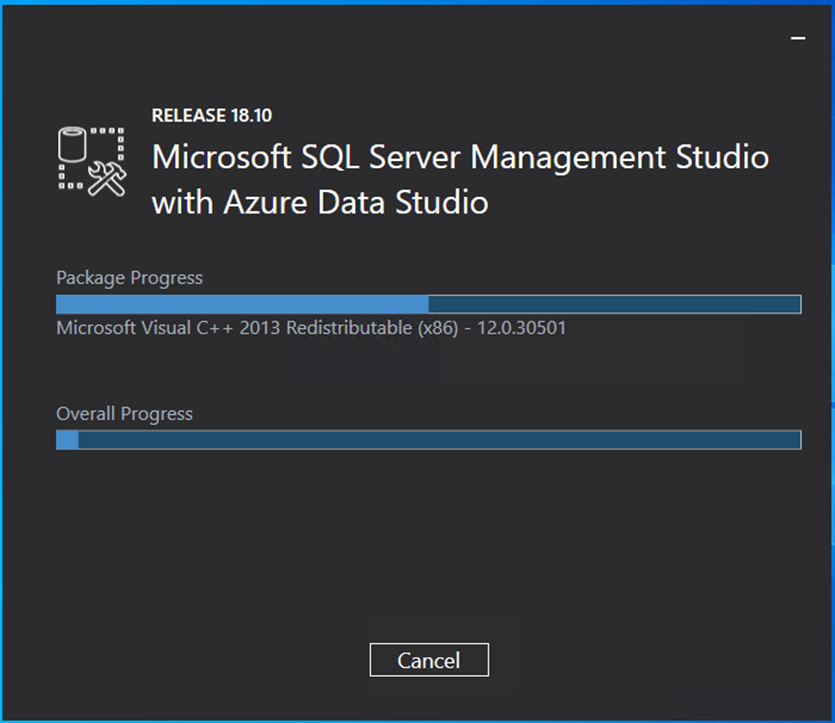
14. It might take few minutes to completed download and installation.
15.On the Setup Completed page, click Close.

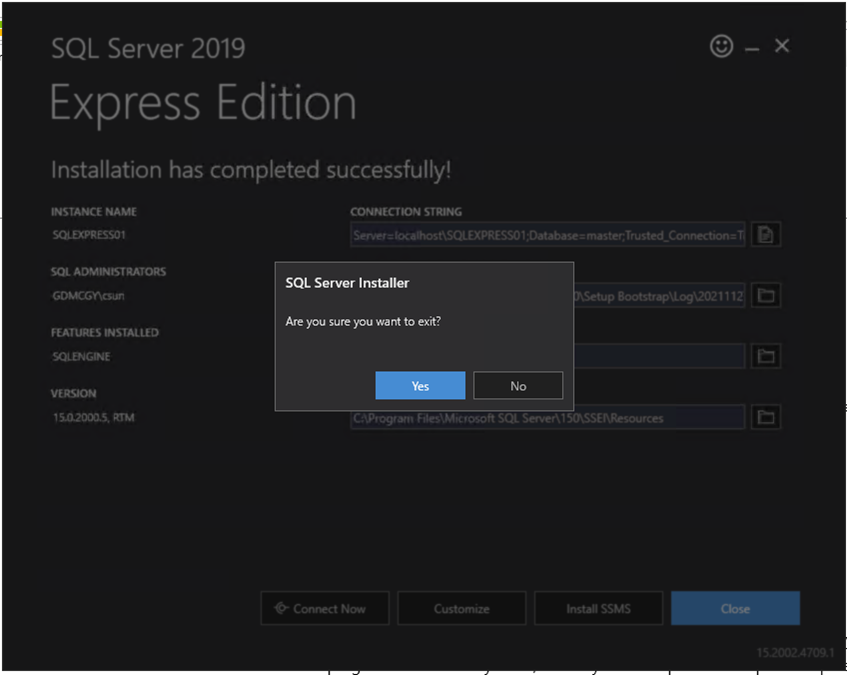
16.On the Installation has completed successfully page, click Close.
17.On the exit confirm page, click Yes.
18.Login to Citrix Virtual Apps Delivery Controller server as local administrator.
19.Stop Citrix services.
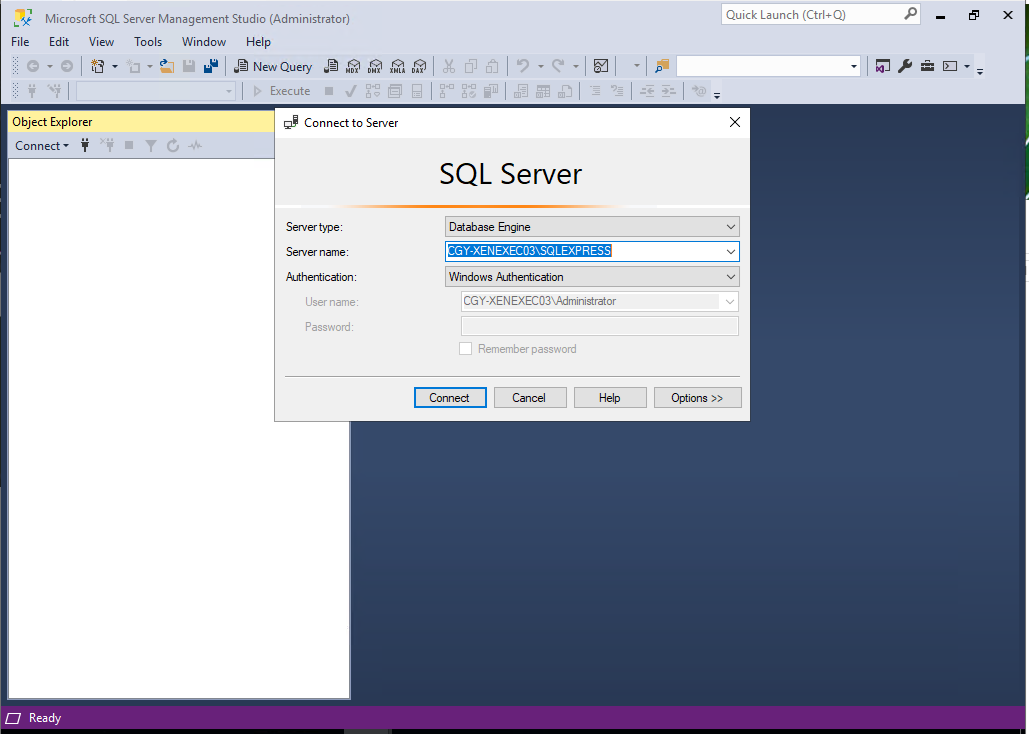
20.Open SSMS, Select the old instance name as Server name click Connect. In my case, it’s CGY-XENEXEC03\SQLEXPRESS.
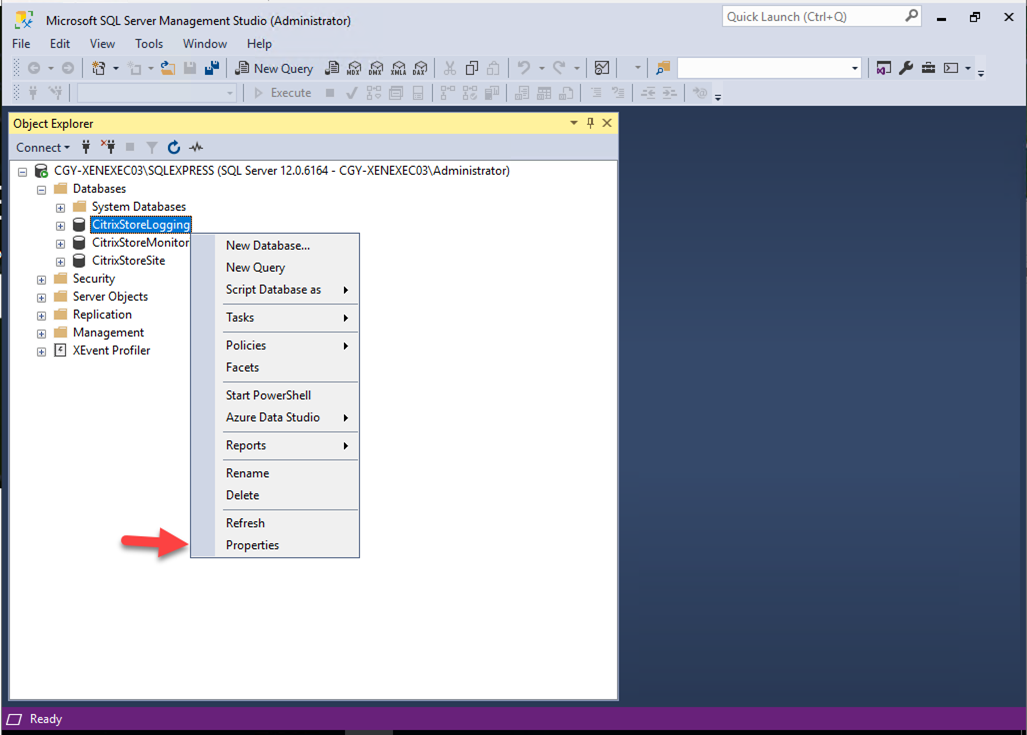
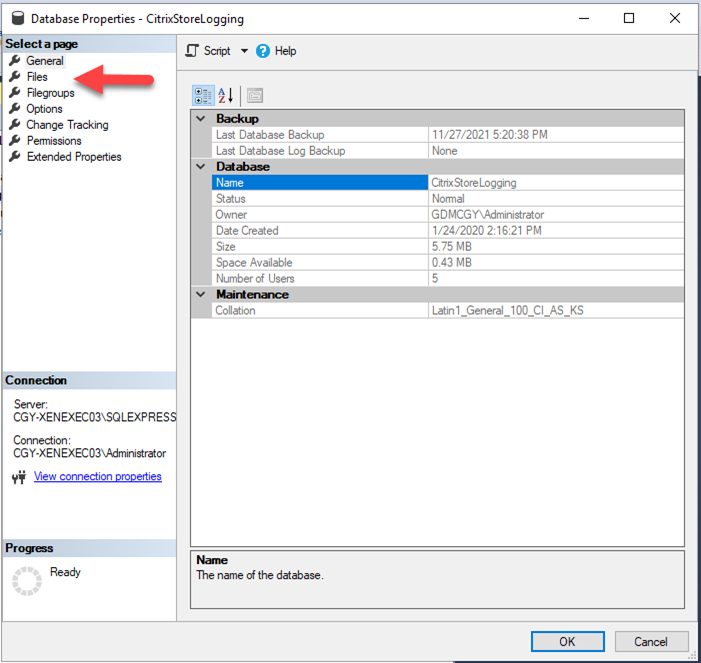
21.On the Object Explorer page, expand the instance, expand Databases, right-click CitrixStoreLogging, select Properties.
22.On the Database Properties – CitrixStoreLogging page, select Files.
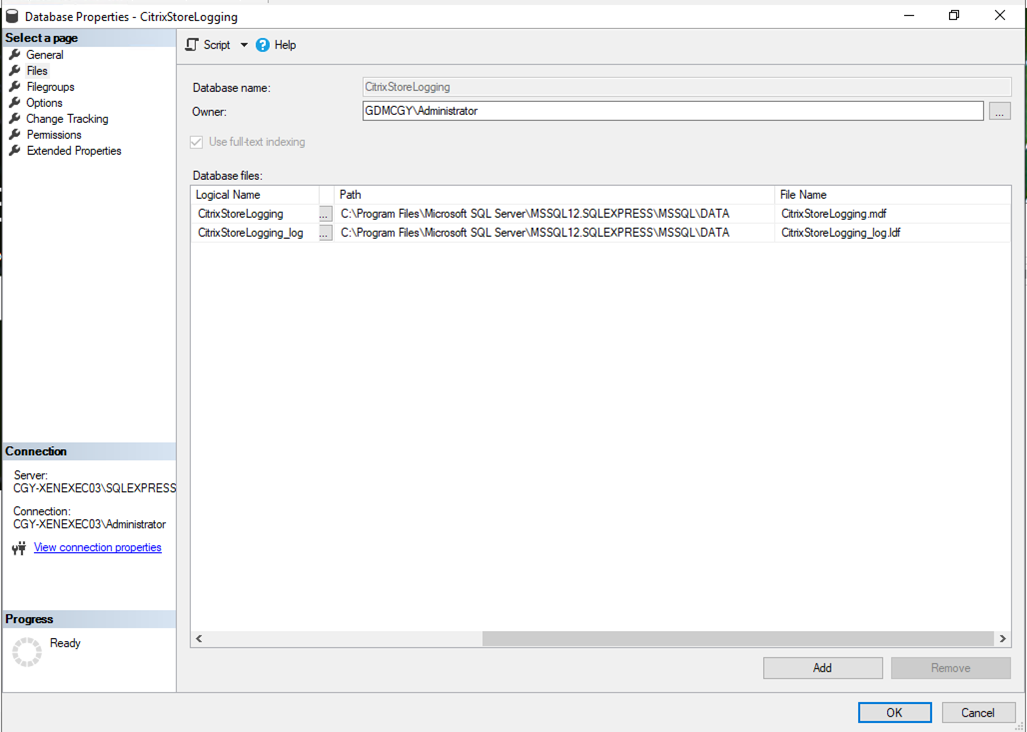
23.On the Files page, take note for the path and file name of Database files.

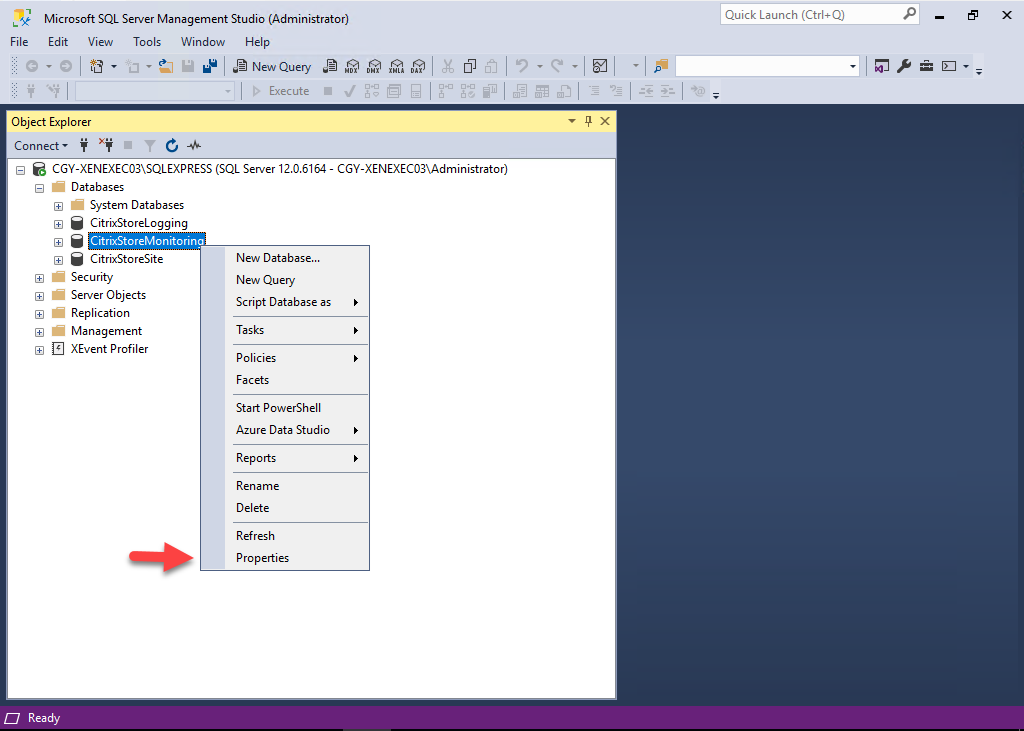
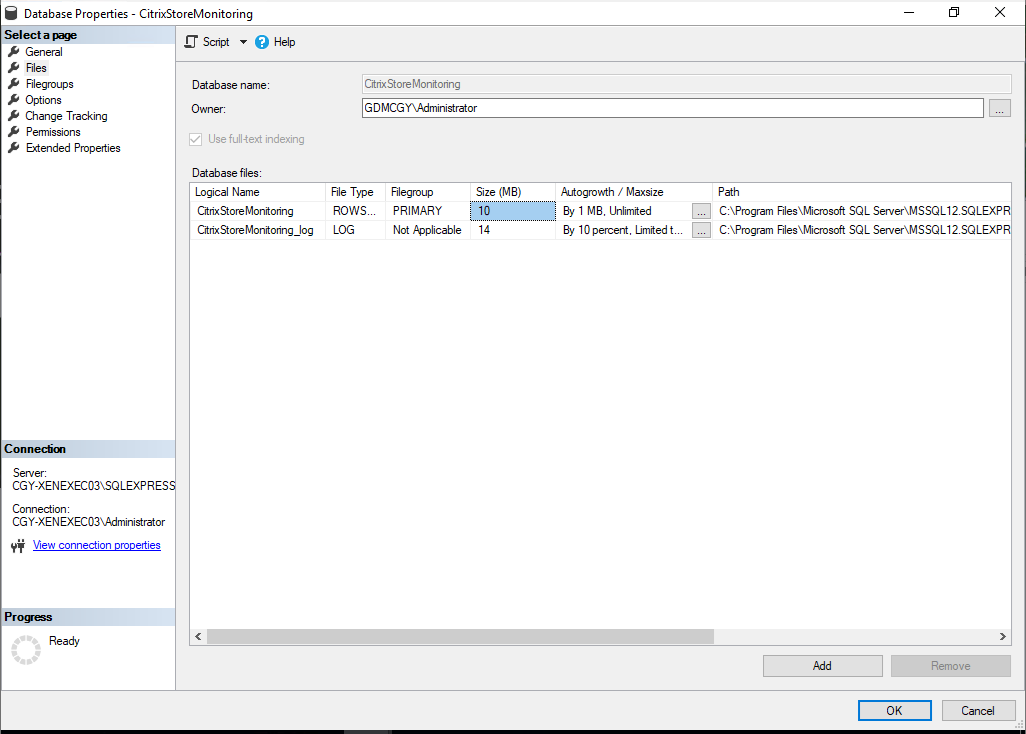
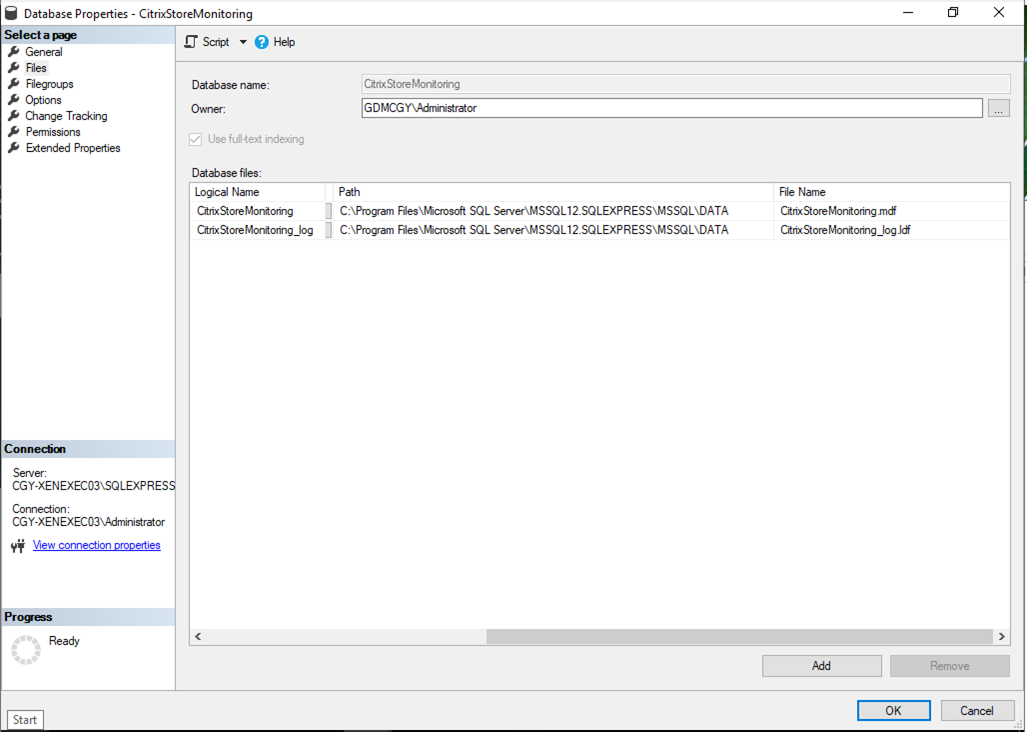
24. On the Object Explorer page, expand the instance, expand Databases, right-click CitrixStoreMonitoring, select Properties.
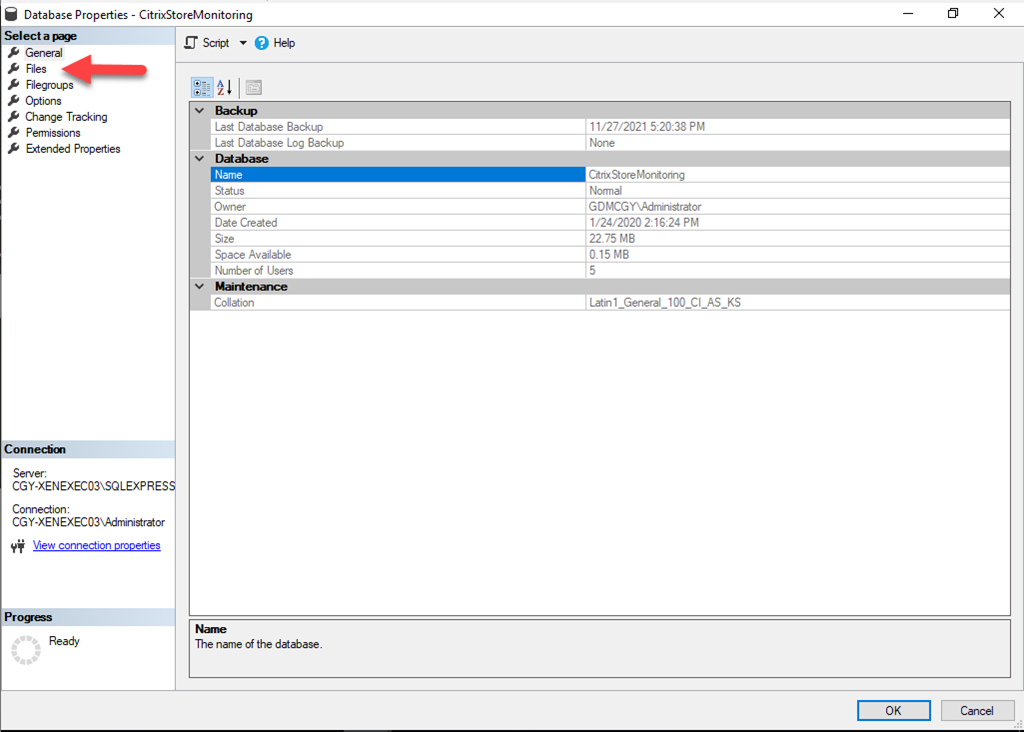
25.On the Database Properties – CitrixStoreMonitoring page, select Files.
26. On the Files page, take note for the path and file name of Database files.
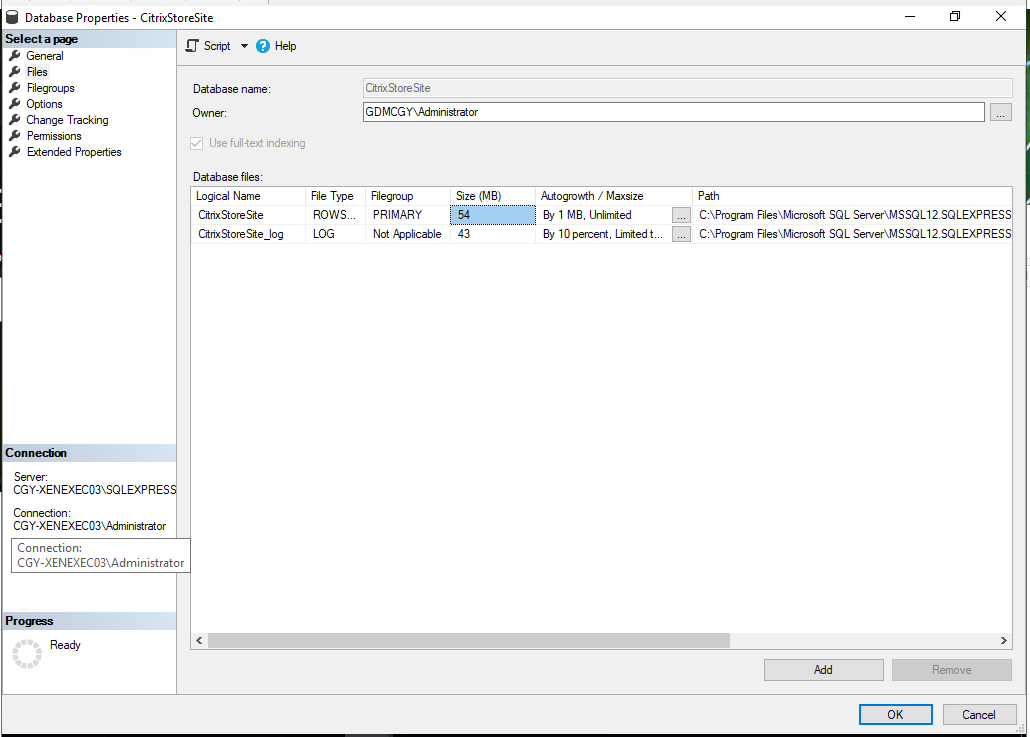
27. On the Object Explorer page, expand the instance, expand Databases, right-click CitrixStoreSite, select Properties.
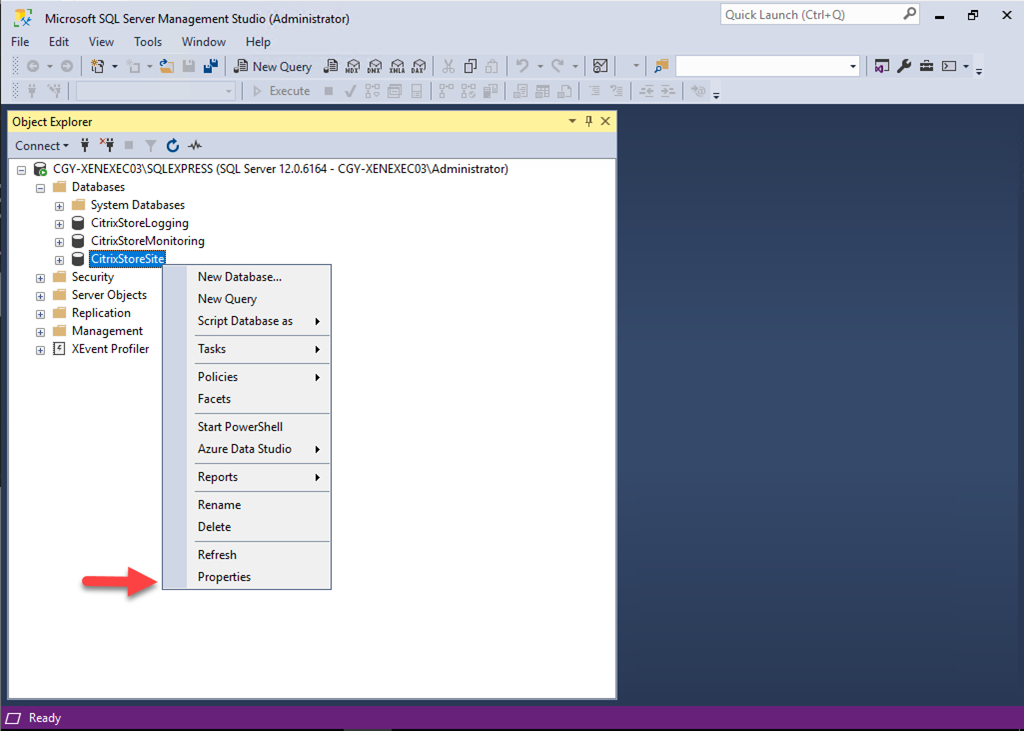
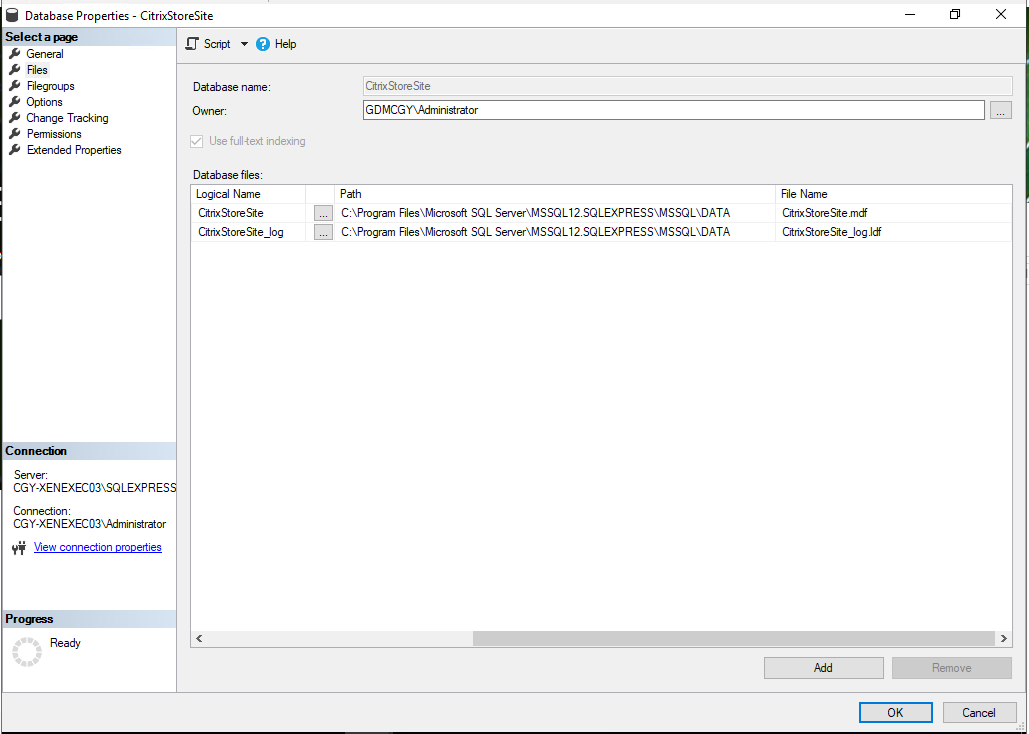
28. On the Database Properties – CitrixStoreSite page, select Files.
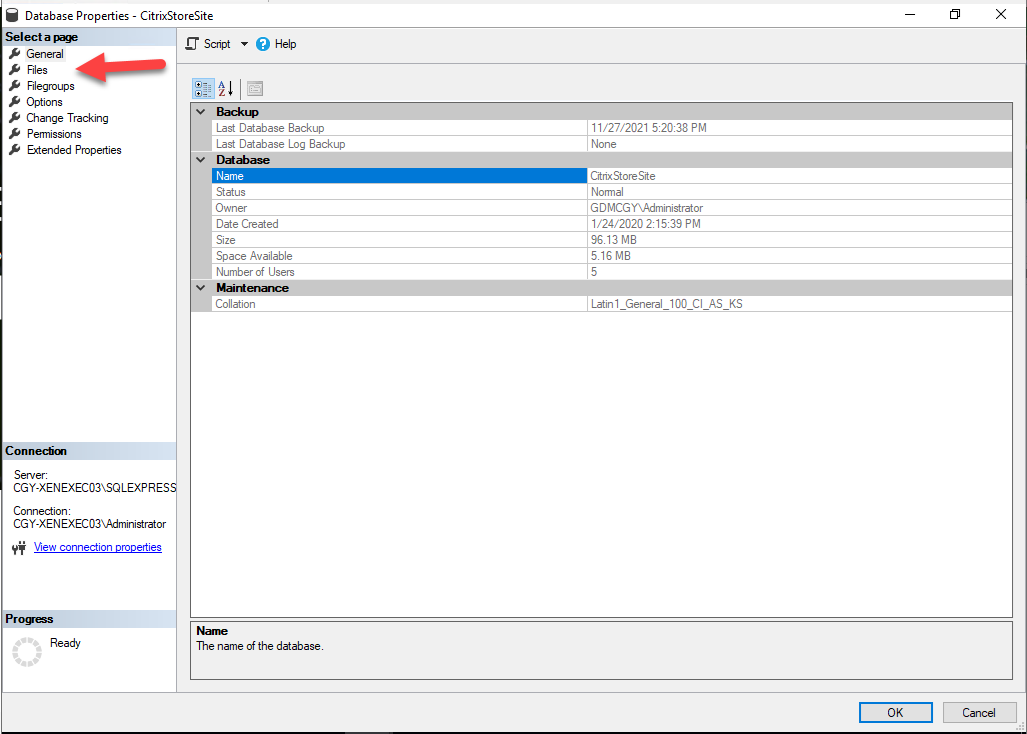
29. On the Files page, take note for the path and file name of Database files.
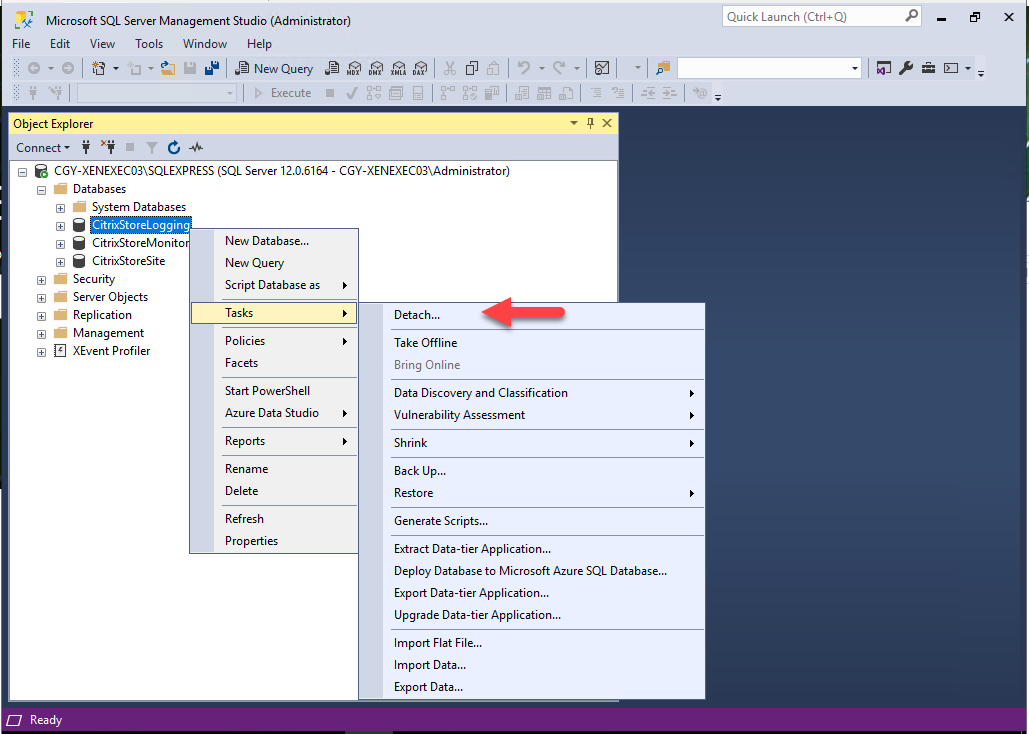
31.On the Object Explorer page, expand the instance, expand Databases, right-click CitrixStoreLogging, select Detach.
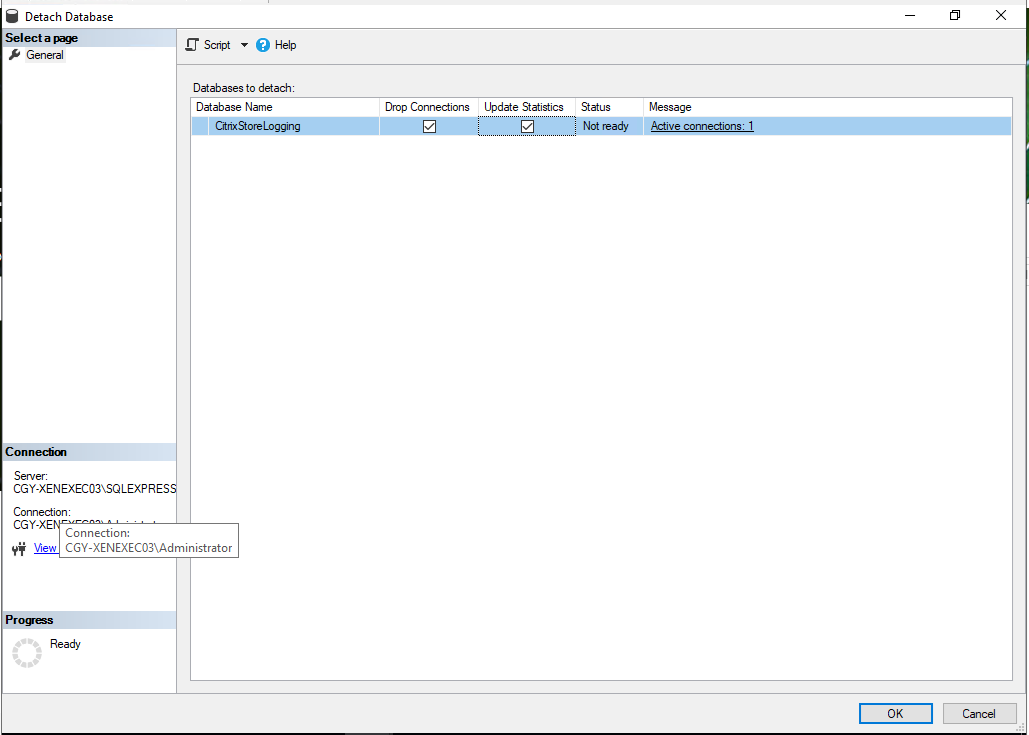
32.On the Database to detach page, select Drop Connections, select Update Statistics, click OK.
33. On the Object Explorer page, expand the instance, expand Databases, right-click CitrixStoreMonitoring, select Detach.
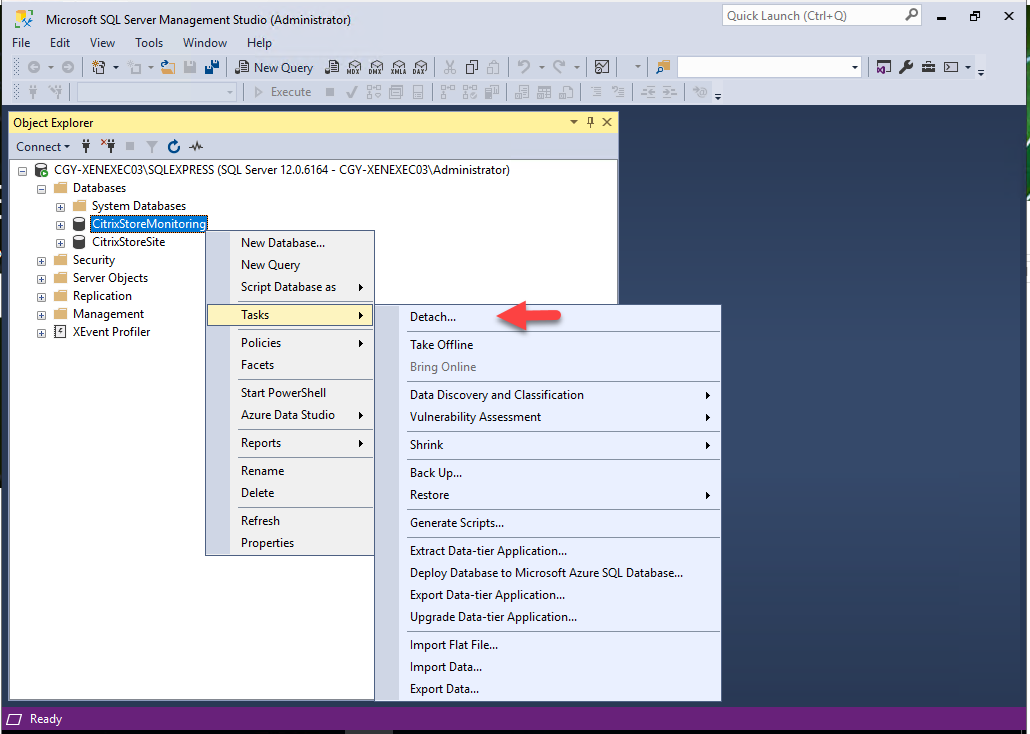
34. On the Database to detach page, select Drop Connections, select Update Statistics, click OK.

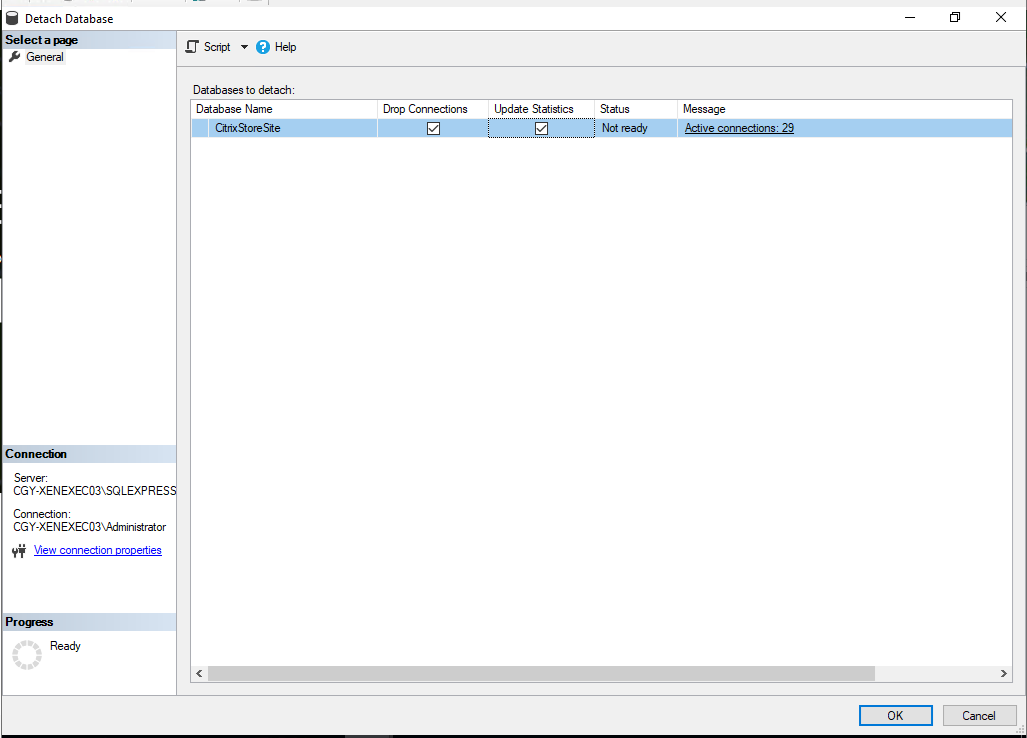
35. On the Object Explorer page, expand the instance, expand Databases, right-click CitrixStoreSite, select Detach.
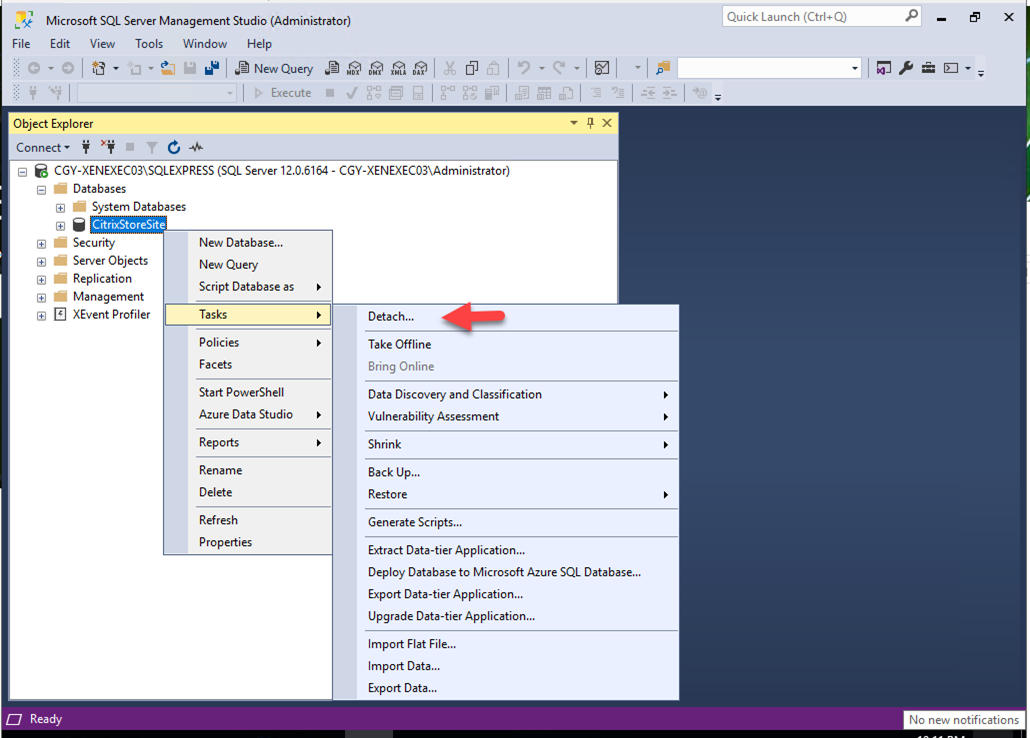
36. On the Database to detach page, select Drop Connections, select Update Statistics, click OK.
37.Close SSMS.
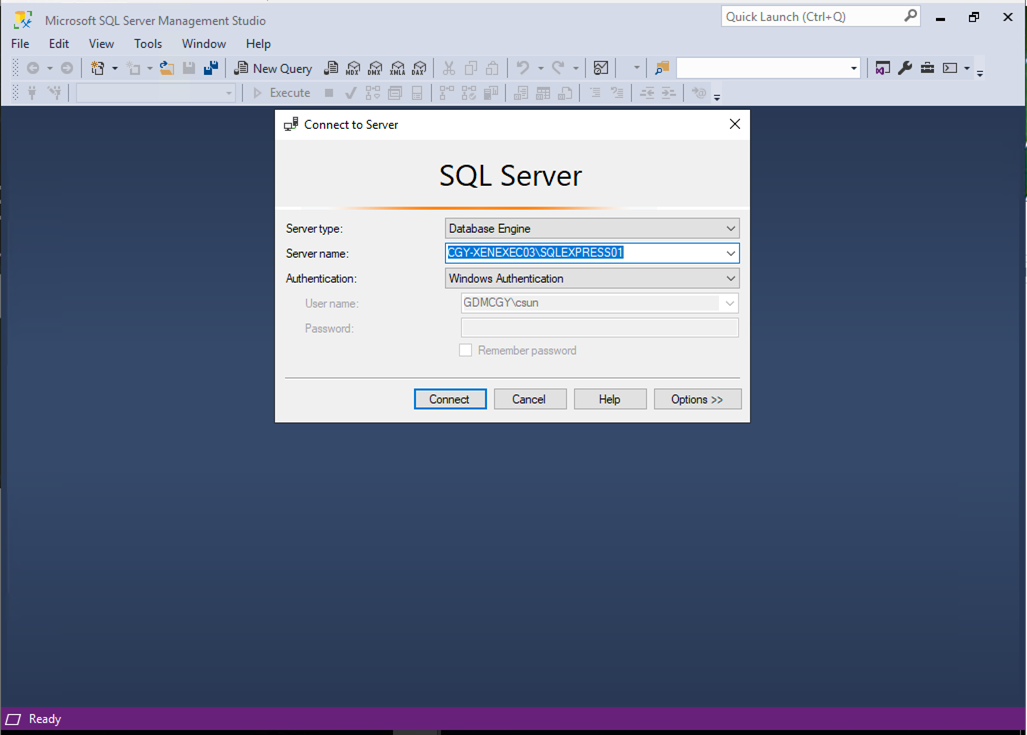
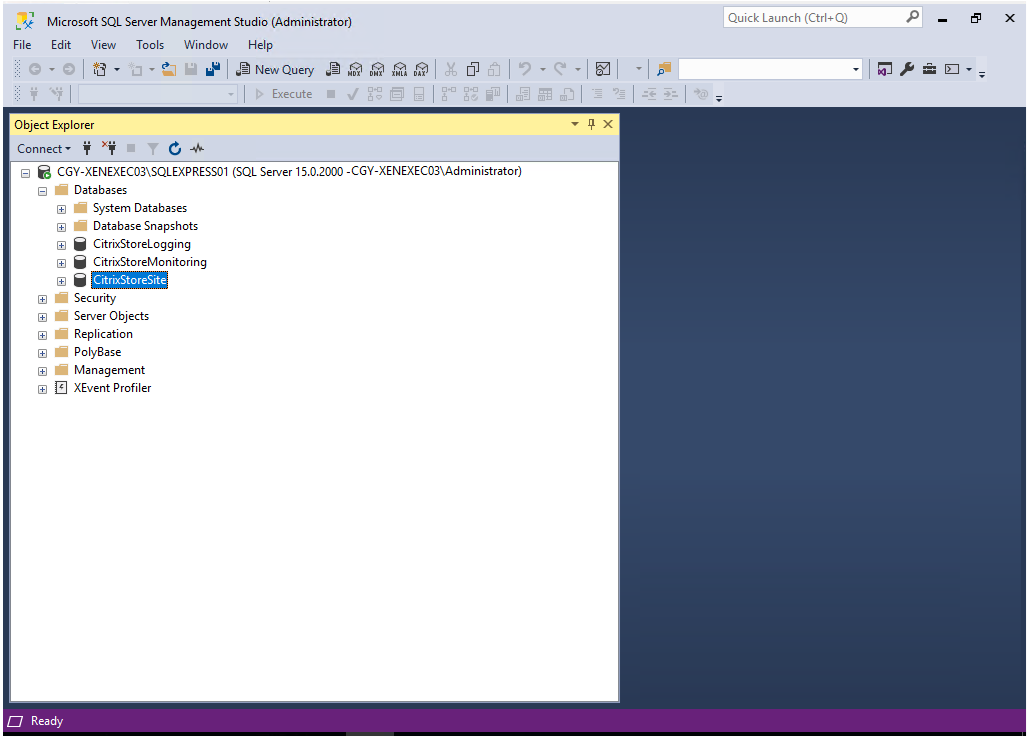
38.Re-open SSMS, select the new instance name as Server name click Connect. In my case, it’s CGY-XENEXEC03\SQLEXPRESS01.
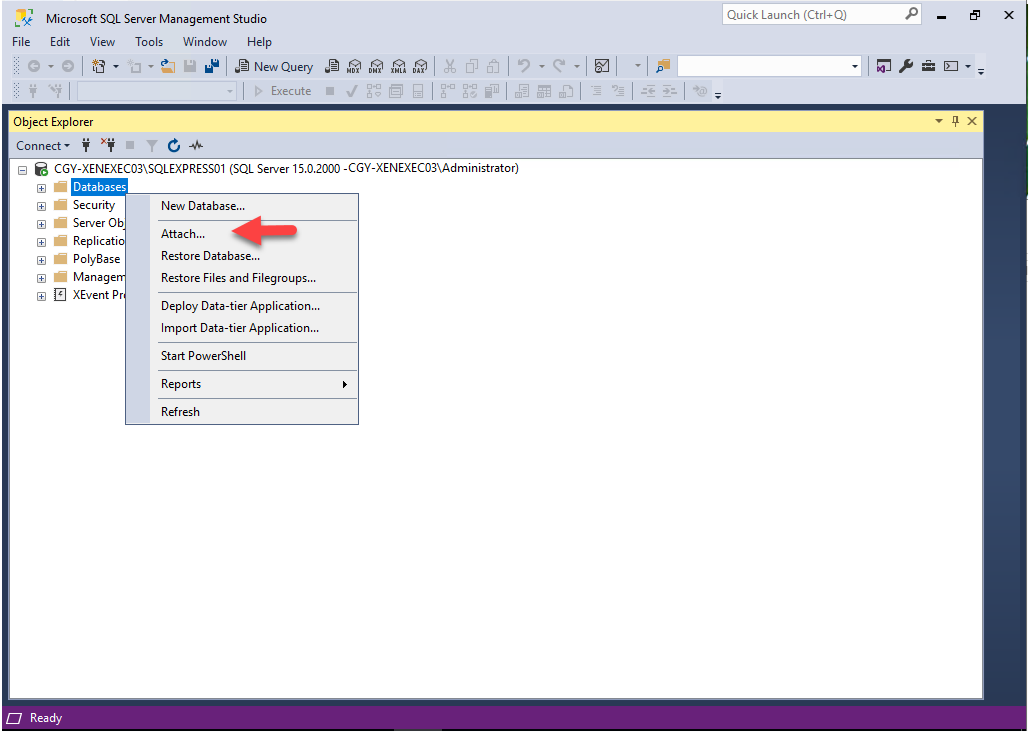
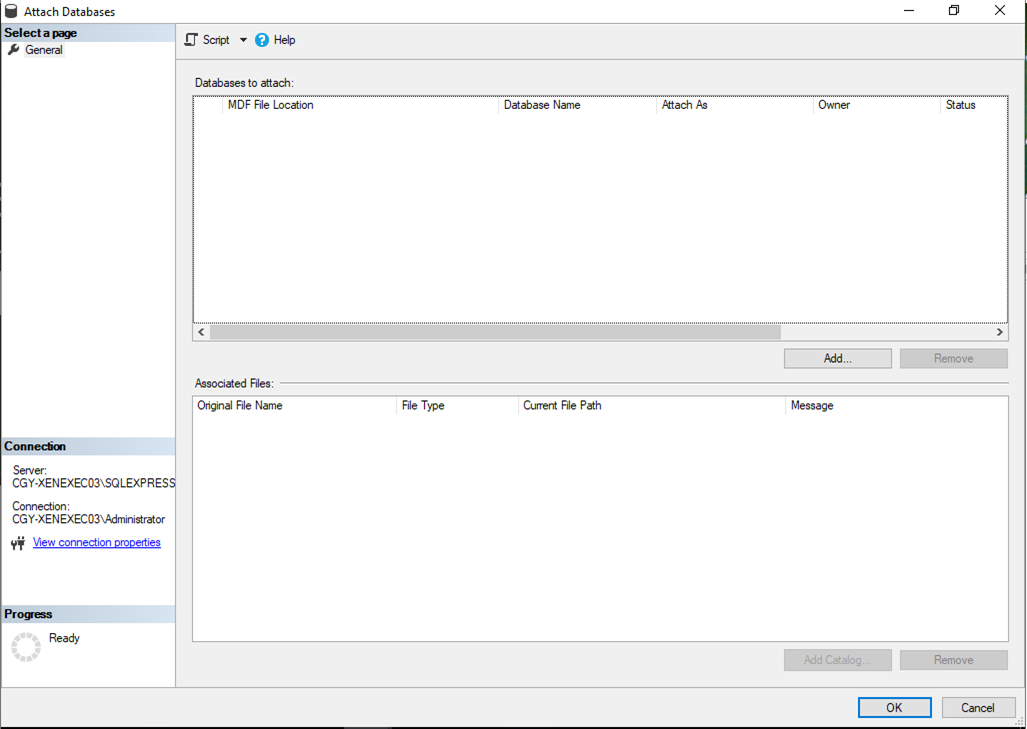
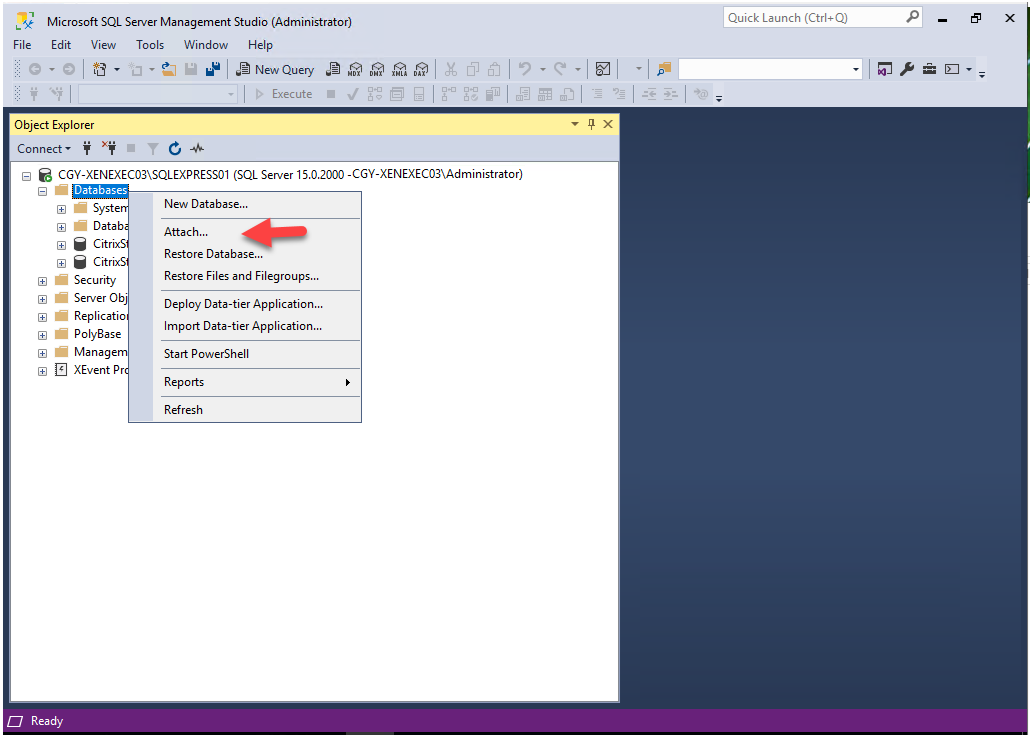
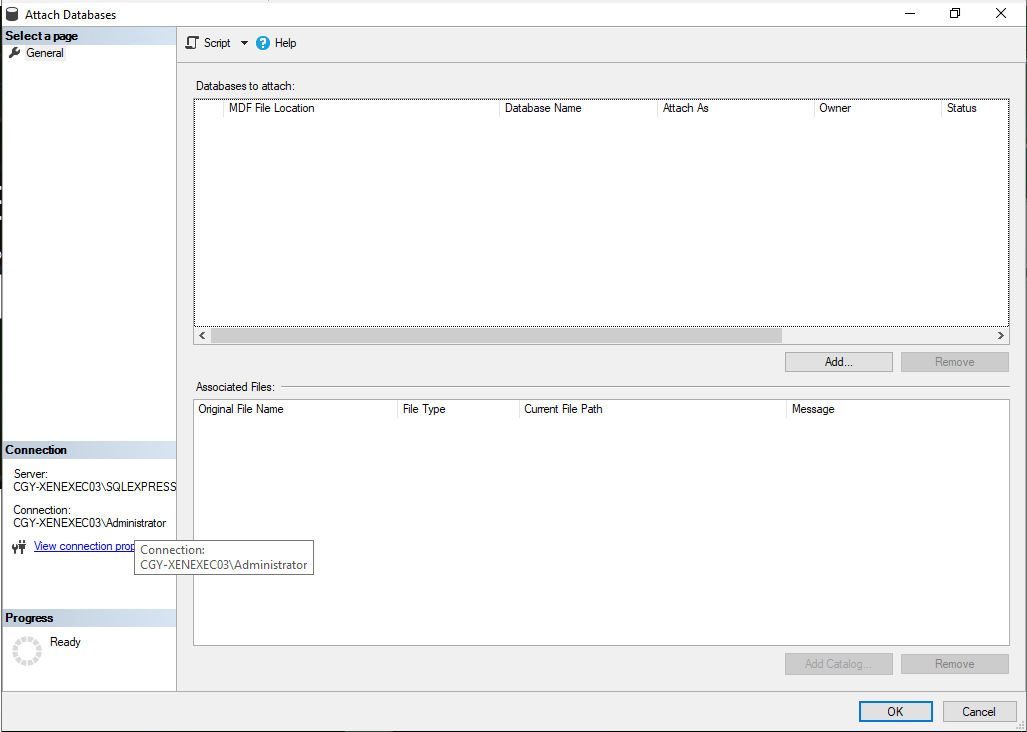
39. On the Object Explorer page, expand the instance, right-click Databases, select Attach.
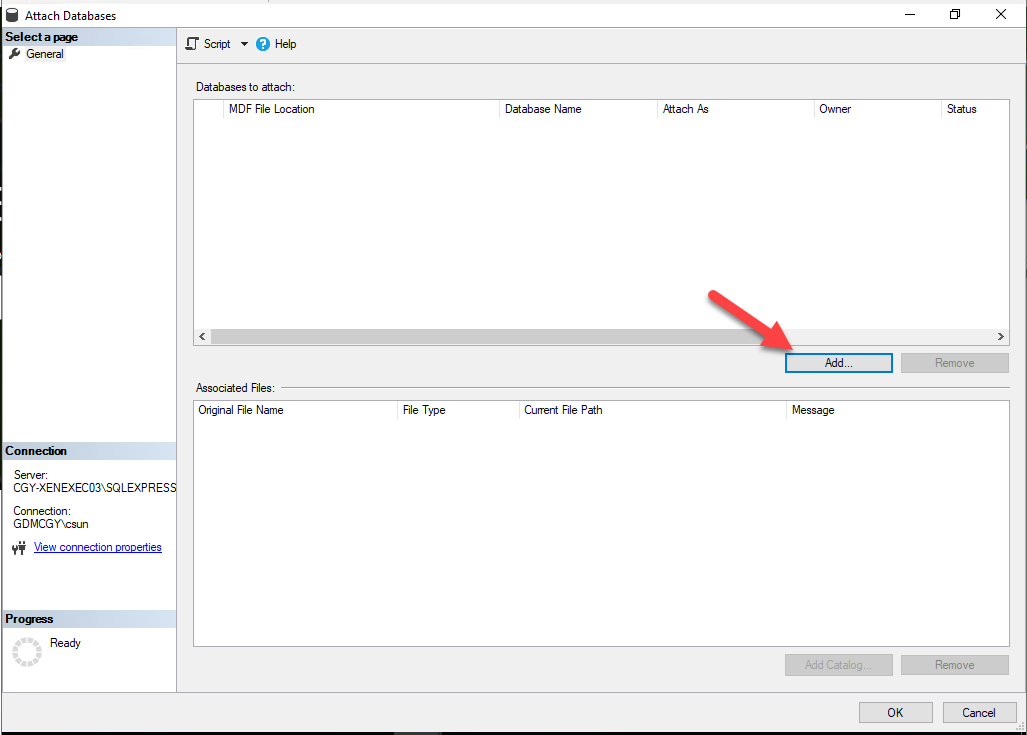
40.On the Database to attach page, click Add.
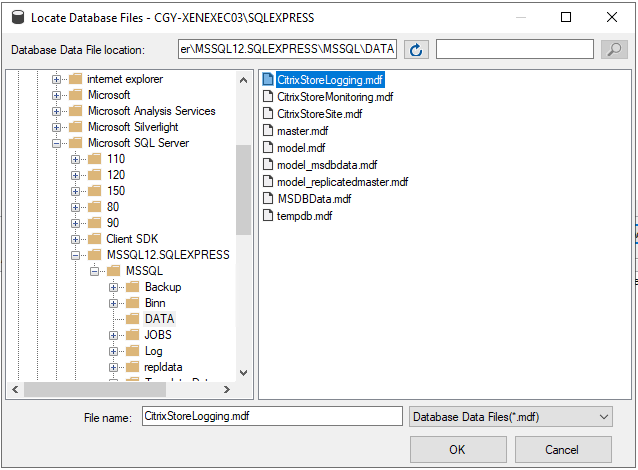
41.Select CitrixStoreLogging.mdf from previsouly noted path, click OK.
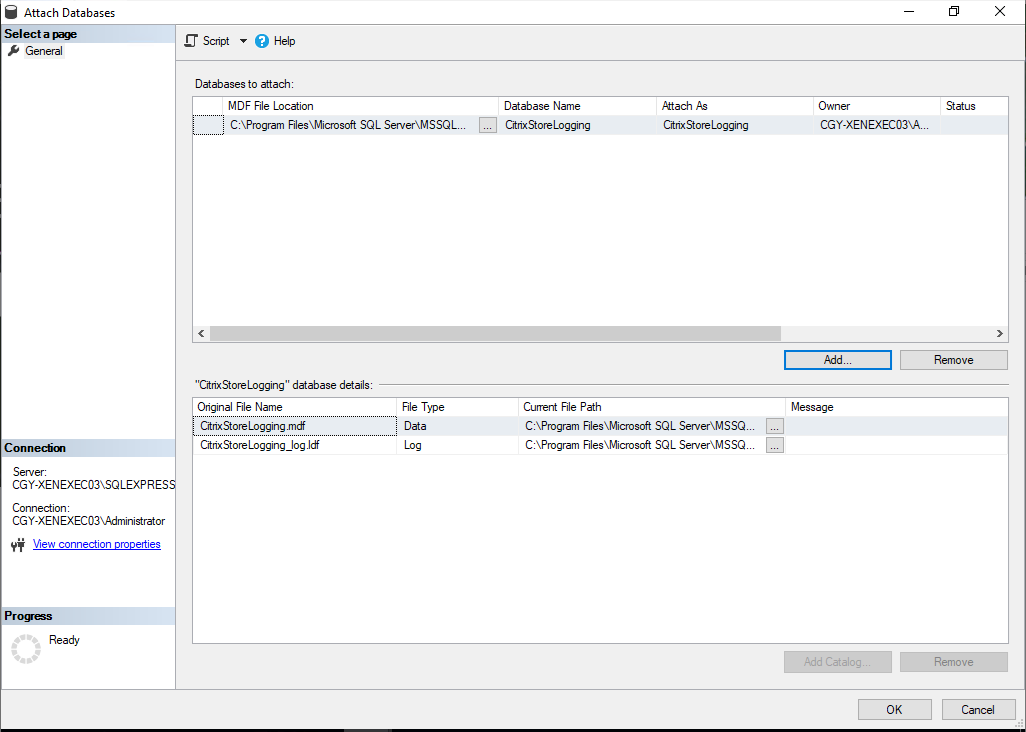
42.On the Attach Database page, click OK.
43. On the Object Explorer page, expand the instance, right-click Databases, select Attach.

44. On the Database to attach page, click Add.
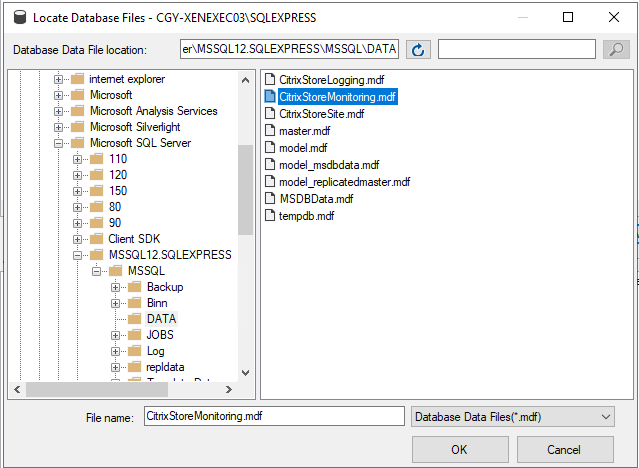
45. Select CitrixStoreMonitoring.mdf from previsouly noted path, click OK.
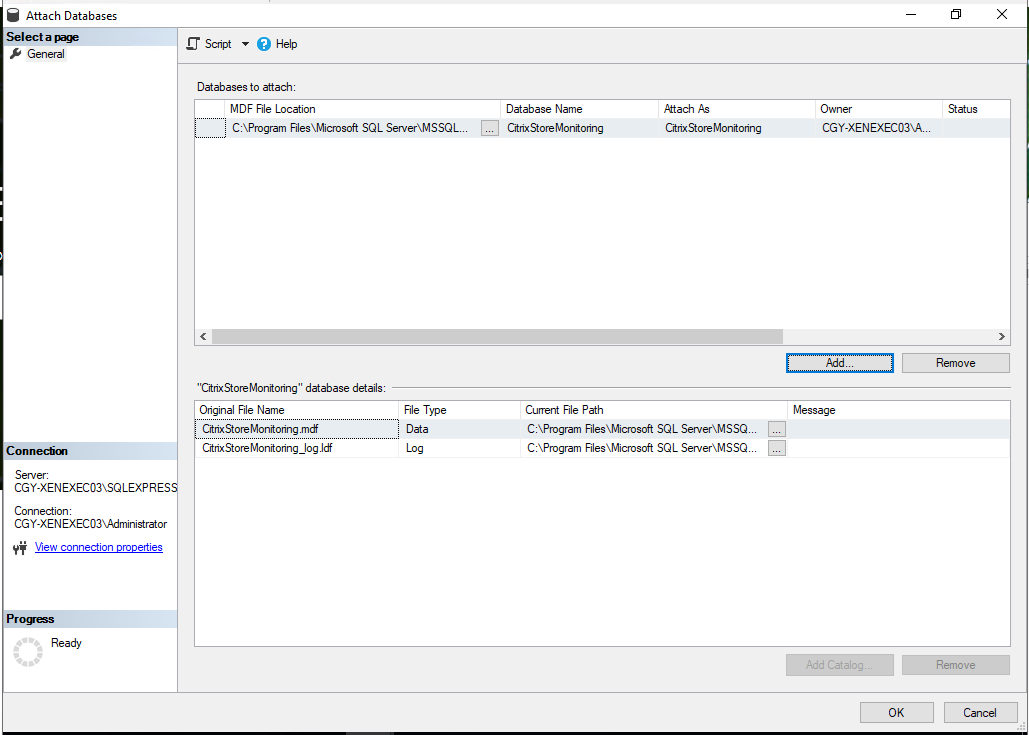
46. On the Attach Database page, click OK.
47.On the Object Explorer page, expand the instance, right-click Databases, select Attach.
48. On the Database to attach page, click Add.
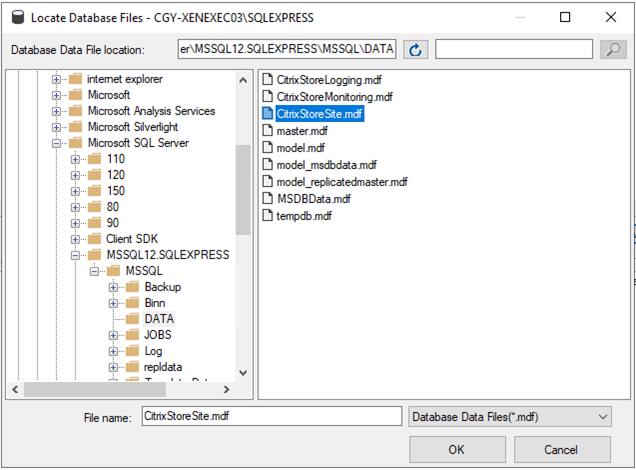
49. Select CitrixStoreSite.mdf from previsouly noted file path, click OK.
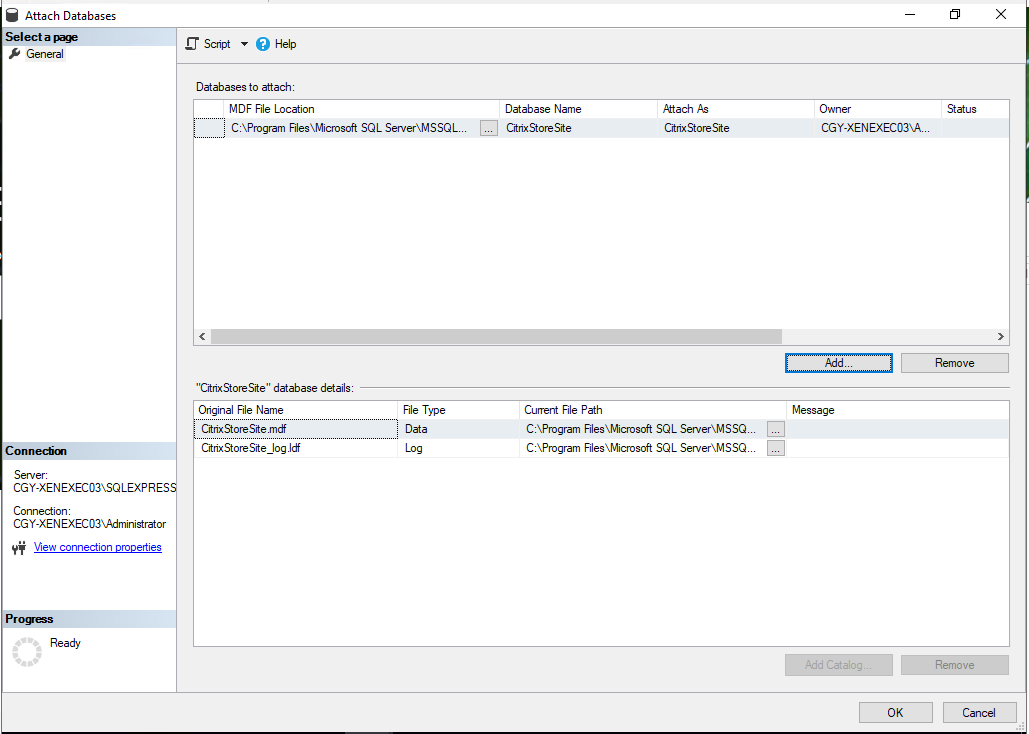
50. On the Attach Database page, click OK.
Hope you enjoy this post.
Cary Sun
Twitter: @SifuSun
Web Site: carysun.com
Blog Site: checkyourlogs.net
Blog Site: gooddealmart.com