
On the previously posts, we were talking lots of site to site VPN settings between on-premises with Azure, now, it’s time to know how to deployment a domain controller server as a DR DC at Azure. I assure you have an Azure VM with windows server 2016 already. If don’t, just go to my previously posts and follow steps to build a new one.
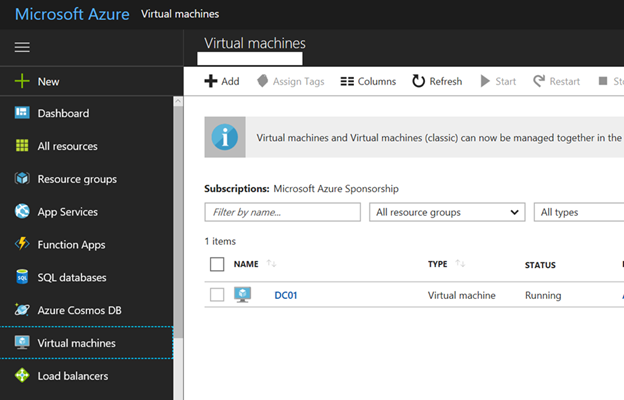
- Logon to Azure portal and click Virtual Machine and you will find your VMs.
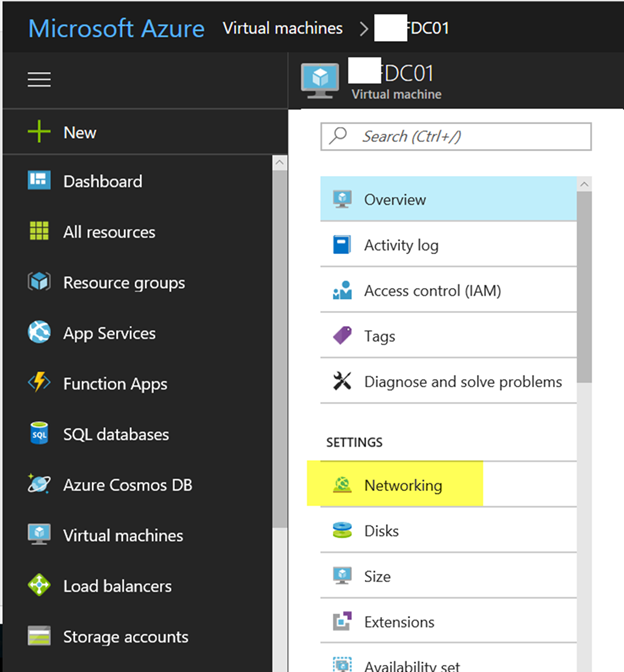
2. Click VM and select Networking.
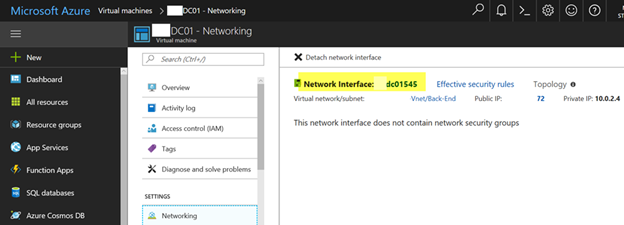
3. On the Networking page, click Network Interface.
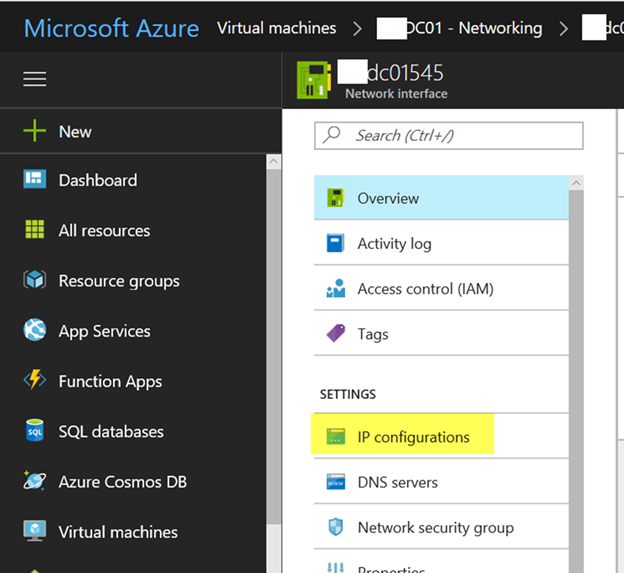
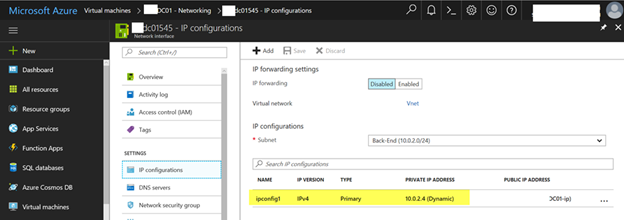
4. On the Networking Interface page, Select IP Configurations.
5. On the IP configurations page, you will see the Private IP Address is showing Dynamic, click ipconfigure1.
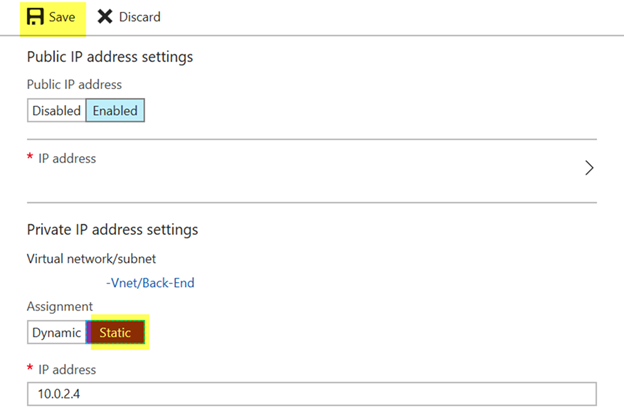
6. Select Static and then type IP address and then click Save.
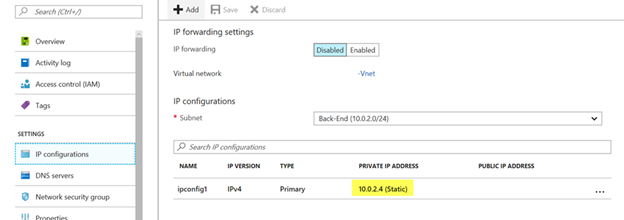
7. On the IP configurations page, you will see the Private IP Address change to Static.
8. Remote connect to your new virtual machine.
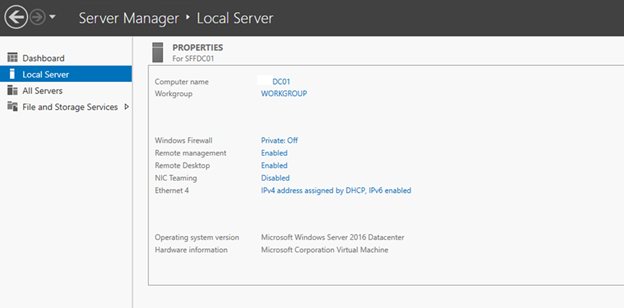
9. You will find the network settings still show IP addresses assigned by DHCP but it’s fine, because Static IP assignment in Azure VMs is not the same as configuring a typical static IP for a server in your on-premises network. Please don’t try to change it from network properties.

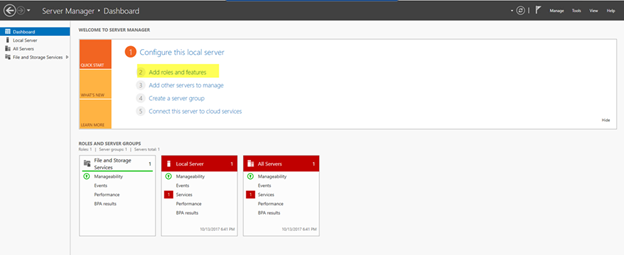
10. On the Server Manager, select Dashboard and click Add Roles and features.
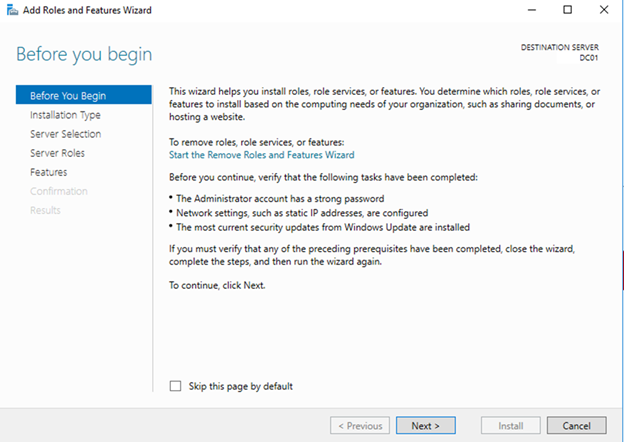
11. On the Before You Begin page, click Next.
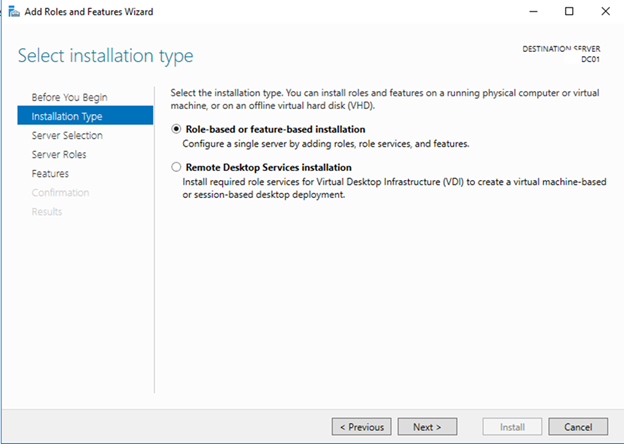
12. On the Select installation type page, select Role-based or feature-based installation, and click NEXT.
13. On Select Destination server page, click Next.

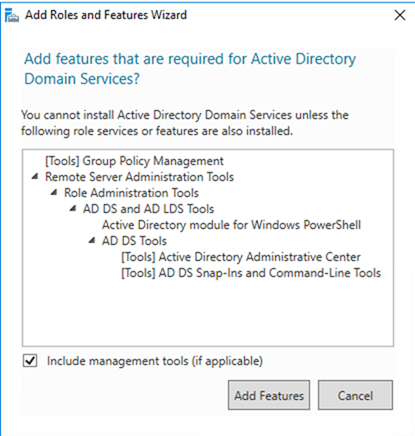
14. On the Select server roles page, select Active Directory Domain Services.

15. On the Add Roles and Features Wizard page and click Add Features.
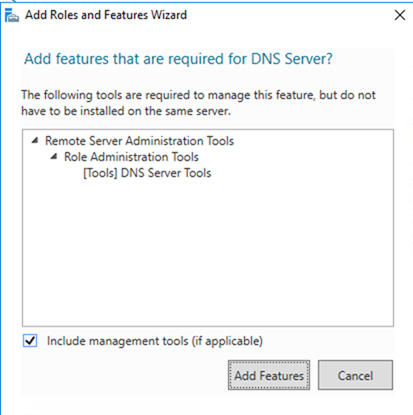
16. On the Select server roles page, select DNS Server.

17. On the Add Roles and Features Wizard page and click Add Features.
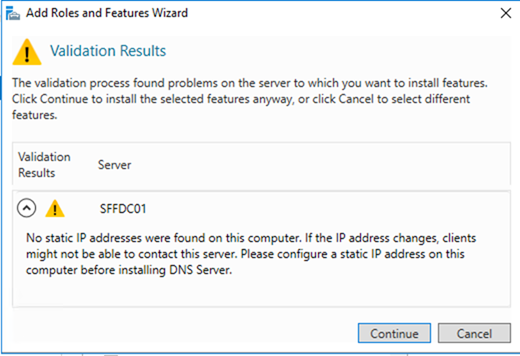
18. On the Validation Results page, it will show No static IP address warning, just ignore it and click Continue and the click Next.
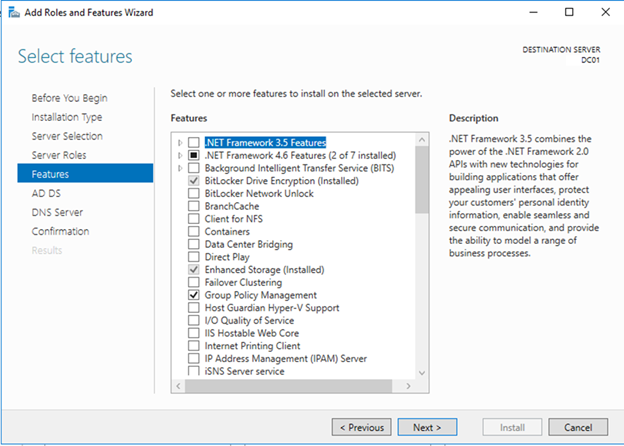
19. On the Select features page, click Next.
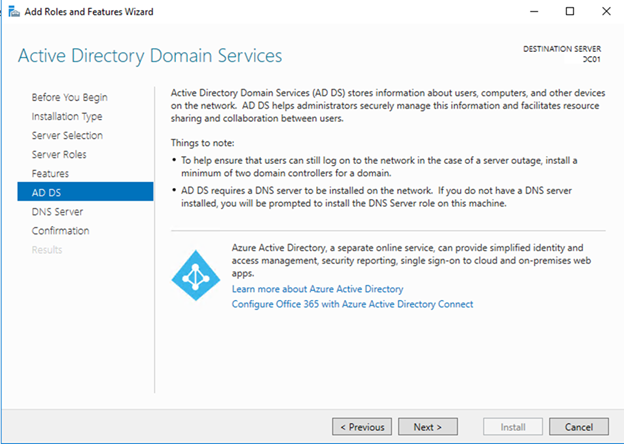
20. On the Active Directory Domain Services page, click Next.
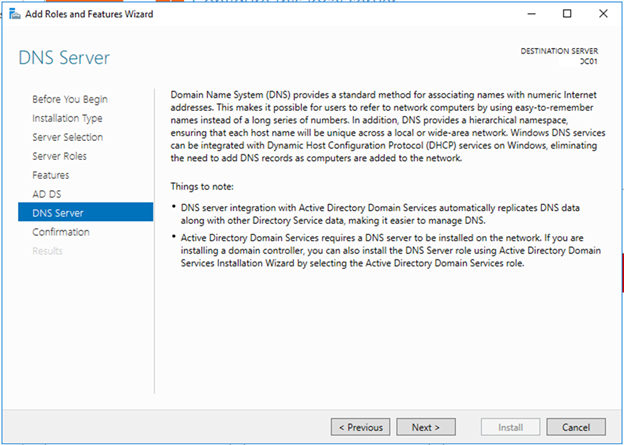
21. On the DNS Server page, click Next.
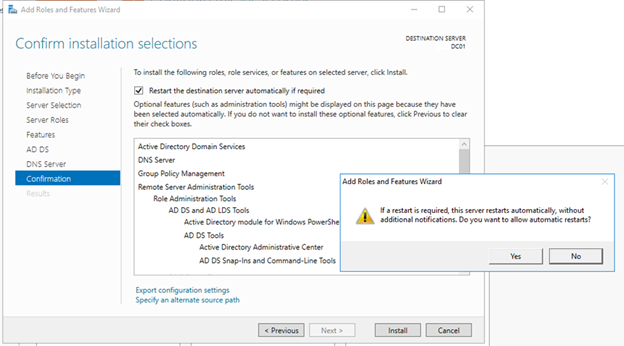
22. On the Confirm Installation selections page, select Restart the destination server automatically if required and click Yes and then click Install.
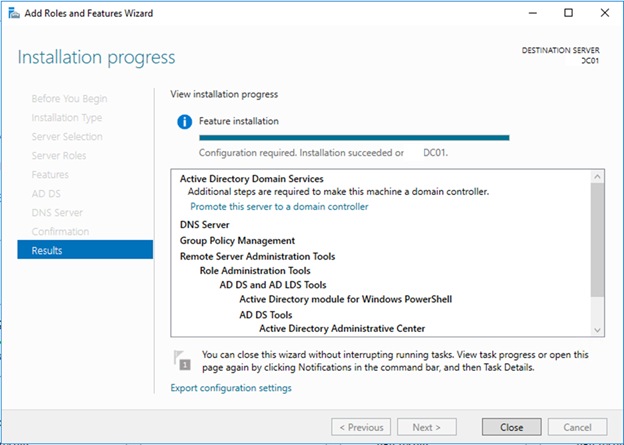
23. Click Promote this server to a domain controller after Feature installation completed.
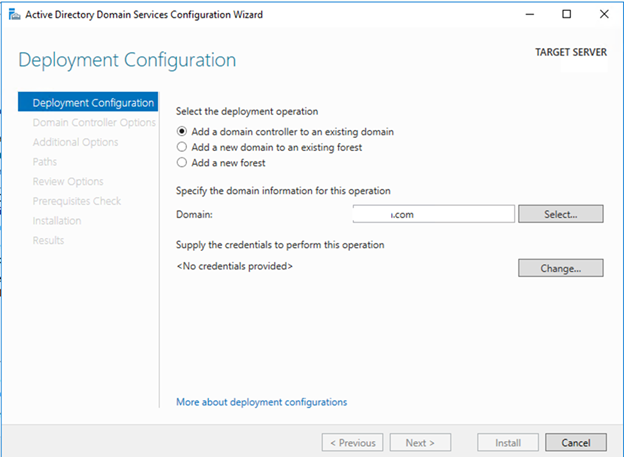
24. On the Deployment Configuration page, select Add a domain controller to an existing domain.
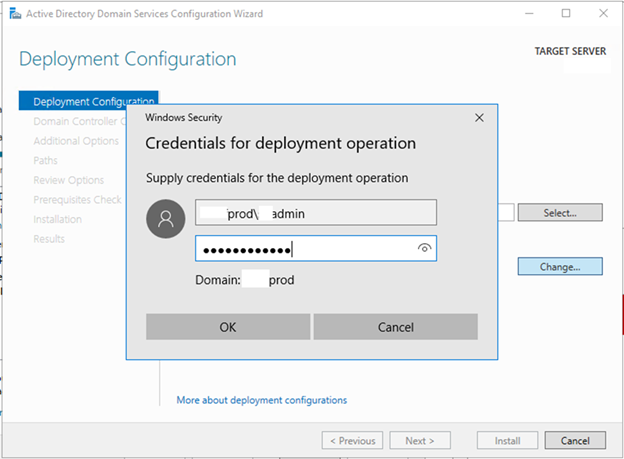
25. Enter domain name to Domain filed, and the click Change….
26. Type domain administrator (or domain user which has join domain permissions) and password and click OK and then click Next.
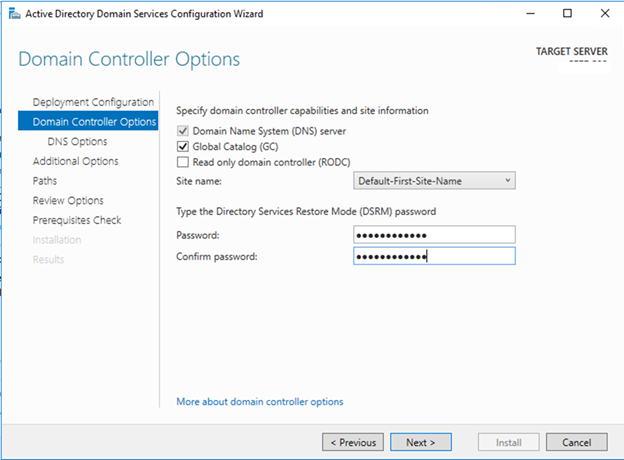
27. On the Domain Controller Options page, type the Directory Service Restore Mode password and click Next.
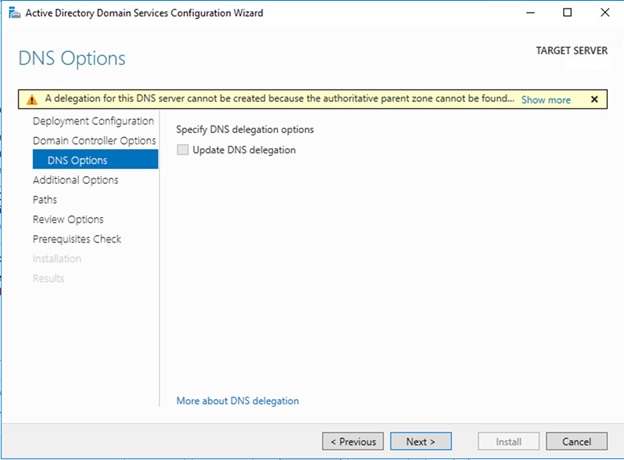
28. On the DNS Options page, click Next.
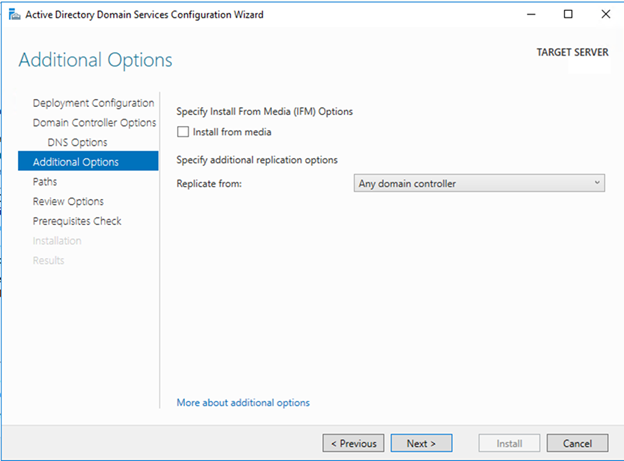
29. On the Addition Options page, click Next.
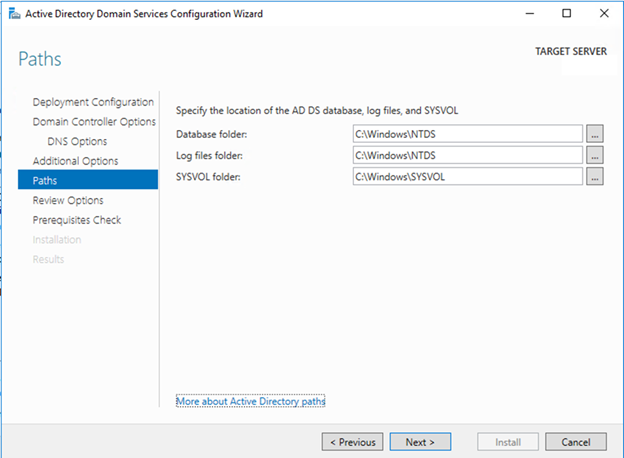
30. On Path page, click Next.
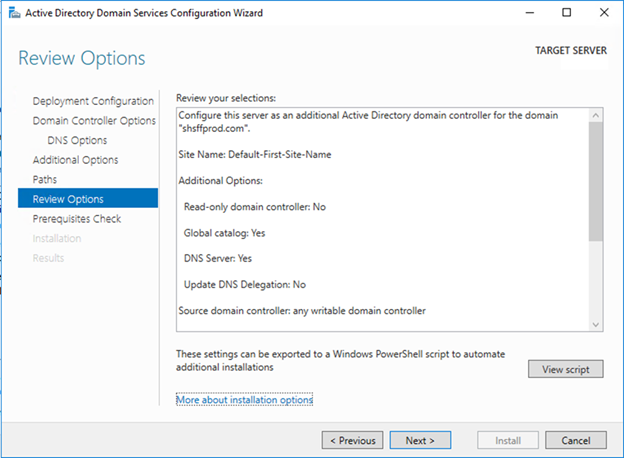
31. On the Review Options page, click Next.
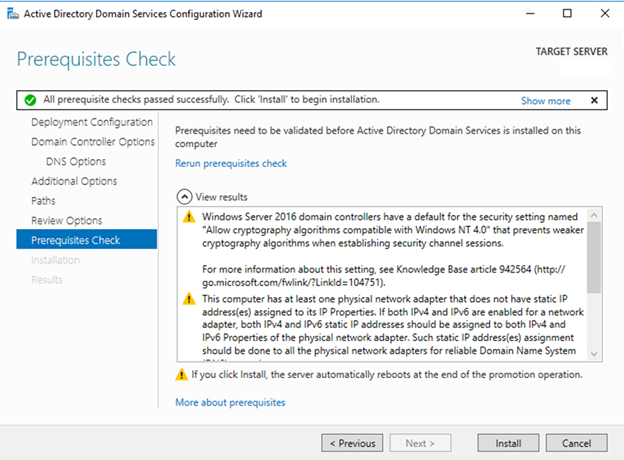
32. On the Prerequisites Check page, make sure all prerequisite checks passed successfully and then click Install.
33. The server reboot automatically after install completed.
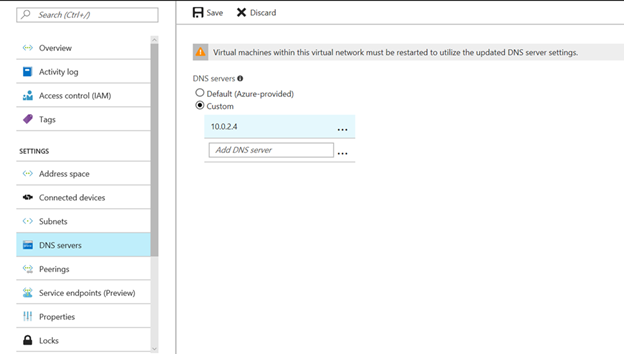
34. The last step we need to go to the Azure Vnet settings and change DNS servers from Default (Azure-provided) to Custom.

35. On the Custom page, Add IP address of new Domain controller server.
Now you should have a domain controller at Azure site as DR
Hope you enjoy this post.
Cary Sun @SifuSun