
Failback is returning operations to the primary site after a disaster recovery event. It reverses the failover process by replicating any changes made to the virtual machine during the Failover state back to the primary site and then redirecting users and applications back to the primary site.
Veeam Backup & Replication provides the following failback options:
- Failback to the original VM in the original location.
- Failback to a VM already recovered to a new location. This VM must be retrieved before you perform failback.
- Failback to a VM from a replica in a different location or to any site with different settings. During the failback process, the VM will be recovered from the replica.
Because Veeam Backup & Replication only needs to transfer differences between the original/recovered VM and VM replica, the Failback to the original VM in the original location option helps reduce recovery time and network traffic.
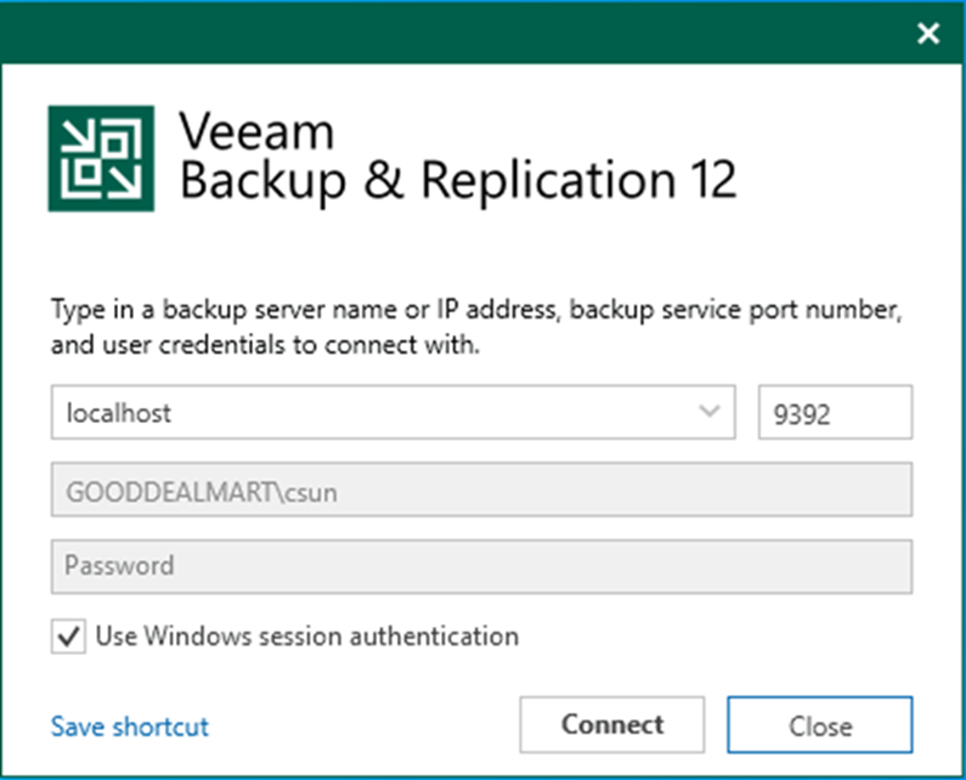
1. Login to the Veeam Backup and replication manager server.
2. Open the Veeam Backup & Replication 12 Console and click Connect.
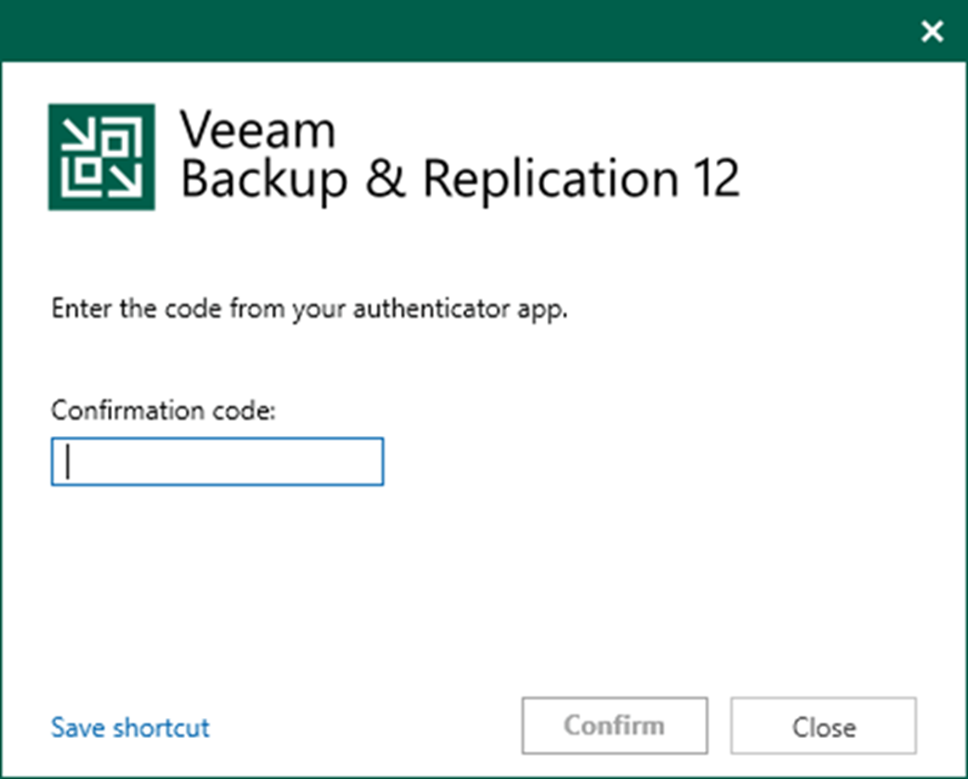
3. Enter the MFA Confirmation code and click Confirm.
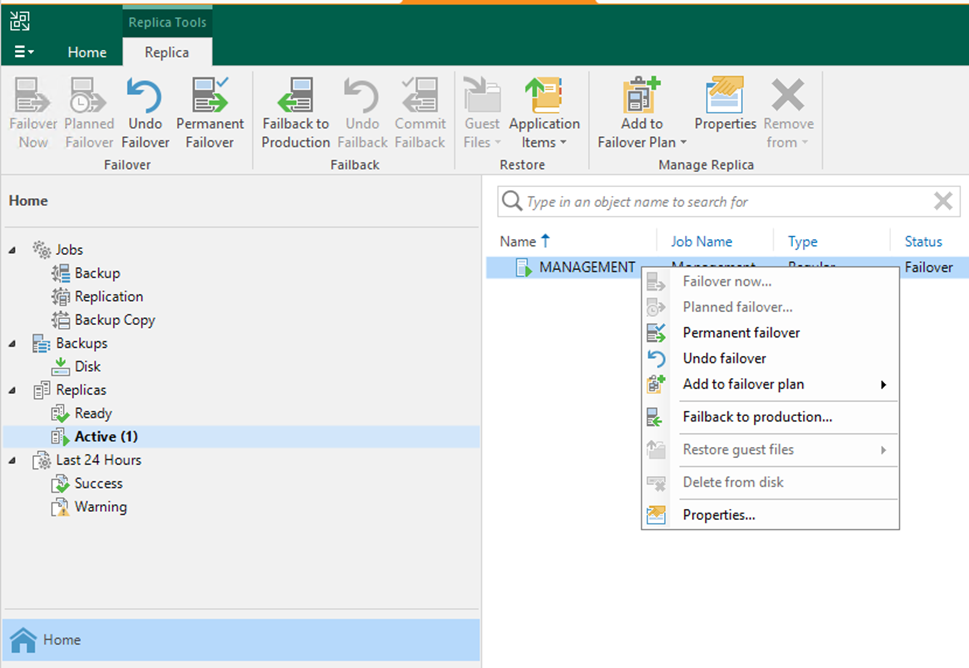
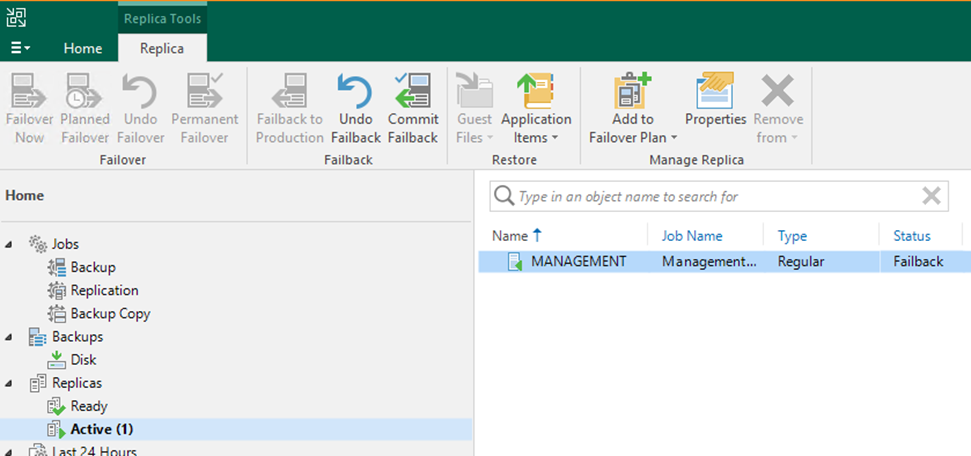
4. On the Home page, expand Replicas. Select Active.
5. Right-click the virtual machine and select Failback to production.
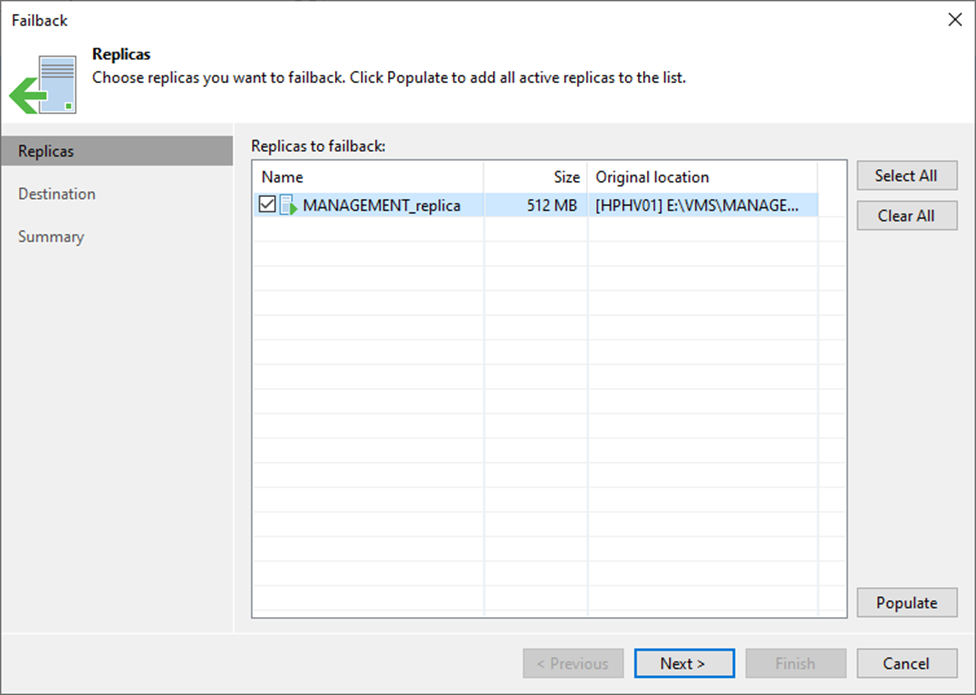
6. Click Populate on the Virtual Machine page to update the replicas ready for the failback list.
7. Select the replicas and click Next.
8. On the Destination page, select Failback to the original VM.
9. Select Quick rollback (sync changed blocks only) If you want to fasten failback, and the original VMs had problems at the guest OS level.
10. Click Next.
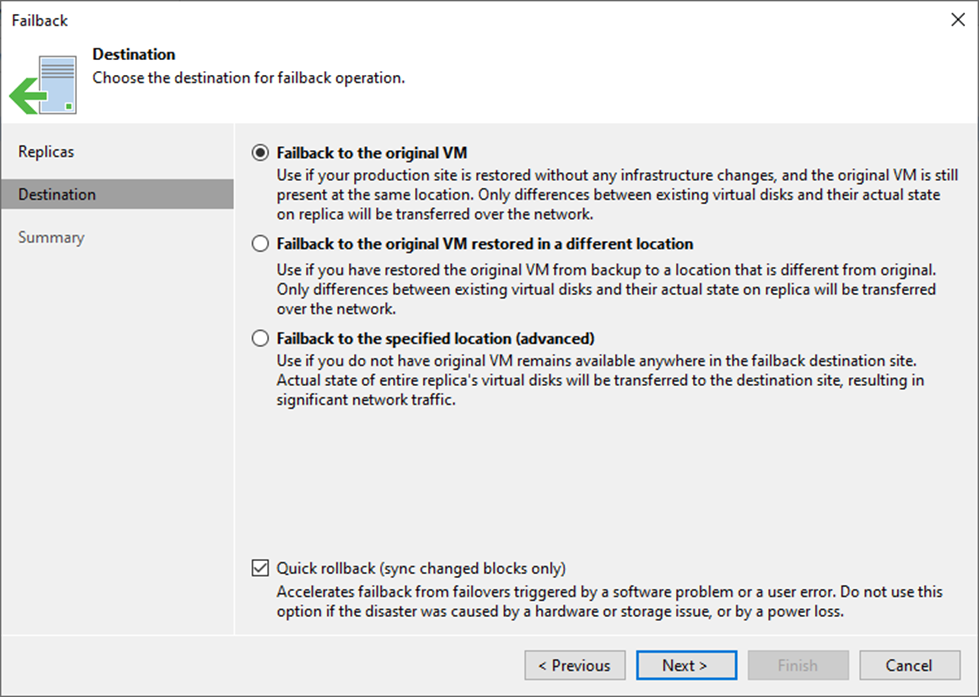
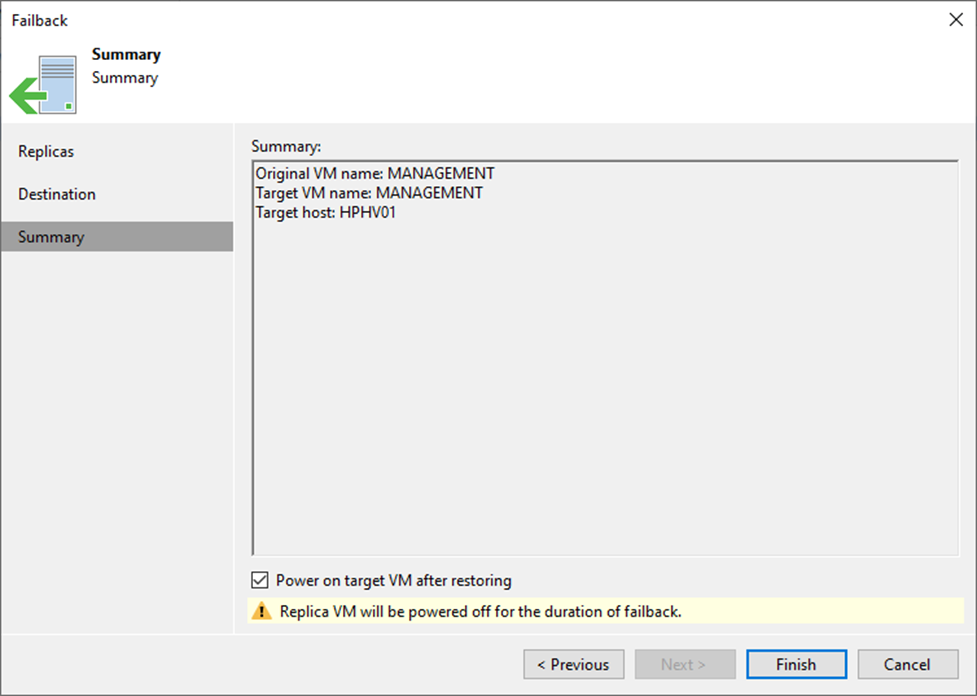
11. Select Power on the target VM after restoring and click Finish on the Summary page.
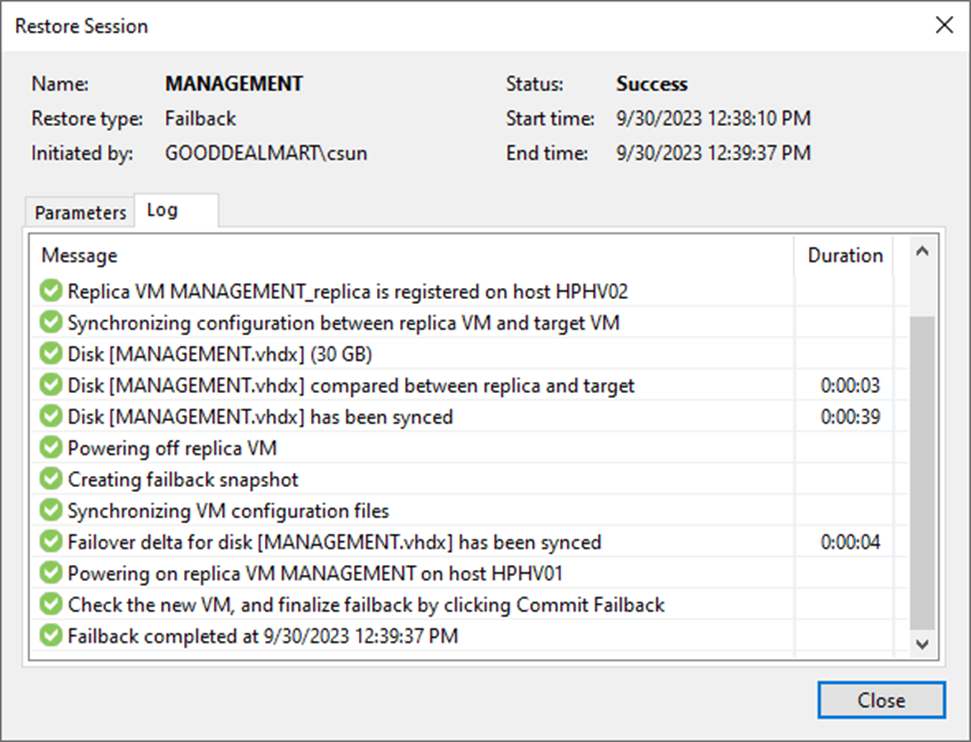
12. On the Restore Session page, select Log.
13. Ensure the failback is completed successfully and click Closed.
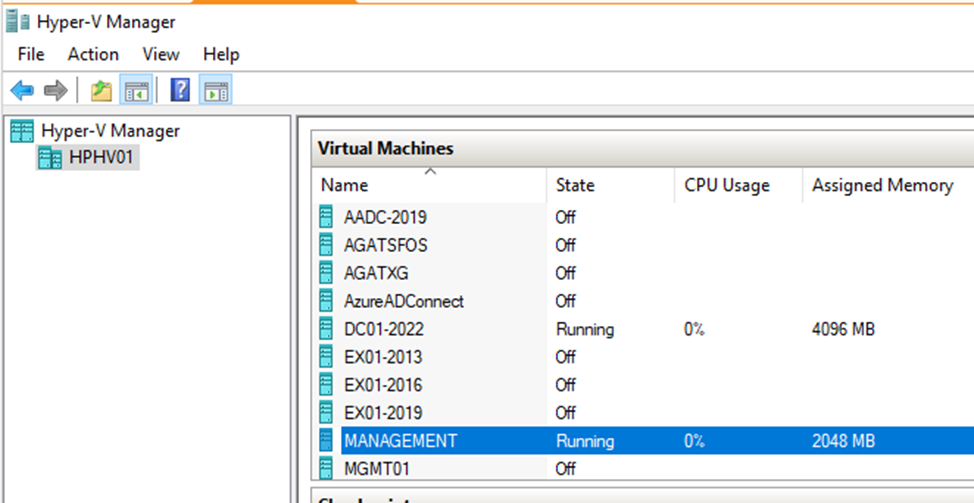
14. The virtual machine is running on the production site host. Ensure the virtual machine functions are working properly.
15. On the Home page, expend Replicas and select Active.
16. The VM status changed from Failover to Failback.
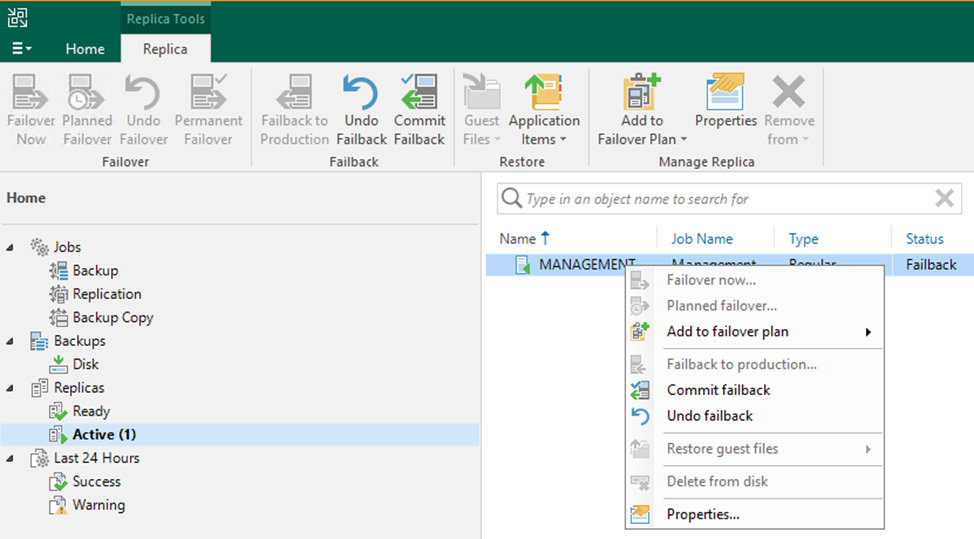
17. Right-click the VM and select Commit failback.
Note:
Select Undo failback if the virtual machine is not working properly.
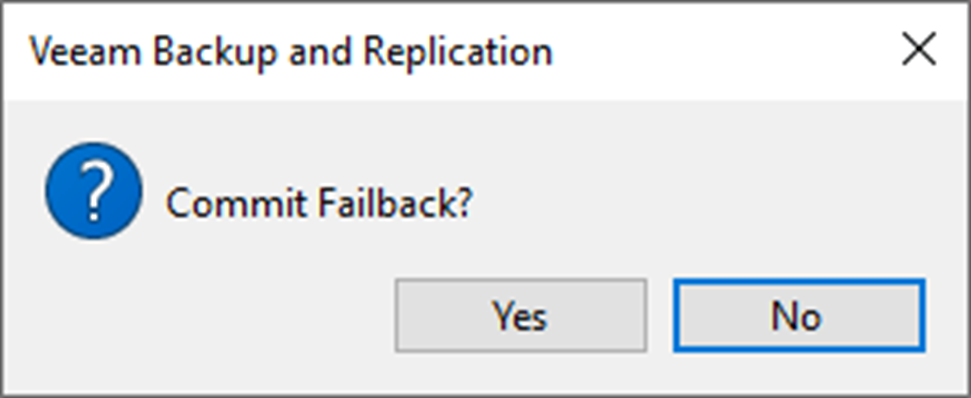
18. Click Yes in the Commit Failback display windows.
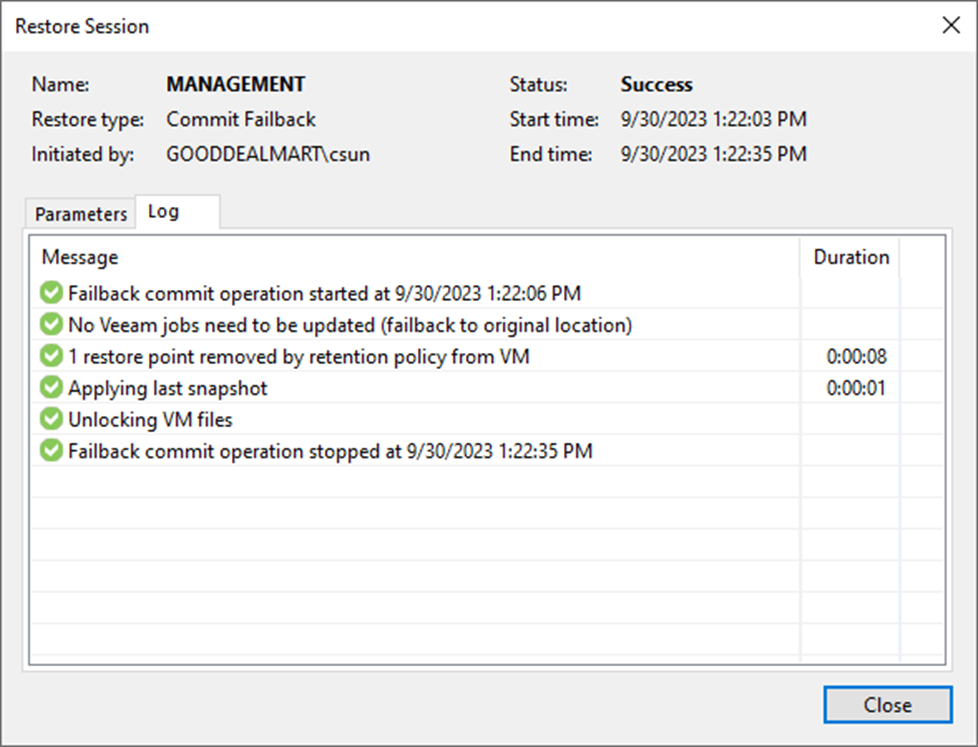
19. On the Restore Session page, select log, make sure the Commit failback is completed successfully, click Closed.
20. On the Home page, expend Replicas and the virtual machine back to regular type and Ready status.

I hope you enjoy this post.
Cary Sun
X: @SifuSun
Web Site: carysun.com
Blog Site: checkyourlogs.net
Blog Site: gooddealmart.com